Sign In
Upload
Manuals
Brands
Toshiba Manuals
All in One Printer
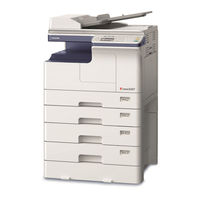
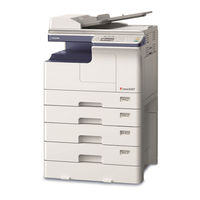
e-studio2507
Toshiba e-studio2507 Manuals
Manuals and User Guides for Toshiba e-studio2507. We have
5
Toshiba e-studio2507 manuals available for free PDF download: Service Manual, User Manual, Fax Manual, Software Installation Manual, Quick Manual
Toshiba e-studio2507 Service Manual (730 pages)
multifunctional digital systems
Brand:
Toshiba
| Category:
All in One Printer
| Size: 64.85 MB
Table of Contents
Service Manual
1
Table of Contents
15
1 Features
25
2 Specifications / Accessories / Options / Supplies
27
Copy
31
Print
34
Accessories
35
Options
36
System List
37
H/23H/25H>
38
La/23Lm/28Lm>
39
Ha/28Ha>
40
Supplies
41
Outline of the Machine
43
3 Outline of the Machine
47
Electric Parts Layout
47
Power Supply
49
Developer Unit
51
Drive Unit
52
Drawer Unit
54
Symbols and Functions of Various Components
56
Electromagnetic Clutches
57
Lamps and Heaters
58
Others
59
Copy Process
60
Comparison with E-STUDIO195 Series
61
General Operation
63
Description of Operation
64
Detection of Abnormality
67
Control Panel
70
Items Shown on the Display Panel
74
Scanner
75
Composition
76
Functions
77
Description of Operation
79
Laser Optical Unit
80
Laser Precautions
81
Drive System
83
Composition
84
Paper Feeding System
85
Composition
86
Functions
87
Operation
88
Drum Related Section
93
Composition
94
Functions
95
Outline
96
Development System
97
Composition
98
Functions
99
Setting
101
Fuser / Exit Unit
103
Composition
104
Functions
105
Operation
106
Heater Control Circuit
107
Automatic Duplexing Unit
112
Composition
113
Drive of ADU
114
Functions
115
Description of Operations
116
Power Supply Unit
118
Operation of DC Output Circuits
119
Output Channel
120
4 Disassembly and Replacement
121
Inner Tray
122
Right Front Cover
122
Left Front Cover
123
Right Rear Cover
127
Right Lower Cover
127
Right Cover
128
Top Cover
129
Control Panel
130
Scanner
135
Laser Optical Unit
148
Main Motor (M3)
150
Paper Eject Unit
151
Lower Drive Unit
152
Bypass Unit
153
Bypass Feed Clutch (CLT3)
154
Duct Unit
155
Lower Bypass Feed Guide
156
Bypass Feed Roller <23LA/23LM/28LM/23HA/28HA>
157
Bypass Separation Pad <20L/23L/25L/20H/23H/25H>
159
Drawer Feed Roller <20L/23L/25L/20H/23H/25H>
160
Drawer Feed Roller <23LA/23LM/28LM/23HA/28HA>
161
Drawer Separation Pad
162
Registration Roller Clutch (CLT1)
163
Registration Roller (Metal)
164
Registration Roller (Rubber)
165
Registration Sensor (S2)
166
Paper Empty Sensor (S5)
167
Process Unit <20L/23L/25L/20H/23H/25H>
169
Process Unit <23LA/23LM/28LM/23HA/28HA>
170
Drum Cleaner Unit
171
Drum
172
Recovery Blade
173
Main Charger
174
Main Charger Cleaner
175
Separation Needle
176
Suction Fun (M5)
177
Developer Unit
179
Filling Developer Unit with Developer Material
181
Doctor Blade <23LA/23LM/28LM/23HA/28HA>
182
Mixer <23LA/23LM/28LM/23HA/28HA>
184
Replacement of Oil Seal <20L/23L/25L/20H/23H/25H>
186
Developer Sleeve <20L/23L/25L/20H/23H/25H>
188
Developer Sleeve <23LA/23LM/28LM/23HA/28HA>
190
Toner Cartridge Interface PC Board (CTIF)
193
Fuser/Exit Unit <20L/23L/25L/20H/23H/25H>
194
Fuser Unit
197
Fuser Unit Cover/Fuser Unit Guide
198
Center Heater Lamp (LAMP1)
200
Side Heater Lamp (LAMP2)
201
Base Unit
202
Separation Finger
203
Pressure Roller
204
Fuser Roller/Fuser Roller Bushing
205
Fuser Center Thermostat (THMO1) / Fuser Front Thermostat (THMO2)
207
Center Thermistor (THMS1) / Side Thermistor (THMS2 Edge Thermistor (THMS3)
208
Exit Sensor (S3)
211
Exit Roller
212
Fuser/Exit Unit <23LA/23LM/28LM/23HA/28HA>
214
Fuser Unit
217
Exit Sensor (S3)
218
Fuser Unit Cover/Fuser Unit Guide
220
Center Heater Lamp (LAMP1)
223
Side Heater Lamp (LAMP2)
224
Base Unit
225
Pressure Roller
226
Separation Finger
227
Fuser Roller/Fuser Roller Bushing
228
Fuser Center Thermostat (THMO1) / Fuser Front Thermostat (THMO2)
229
Center Thermistor (THMS1) / Side Thermistor (THMS2 Edge Thermistor (THMS3)
231
Exit Roller
233
Automatic Duplexing Unit (ADU): Option <20L/23L/25L/20H/23H/25H>
236
ADU Sensor (S8)
237
Paper Exit Motor (M6)
238
ADU Clutch (CLT4)
239
ADU Fan Duct Unit
240
ADU Upper Transport Roller
241
ADU Transport Roller
242
Automatic Duplexing Unit (ADU)
243
ADU Sensor (S8)
244
Paper Exit Motor (M6)
245
ADU Clutch (CLT4)
246
ADU Lower Transport Roller
247
ADU Upper Transport Roller
248
Installation and Replacement of Options <20L/23L/25L/20H/23H/25H>
249
Paper Feed Unit (PFU)
250
Reversing Auto Document Feeder (RADF)
254
Paper Feed Unit (PFU)
255
5 Self-Diagnosis Modes
257
14 Self-Diagnosis Code (03/04/05/08 Code)
261
Input Check (Test Mode 03)
261
Output Check (Test Mode 03)
262
Test Print Mode (Test Mode 04)
263
Operation Procedure in Adjustment Mode (05)
264
Test Print Pattern in Adjustment Mode (05)
266
Operation Procedure in Setting Mode (08)
267
Assist Mode (3C)
269
Operating Procedure of Assist Mode
270
List Print Mode (9S)
271
List Printing
272
Flash Memory Clear Mode (6C)
285
Functions
286
Flash Memory Backup/Restore Mode (59)
287
Backup Procedure
288
PM Support Mode Related Code
290
Restrictions for the PM Counter-Related Self-Diagnosis Codes
293
6 Setting / Adjustment
295
Adjustment of Auto-Toner Sensor
296
Image Dimensional Adjustment
298
Light Volume Adjustment of Scanner LED
299
Paper Alignment at the Registration Roller
300
Printer Related Adjustment
302
Scanner Related Adjustment
309
Image Quality Adjustment (Copying Function)
317
Density Adjustment
318
Background Adjustment
319
Gamma Balance Adjustment
320
Adjustment of Image Density
321
Background Offsetting Adjustment for RADF
322
Image Quality Adjustment (Printing Function)
323
Gamma Balance Adjustment <20H/23H/25H, 23HA/28HA>
324
Image Quality Adjustment (Scanning Function)
325
Density Adjustment
326
Sharpness Adjustment
327
Background Adjustment
328
Fine Adjustment of Black Density
329
Background Processing Offset Adjustment
330
Adjustment of the Scanner Section
331
Adjustment of the Paper Feeding System
332
Adjustment of Developer Unit <23LA/23LM/28LM/23HA/28HA>
333
Adjustment of the RADF
335
Adjustment of Skew
336
Adjustment of the Leading Edge Position
339
Adjustment of Horizontal Position
341
Adjustment of Copy Ratio
342
7 Preventive Maintenance (Pm)
343
PM Support Mode (6S)
344
Transfer Unit
346
General Description
350
Counters to be Cleared
352
Preventive Maintenance Checklist
353
Scanner
354
Feed Unit
355
Bypass Feed Unit
357
Main Charger
358
Transfer / Separation Charger
360
Drum/Cleaner Related Section
361
Developer Unit / Toner Cartridge Related Section
363
Fuser/Paper Exit Unit
365
Automatic Duplexing Unit
367
Radf
368
Maintenance Part List
372
Grease List
373
Precautions for Storing and Handling Supplies
374
Checking and Cleaning of Photoconductive Drum
375
Checking and Cleaning of Drum Cleaning Blade
376
Checking and Replacing the Transfer Roller
377
Operational Items in Machine Refreshing
378
8 Error Code and Troubleshooting
379
If a Problem Continues Even after Performing All Troubleshooting
380
Collection of Debug Logs with a USB Device
381
Traceability Label
383
Error Code List
385
Service Call
388
Error in E-Mail / Scanning Function
390
Error History
391
Diagnosis and Prescription for each Error Code
393
Paper Exit Jam
394
Paper Transport Jam
395
Paper Misfeeding
404
Cover Open Jam
411
Other Jam
416
RADF Jam
420
Drive System Related Service Call
422
Paper Feeding System Related Service Call
423
Scanning System Related Service Call
425
Process Related Service Call
427
Laser Optical Unit Related Service Call
428
Fuser Unit Related Service Call
429
Circuit Related Service Call
437
Communication Related Service Call
439
Error in E-Mail / Scanning Function
441
Troubleshooting for the Image
445
Background Fogging
446
Moire/Lack of Sharpness
447
Toner Offset
448
Blurred Image
449
Poor Fusing
450
Blank Copy
451
Solid Copy
452
White Banding or White Void (in the Feeding Direction)
453
White Banding (at Right Angle with the Feeding Direction)
455
Skew (Inclined Image)
456
Black Banding (in the Feeding Direction)
457
Black Banding (at Right Angle with the Feeding Direction)
458
White Spots
459
Poor Image Transfer
460
Uneven Image Density
461
Faded Image (Low Density, Abnormal Gray Balance)
462
Image Dislocation in Feeding Direction
463
Jittering Image
464
Poor Cleaning
465
Uneven Light Distribution
466
Blotched Image
467
Black Streaks on Image Leading Edge During Scanning
468
Other Errors
469
Precautions for Image Missing Width on the Paper Trailing Edge at Enlargement Copying
470
When the Error Code "F014" Is Displayed <23HA Only>
472
Disassembly and Replacement of PC Boards <20L/23L/25L/20H/23H/25H>
473
Lvps
474
Hvps
475
Disassembly and Replacement of PC Boards <23LA/23LM/28LM/23HA/28HA>
476
Lvps
477
Hvps
478
9 Replacement of Pc Boards
474
Precautions, Procedures and Settings for Replacing MAIN Board
479
Precautions, Procedures and Settings for Replacing the Flash Memory
482
Items to be Notified
485
Supply Notice
490
11 Firmware Updating
491
Firmware Updating with USB Device
492
Firmware Updating with PC Update Tool
498
Update Procedure
499
When Firmware Updating Fails
501
Firmware Updating with BIOS Mode
502
When Firmware Updating Fails
505
Confirmation of the Updated Data
506
12 External Counters
507
Pin Layout <23LA/23LM/28LM/23HA/28HA>
508
Details of the Signals
509
Notices
510
13 Wire Harness Connection Diagrams
511
AC Wire Harness <23LA/23LM/28LM/23HA/28HA>
512
DC Wire Harness <20L/23L/25L>
513
Electric Parts Layout <20L/23L/25L>
514
DC Wire Harness <20H/23H/25H>
515
Electric Parts Layout <20H/23H/25H>
516
DC Wire Harness <23LA/23LM/28LM>
517
Electric Parts Layout <23LA/23LM/28LM>
518
DC Wire Harness <23HA/28HA>
519
Electric Parts Layout <23HA/28HA>
520
Appendix
715
Maintenance Check List <23LA/23LM/28LM/23HA/28HA
716
Revision Record
717
Advertisement
Toshiba e-studio2507 User Manual (170 pages)
MULTIFUNCTIONAL DIGITAL SYSTEMS
Brand:
Toshiba
| Category:
All in One Printer
| Size: 16.97 MB
Table of Contents
Preface
3
Forgery Prevention Function
4
Lineup of Our Manuals
4
Recommended Toner Cartridges
5
Table of Contents
7
Contents
7
Chapter 1 PREPARATION
12
Components
12
Front/Left Side/Inner Side
12
Right Side
14
Configuration of Options
15
Control Panel
16
Main Screen (Copy)
19
Preparation 1 - Turning Power on
20
Turning on
20
Saving Energy When Not in Use - Energy Saving Mode
20
Preparation 2 - Loading Paper
22
Acceptable Paper Types
22
Recommended Paper
23
Loading Paper in the Drawer/Paper Feed Unit
24
Loading Paper in the Drawers of Paper Feed Pedestal
27
Loading Paper on the Bypass Tray
29
Bypass Tray
30
Loading an Envelope on the Bypass Tray
31
Preparation 3 - Registering Paper Size and Type
34
Chapter 2 Copy Functions
35
Basic Copy Procedure
36
Acceptable Originals
36
Copying Originals
37
Shortcut Keys
41
Copy Settings
43
Adjusting the Exposure
43
Selecting the Original Mode
44
Selecting the Paper
45
Enlarging or Reducing the Copy Size
47
Sorting
50
Copying Two or Four Pages on each Sheet
52
Copying both Sides of a Card on a Sheet
54
Erasing the Shadow on Edges
55
Copying Right and Left Pages Separately
56
Shifting the Pages to the Right or Left
57
Copying on One or both Sides
58
Copying on One Side
59
Copying on both Sides
60
Adding a Page Number and Date/Time on the Copied Paper
61
Copying Different Sizes in One Go
62
Image Direction
63
Confirming the Current Function Settings
64
Chapter 3 Print Functions
65
Before Using the Printer Driver
66
Configuring the Options
66
Printing from Application
71
Considerations and Limitations
71
How to Print
71
Status Monitor
73
Monitoring the Print Status and Reporting Print Errors
73
Setting up Print Options
74
How to Set up
74
Setting Print Options Using Profiles
75
Print Options
77
Printing with Best Functions for Your Needs
91
Layout and Finishing Options in [Basic] Tab Menu
91
Layout and Finishing Options in [Finishing] Tab Menu
92
Making a Booklet
94
Printing Several Pages on One Sheet
95
Finishing Options in [Effect] Tab Menu
96
Chapter 4 Scan Functions
99
Scanning from Application
100
How to Scan
100
Setting up Scan Options
102
Scan Options
102
Scanning from the Equipment on the Network
104
Scanning from the Equipment Connected by USB Cable
104
Using the Easy Set Feature
105
Scan to E-Mail
106
Procedure for Scan to E-Mail
106
Scan to File
109
Procedure for Scan to File
109
Scan to USB Memory
111
Procedure for Scan to USB Memory
111
Scan Settings
114
Selecting the Color Mode
114
Selecting the Resolution
114
Scanning the 2-Sided Originals
115
Selecting the Original Size
115
Scanning Different Sizes in One Go
116
Selecting the Original Mode
116
Selecting the Orientation
116
Selecting the Compression Ratio
117
Adjusting the Exposure
118
Specifying E-Mail Addresses
118
Character Entry
122
Relationship between the Digital Keys and the Input Character
123
Scan Speed
124
Chapter 5 VARIOUS FUNCTIONS
126
Copy Menu List
126
Copy Menu Items
126
Scan Menu List
127
Scan Menu Items
127
Network Menu List
129
Setting the Ethernet Speed
129
Setting the TCP/IP Protocol
129
Setting the HTTP Network Service
130
User Functions Menu List
131
User Functions Menu Items
132
Address Book
137
Chapter 6 Troubleshooting
139
When this Message Appears
140
Paper Misfeed
141
Find the Position of Paper Misfeeds
141
When Paper Misfeeds Occur Frequently
141
When Removing Misfed Paper
141
Paper Misfeeds on the Reversing Automatic Document Feeder (RADF)
142
Paper Misfeeds on the Bypass Tray
144
Paper Misfeeds Inside of the Side Cover
145
Paper Misfeeds Within the Paper Feed Unit
148
Paper Misfeeds Within the Paper Feed Pedestal
149
Replacing Toner Cartridge
150
When a Message for Replacement Appears
150
Before Calling Service Technician
153
General Operation
153
Toner-Related Items
153
Original/Paper-Related Items
154
Image Trouble
154
Chapter 7 MAINTENANCE and INSPECTION
155
Regular Cleaning
156
Cleaning Charger
157
Chapter 8 Appendix
160
E-STUDIO2007/2307/2507 Specifications
160
Continuous Copying Speed
161
Specifications of Options
162
Packing List
163
Copying Function Combination Matrix
164
Combination Matrix
164
Index
165
Toshiba e-studio2507 Fax Manual (126 pages)
Brand:
Toshiba
| Category:
All in One Printer
| Size: 7.78 MB
Table of Contents
Preface
3
Notice to Users
4
Before Reading this Manual
8
Lineup of Our Manuals
10
General Precautions
12
Table of Contents
13
Contents
15
Chapter 1 BEFORE USING FAX
18
Description of each Component
18
Control Panel
18
Fax Screen
20
Connecting Cables
21
Chapter 2 Sending a Fax
23
Basic Procedures
24
Redial Function
25
Setting an Original
26
Setting the Transmission Conditions
33
Original Mode
34
Quality Tx
34
Original Size
35
Mixed Size Original
36
Direct Entry with Digital Keys
37
Specifying the Recipient
37
One Touch Key Dialing
38
Searching the Recipient in the Address Book
42
Speed Dial
43
Group Entry
44
Checking and Canceling the Transmissions
45
Checking Transmission Status (Log)
45
Checking and Canceling the Reserved Transmissions
45
Canceling Transmission When an Original Is Being Scanned
46
Chapter 3 RECEIVING a FAX
48
Reception Mode
48
AUTO Reception
48
Memory Reception
48
Remote Reception
48
Checking Reception Status (Log)
48
Originals and Paper
49
Acceptable Size of Paper
49
Default Setting for RX Printing
49
Paper Priority When There Is no same Size Paper
50
Setting a Fax Drawer
52
Printing SECURE RECEIVE Fax Jobs
53
Chapter 4 PRINTING LISTS and REPORTS
56
Printing Lists & Reports Manually
56
Journal (Transmission and Reception Journal)
56
Reservation List
57
Dial List
58
Printing Lists & Reports Automatically
59
List/Report Samples
60
Activity Report (Transmission and Reception Journal)
60
Memory Data List (Reservation List)
60
TX Result Report (Memory Transmission Report)
61
Dial List
62
Chapter 5 Sending a N/W-Fax
65
Features and Functions
66
Features
66
Functions
66
Faxing from Applications
67
How to Fax Using the N/W-Fax Driver
67
Specifying Recipients
70
Setting up the Network Fax Options
74
Setting up the Cover Sheet Properties
76
Sending with Extended Fax Functionality
77
Managing Address Book
80
Opening and Creating the Address Book
80
Managing Contacts and Groups
83
Managing Groups
87
Creating Groups
87
Cover Sheet Samples
91
Standard Cover Page
91
Business Cover Page
92
Professional Cover Page
93
Chapter 6 Setting Items
95
Operating the USER FUNCTIONS Menu
96
Character Entry
98
Switching the Input Mode
98
Entering Characters
98
Relationship between the Digital Keys and the Input Character
99
User Functions Menu Items
100
Fax
101
Menu Functions
101
Report Setting
104
List
104
Address Book
104
Registering the Terminal ID
105
Managing the Address Book
107
Registering or Modifying a Speed Dial Number
108
Registering or Modifying a Group Dial Number
110
Registering or Modifying a One Touch Dial Key Number
113
Setting SECURE RECEIVE
115
Chapter 7 TROUBLESHOOTING and SPECIFICATIONS
118
Troubleshooting
118
Error Messages
118
Transmission/Reception Trouble
120
Specifications of Fax
122
Index
123
Advertisement
Toshiba e-studio2507 Software Installation Manual (32 pages)
MULTIFUNCTIONAL DIGITAL SYSTEMS
Brand:
Toshiba
| Category:
All in One Printer
| Size: 1.37 MB
Table of Contents
Preface
3
End User Software License Agreement
4
Table of Contents
5
Chapter 1 BEFORE INSTALLATION
7
Before Installation
7
Software on the Client Utilities/User Documentation DVD
8
System Requirements
8
Chapter 2 INSTALLING DRIVERS
9
Installing Drivers
9
Connection Environment
10
Network Connection
11
Installing the Drivers
12
Uninstalling Drivers
25
Chapter 3 UNINSTALLING DRIVERS
29
Index
29
Toshiba e-studio2507 Quick Manual (2 pages)
Brand:
Toshiba
| Category:
All in One Printer
| Size: 0.46 MB
Advertisement
Related Products
Toshiba e-STUDIO2500c
Toshiba e-STUDIO250
Toshiba e-STUDIO2505H
Toshiba e-studio2507i
Toshiba e-studio2505f
Toshiba E-STUDIO2500AC
Toshiba E-STUDIO2505AC
Toshiba E-STUDIO2508A
Toshiba e-Studio2505
Toshiba E-STUDIO2506
Toshiba Categories
Laptop
Air Conditioner
TV
LCD TV
All in One Printer
More Toshiba Manuals
Login
Sign In
OR
Sign in with Facebook
Sign in with Google
Upload manual
Upload from disk
Upload from URL