Sign In
Upload
Manuals
Brands
Panasonic Manuals
Digital Camera
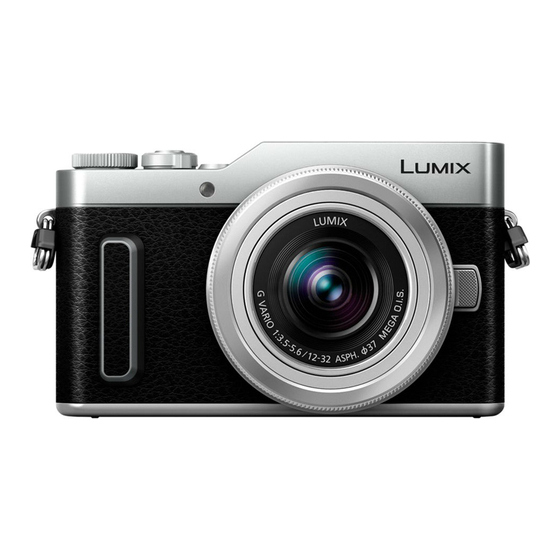
Lumix DC-GX880
User Manuals: Panasonic Lumix DC-GX880 Lens Camera
Manuals and User Guides for Panasonic Lumix DC-GX880 Lens Camera. We have
1
Panasonic Lumix DC-GX880 Lens Camera manual available for free PDF download: Operating Instructions For Advanced Features
Panasonic Lumix DC-GX880 Operating Instructions For Advanced Features (330 pages)
Brand:
Panasonic
| Category:
Digital Camera
| Size: 14.21 MB
Table of Contents
Finding the Information You Need
2
How to Use this Manual
3
Table of Contents
4
Contents by Function
9
Before Use
12
Care of the Camera
12
Standard Accessories
13
Names and Functions of Components
14
About the Lens
17
Getting Started/Basic Operations
18
Attaching the Shoulder Strap
18
Charging the Battery
19
Inserting the Battery
20
Charging
21
Approximate Operating Time and Number of Recordable Pictures
24
Inserting and Removing the Card (Optional)
27
Card Information
28
Formatting the Card (Initialisation)
29
Approximate Number of Recordable Pictures and Available Recording Time
30
Attaching/Removing the Lens
32
Setting Date/Time (Clock Set)
36
Re-Adjusting the Clock
37
Basic Operations
38
Tips for Taking Good Pictures
38
Extending/Retracting the Lens [When the Interchangeable Lens (H-FS12032/H-FS35100) Is Attached]
39
Adjust the Angle of the Monitor
40
Shutter Button (Taking Pictures)
41
Motion Picture Button (Recording Motion Pictures)
41
Mode Dial (Selecting a Recording Mode)
42
Control Dial
43
Cursor Buttons/[Menu/Set] Button
43
[DISP.] Button (Switching the Displayed Information)
44
Touch Screen (Touch Operations)
46
Taking Pictures Using the Touch Function
47
[REC. SETTING RESET] Button (Resetting the Recording Settings)
49
Setting Menu Items
50
Calling Frequently-Used Menus Instantly (Quick Menu)
52
Customising the Quick Menu Settings
53
Assigning Frequently Used Functions to the Buttons (Function Buttons)
54
Entering Text
57
Recording Modes
58
Taking Pictures Using the Automatic Function (Intelligent Auto Mode)
58
Taking Handheld Shots of Night Scenes ([Ihandheld Night Shot])
61
Combining Pictures into a Single Picture with Rich Gradation ([Ihdr])
62
Taking Pictures with Customised Colour, Defocus Control, and Brightness Settings
63
Taking Pictures of Yourself ([Self Shot])
65
Changing the Way the Shutter Is Released
74
Taking Pictures with Automatically Adjusted Aperture and Shutter Speed (Programme AE Mode)
76
Taking Pictures by Specifying the Aperture/Shutter Speed
78
Aperture-Priority AE Mode
79
Shutter-Priority AE Mode
79
Manual Exposure Mode
80
Confirm the Effects of Aperture and Shutter Speed (Preview Mode)
82
Easily Set Aperture/Shutter Speed for Suitable Exposure (One Push AE)
83
Taking Panorama Pictures (Panorama Shot Mode)
84
Taking Pictures that Match the Scene Being Recorded (Scene Guide Mode)
87
Taking Pictures of Children or Portraits with Optimal Settings
90
Child Mode
90
Portrait Mode
91
Taking Pictures with Different Image Effects (Creative Control Mode)
92
Focus, Brightness (Exposure) and Colour Tone Settings
98
Adjusting Focus Automatically
98
Focus Mode (AFS/AFF/AFC)
100
Auto Focus Mode
102
Setting up Position of the AF Area/Changing Size of the AF Area
107
Optimising the Focus and Brightness for a Touched Position
109
Adjusting Focus Manually
110
Fixing the Focus and the Exposure (AF/AE Lock)
113
Compensating the Exposure
114
Setting the Light Sensitivity
116
Adjusting the White Balance
118
K Photo and Drive Settings
122
Recording 4K Photos
122
Selecting Pictures from 4K Burst File and Saving
126
Notes on the 4K Photo Function
129
Controlling Focus after Recording (Post Focus/Focus Stacking)
132
Recording Using [Post Focus]
132
Selecting the Desired Focus Area and Saving a Picture
135
Merging Multiple Pictures to Widen the Focus Range (Focus Stacking)
136
Select a Drive Mode
138
Burst Mode
139
Self-Timer
141
Taking Pictures While Adjusting a Setting Automatically (Bracket Recording)
142
Exposure Bracket
143
Taking Pictures Automatically at Set Intervals ([Time Lapse Shot])
144
Creating Stop Motion Pictures ([Stop Motion Animation])
147
Stabiliser, Zoom and Flash
150
Image Stabiliser
150
Taking Pictures with the Zoom
152
Raising the Telescopic Effect
153
Zooming Using Touch Operations (Touch Zoom)
157
Taking Pictures by Using the Flash
158
Changing Flash Mode
160
Setting to the 2Nd Curtain Synchro
162
Adjust the Flash Output
163
Synchronising the Output of the Flash to the Exposure Compensation
163
Recording Motion Pictures
164
Recording Motion Picture/4K Motion Picture
164
Setting the Format, Size and Recording Frame Rate
166
Motion Picture [Rec Format]
166
How to Set Focus When Recording a Motion Picture ([Continuous AF])
168
Recording Still Pictures While Recording Motion Pictures
169
Recording Snap Movies
171
Playing Back and Editing Images
174
Playing Back Pictures
174
Playing Back Motion Pictures
175
Creating Still Pictures from a Motion Picture
176
Switching the Playback Method
177
Using the Playback Zoom
177
Displaying Multiple Screens (Multi Playback)
177
Displaying Pictures by Recording Date (Calendar Playback)
178
Playing Back Group Pictures
179
Deleting Pictures
181
Using Menu Functions
182
Menu List
182
[Rec] Menu
182
Playback
182
Delete
200
[Motion Picture] Menu
202
[MIC Level Adj.]
202
[Wind Noise Canceller]
203
[Custom] Menu
204
[Center Marker]
208
Zebra Pattern
209
[Monochrome Live View]
210
[Setup] Menu
213
[Sensor Cleaning]
220
[Custom] Menu
220
[Playback] Menu
221
[Beauty Retouch]
226
P177 [RAW Processing]
229
P177 [4K PHOTO Bulk Saving]
231
[Light Composition]
232
[Clear Retouch]
234
[Title Edit]
235
[Text Stamp]
236
[Favorite]
242
[Print Set]
243
[Protect]
244
Using the Wi-Fi Function
245
What You Can Do with the Wi-Fi ® Function
245
Wi-Fi Function
246
Wi-Fi
246
Controlling with a Smartphone/Tablet
248
Installing the Smartphone/Tablet App "Image App
248
Image App
248
Connecting to a Smartphone/Tablet
249
Taking Images Via a Smartphone/Tablet (Remote Recording)
253
Playing Back Images in the Camera
254
Saving Images Stored in the Camera
254
Sending Images in the Camera to an SNS
255
Adding Location Information to Images Stored in the Camera from a Smartphone/Tablet
255
Combining Motion Pictures Recorded with Snap Movie According to Your Preference on a Smartphone/Tablet
257
Displaying Pictures on a TV
258
Sending Images
259
Sending Images to a Smartphone/Tablet
263
Printing Wirelessly
264
Sending Images to AV Device
265
Sending Images to PC
266
Photofunstudio
266
Using Web Services
268
When Sending Images to Web Service
268
When Sending Images to [Cloud Sync. Service]
271
Registering to the "LUMIX CLUB
272
About the [LUMIX CLUB]
272
About Connections
276
Connecting Via a Wireless Access Point (Via the Network)
277
Connecting the Camera and Another Device Directly (Direct Connection)
279
Connecting Quickly with the same Settings as the Previous Ones ([Select a Destination from History]/[Select a Destination from Favorite])
280
[Wi-Fi Setup] Menu
282
Connecting to Other Equipment
284
Watching 4K Motion Pictures on a TV/ Saving 4K Motion Pictures on Your PC or Recorder
284
Watching Motion Pictures in 4K
284
Storing 4K Motion Pictures
285
Playing Back Pictures on a TV Screen
286
Using VIERA Link (HDMI)
288
Saving Still Pictures and Motion Pictures on Your PC
289
Downloading Software
290
SILKYPIX Developer Studio
291
Transferring Images to a PC
292
Saving Still Pictures and Motion Pictures on a Recorder
294
Printing the Pictures
295
Enjoying 3D Pictures
298
Playing Back Pictures on a TV
299
Screen
299
Others
301
Optional Accessories
301
Monitor Display
302
Message Display
309
Troubleshooting
312
Cautions for Use
321
Device
327
Using [Cloud Sync. Service]
328
Advertisement
Advertisement
Related Products
Panasonic Lumix DC-GX880K
Panasonic LUMIX DC-GX880W
Panasonic Lumix DC-GX850
Panasonic Lumix DC-GX800K
Panasonic Lumix DC-GX800-4K
Panasonic Lumix DC-GX800KEC
Panasonic Lumix DC-GX800KEE
Panasonic Lumix DC-GX800KEF
Panasonic Lumix DC-GX850KP
Panasonic Lumix DC-GX850KGN
Panasonic Categories
Camcorder
Air Conditioner
TV
Digital Camera
Cordless Telephone
More Panasonic Manuals
Login
Sign In
OR
Sign in with Facebook
Sign in with Google
Upload manual
Upload from disk
Upload from URL