Sign In
Upload
Manuals
Brands
Panasonic Manuals
Recording Equipment
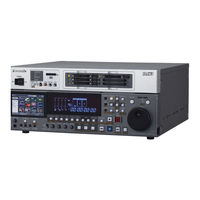
AJ-HPD2500E
Panasonic AJ-HPD2500E Manuals
Manuals and User Guides for Panasonic AJ-HPD2500E. We have
2
Panasonic AJ-HPD2500E manuals available for free PDF download: Operating Instructions Manual
Panasonic AJ-HPD2500E Operating Instructions Manual (236 pages)
Memory Card Recorder
Brand:
Panasonic
| Category:
Recording Equipment
| Size: 36.99 MB
Table of Contents
Operating Instructions
1
Read this First! (for AJ-HPD2500P)
2
Important Safety Instructions
3
Read this First! (for AJ-HPD2500E)
5
Table of Contents
9
Accessories
15
Included Accessories
15
Optional Accessories
15
Adjusting Lower Front Panel Tilt
16
Introduction Features
18
Introduction
18
Features
18
Usb Keyboard
20
Control Reference Guide
22
Audio and Video Controller
22
GUI Operations
26
Panel Control Unit and Card Slots
30
LCD Panel
32
Rear Panel and Connectors Inside the Lower Front Panel
34
Moving between Screens and Menu Operations
37
Operating Modes
37
Menu Operations
38
Using the On-Screen Keyboard
39
Using the Full Keyboard
39
Using the Ten Keypad
39
Using a USB Keyboard
40
Recording, Playback and P2 Card Handling
41
Insert a P2 Card
41
Recording and Playback
41
P2 Card and Recording Times
42
LOOP REC Function
43
Removing P2 Cards
43
Preventing Accidental Deletion
44
Connections
45
Example of Connections in 23.98/24/29.97/25 Hz Mode
45
Example of Connections for Remote Control
45
Recording from a Variable Frame-Rate Camera
46
Recording HD SDI Output Signals from a Variable Frame-Rate Camera as 720/23.98P
46
Recording HD SDI Signals Output by an HD Camera as 1080/23.98P
47
Jog and Shuttle Operations Using the Search Dial
48
Jog Mode
48
Shuttle Mode and Slow Mode (SHTL Mode/Slow Mode)
48
Clip Management
49
Thumbnail and Clip Management
49
Thumbnail Screen Names and Functions
50
Thumbnail Menu
53
Changing Thumbnail Display
54
Thumbnail Editing
57
Selecting Clips
58
Playing Back Clips
59
Playing Back Single Clips
60
Continuous Playback of Clips by Inserting/Removing P2 Cards
61
Attaching Text Memos and Shot Marks
64
Attaching Text Memos
64
Attaching Shot Marks
65
Copying Clips
66
Converting Clip Audio
67
Deleting Clips
69
Repairing and Reconnecting Clips
70
Repairing Bad Clips
70
Reconnecting Incomplete Clips
70
Viewing and Revising Clip Information
71
Viewing Clip Information
71
Revising Clip Metadata
72
Attaching Metadata to Clips
73
Preparing a Metadata Upload File
73
Setup to Attach Metadata
73
Loading Set Metadata Values
74
Recording Clips Containing Metadata
76
Using SD/SDHC Memory Cards
77
Displaying Miscellaneous SD Memory Card Information
77
Formatting SD Memory Cards
77
Formatting P2 Cards
79
Formatting Individual P2 Cards
79
Formatting All P2 Cards
79
Checking Card Status
80
Selecting Information to Display
80
Displaying Card Status Information
81
Editing Playlist Function
82
Editing Workflow
83
Insert Editing Mode and Overwrite Editing Mode
84
Handling of Sections Without Audio and Video
84
Undoing and Redoing
84
Audio Fading between Events
84
Names and Functions of the Playlist Screen
85
Buttons Used in Playlist Operations
90
Preparing for Playlist Creation
94
Setting System Frequency
94
Setting Playlist Format
94
Setting the Playback Time Code (TC)
94
Other Settings
95
Creating a New Playlist
96
Naming Playlists
96
Creating Playlists
97
Registering Events in a Playlist
97
Setting in and out Points
99
Hard Disk
102
Registering Events by Clip
103
Revising Registered Events
103
Deleting Events
106
Saving a Playlist to a P2 Card
107
Opening a Playlist File
108
Exporting a Playlist
109
Deleting Playlist Files
110
Recording Voice-Overs
111
Preparing for Voice-Overs
111
Voice-Over after Assigning the in and out Points
112
Voice-Over from Playback Status
113
Revising Voice-Overs
113
Setting Audio Level
114
Setting a Constant Audio Level for the Entire Event During Event Recording
114
Changing Audio Level in an Event During Event Registration
115
Setting Audio Levels for Specific Sections
115
Viewing Event and Clip Information
117
Event Property Indication
117
Clip Property Indication
117
Playing Back Playlists
119
Reviewing Events
119
Creating New Clips from the Playlist (Edit Copy)
120
Editing and Overwriting Clips (Rewrite Edit)
122
Connections Using USB or Esata Connectors
124
Using the Unit as a USB Device
124
Connecting the Unit to a Hard Disk
124
Connecting a PC to this Unit
125
Switching to USB Device Mode
125
Using this Unit with a Hard Disk
126
Supported Hard Disks
126
Formatting Hard Disks
128
Exporting Data by Card to a Hard Disk
128
Copying Clips to a Hard Disk
129
Displaying Hard Disk Information (Explorer Screen)
130
Hard Disk Operations
131
Importing/Copying Data from a Hard Disk to a P2 Card or FTP Server
133
Displaying Clip Thumbnails on a Hard Disk
134
Viewing Hard Disk Clip Information
135
Deleting Hard Disk Clips (TYPE S and FAT Formatted Hard Disks)
135
Playing Back Audio and Video of Hard Disk Clips for Confirmation
136
External Remote Control
137
Remote Operation of External Devices
137
Automatic Recording of Cards
138
Connecting this Unit to a Network
139
Network Settings
139
Saving and Loading Settings
142
Using FTP Client Functions
144
Displaying Clip Thumbnails on the FTP Server (FTP Thumbnail Screen)
145
Deleting Clips on the FTP Server
146
Viewing FTP Server Clip Information
146
Transferring Clips
146
Transferring SD Memory Card Data
148
Using Server Functions
149
Using Browser Functions
150
RS-232C Interface
153
Conditions for Receiving Commands Via an RS-232C Interface
153
Hardware Specifications
153
Software Specifications (Protocol)
153
About the Clip Select Function
157
Clip Select Setting
157
Canceling Clip Select
157
Using an Optional AVCHD Board
158
SD/SDHC Memory Cards
158
Operating the AVCHD Thumbnail Screens
161
System Info
164
Setting up for Playback
168
Playing Back AVCHD Clips
169
Recording AVCHD Material on P2 Cards
169
Recording Operations
170
Recording AVCHD to an SD Memory Card
171
Preparing for Recording
172
Unit Setup
173
Changing Settings
174
Change Operations
174
Using a Lock to Protect the User Setting File
175
Returning to Factory Defaults (Initial Settings)
175
Setup Menu
176
Item Settings
178
System
178
Basic
180
Operation
187
Interface
189
Edit
190
Time Code
190
Video
193
Audio
197
Lcd
201
Menu
202
Saving Menu Settings to SD Memory Cards
203
Time Code, User Bit and CTL
205
Superimpose Screen
208
List of Compatible Input and Output Formats
209
Audio V Fade Function
211
Audio Recording Channels Selection
212
Audio Recording Channels
212
For Long and Trouble-Free Operation
213
Condensation
213
Maintenance
213
Error Messages
214
WARNING Information Display
215
Error Information
221
Error Indication
222
HOURS METER" Information Display
223
List of Shortcuts
224
List of Multiple Button Operations
225
Updating the Firmware in this Unit
226
Rack Mounting
227
Mounting the Recorder in the Rack
227
Handling P2 Card Recording
228
Handling SD Memory Card Recording
229
Specifications
230
Index
233
Advertisement
Panasonic AJ-HPD2500E Operating Instructions Manual (226 pages)
Memory Card Recorder
Brand:
Panasonic
| Category:
Voice Recorder
| Size: 31.25 MB
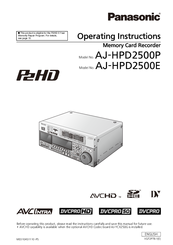
Table of Contents
Operating Instructions
1
Read this First! (for AJ-HPD2500P)
2
Important Safety Instructions
3
Read this First! (for AJ-HPD2500E)
5
Caution for Ac Mains Lead
6
Table of Contents
9
Place of Installation
14
Accessories
15
Included Accessories
15
Optional Accessories
15
Adjusting Lower Front Panel Tilt
16
Introduction
18
Introduction Features
18
Features
18
Native Recording
21
Control Reference Guide
22
Audio and Video Controller
22
GUI Operations
26
Panel Control Unit and Card Slots
30
LCD Panel
32
Rear Panel and Connectors Inside the Lower Front Panel
34
Moving between Screens and Menu Operations
37
Operating Modes
37
Menu Operations
38
Using the On-Screen Keyboard
39
Using the Full Keyboard
39
Using the Ten Keypad
39
Using a USB Keyboard
40
Recording, Playback and P2 Card Handling
41
Insert a P2 Card
41
Recording and Playback
41
P2 Card and Recording Times
42
LOOP REC Function
43
Removing P2 Cards
43
Preventing Accidental Deletion
44
Connections
45
Example of Connections in 23.98/24/29.97/25 Hz Mode
45
Example of Connections for Remote Control
45
Recording from a Variable Frame-Rate Camera
46
Recording HD SDI Output Signals from a Variable Frame-Rate Camera as 720/23.98P
46
Recording HD SDI Signals Output by an HD Camera as 1080/23.98P
47
Jog and Shuttle Operations Using the Search Dial
48
Jog Mode
48
Shuttle Mode and Slow Mode (SHTL Mode/Slow Mode)
48
Clip Management
49
Thumbnail and Clip Management
49
Thumbnail Screen Names and Functions
50
Thumbnail Menu
53
Changing Thumbnail Display
54
Thumbnail Editing
57
Selecting Clips
58
Playing Back Clips
59
Playing Back Single Clips
60
Attaching Text Memos and Shot Marks
61
Attaching Text Memos
61
Attaching Shot Marks
62
Copying Clips
63
Deleting Clips
64
Repairing and Reconnecting Clips
65
Repairing Bad Clips
65
Reconnecting Incomplete Clips
65
Viewing and Revising Clip Information
66
Viewing Clip Information
66
Revising Clip Metadata
67
Attaching Metadata to Clips
68
Preparing a Metadata Upload File
68
Setup to Attach Metadata
68
Loading Set Metadata Values
69
Recording Clips Containing Metadata
71
Using SD/SDHC Memory Cards
72
Displaying Miscellaneous SD Memory Card Information
72
Formatting SD Memory Cards
72
Formatting P2 Cards
74
Formatting Individual P2 Cards
74
Formatting All P2 Cards
74
Checking Card Status
75
Selecting Information to Display
75
Displaying Card Status Information
76
Editing Playlist Function
78
Editing Workflow
79
Insert Editing Mode and Overwrite Editing Mode
80
Handling of Sections Without Audio and Video
80
Undoing and Redoing
80
Audio Fading between Events
80
Names and Functions of the Playlist Screen
81
Buttons Used in Playlist Operations
86
Preparing for Playlist Creation
90
Setting System Frequency
90
Setting Playlist Format
90
Setting the Playback Time Code (TC)
90
Other Settings
90
Creating a New Playlist
91
Naming Playlists
92
Creating Playlists
93
Registering Events in a Playlist
93
Registering Events by Clip
99
Revising Registered Events
99
Switching Audio Channels
102
Saving a Playlist to a P2 Card
103
Opening a Playlist File
104
Deleting Playlist Files
105
Recording Voice-Overs
106
Preparing for Voice-Overs
106
Voice-Over after Assigning the in and out Points
107
Revising Voice-Overs
108
Setting Audio Level
109
Setting a Constant Audio Level for the Entire Event During Event Recording
109
Changing Audio Level in an Event During Event Registration
110
Setting Audio Levels for Specific Sections
110
Viewing Event and Clip Information
112
Event Property Indication
112
Clip Property Indication
112
Playing Back Playlists
114
Reviewing Events
114
Creating New Clips from the Playlist (Edit Copy)
115
Connections Using USB or Esata Connectors
116
Using the Unit as a USB Device
116
Using the Unit as a USB Host
116
Connecting a PC to this Unit
117
Switching to USB Device Mode
117
Using this Unit with a Hard Disk
118
Supported Hard Disks
118
Formatting Hard Disks
120
Exporting Data by Card to a Hard Disk
120
Copying Clips to a Hard Disk
121
Displaying Hard Disk Information (Explorer Screen)
122
Hard Disk Operations
123
Importing Data from a Hard Disk to a P2 Card
124
Displaying Clip Thumbnails on a Hard Disk
125
Viewing Hard Disk Clip Information
127
Deleting Hard Disk Clips (TYPE S and FAT Formatted Hard Disks)
127
Playing Back Audio and Video of Hard Disk Clips for Confirmation
127
External Remote Control
128
Remote Operation of External Devices
128
Automatic Recording of Cards
129
Connecting this Unit to a Network
130
Network Settings
130
Using FTP Client Functions
135
Displaying Clip Thumbnails on the FTP Server (FTP Thumbnail Screen)
136
Deleting Clips on the FTP Server
137
Viewing FTP Server Clip Information
137
Transferring Clips
137
Transferring SD Memory Card Data
139
Using Server Functions
140
Using Browser Functions
141
RS-232C Interface
144
Conditions for Receiving Commands Via an RS-232C Interface
144
Hardware Specifications
144
Software Specifications (Protocol)
144
About the Clip Select Function
148
Clip Select Setting
148
Canceling Clip Select
148
Using an Optional AVCHD Board
149
SD/SDHC Memory Cards
149
Operating the AVCHD Thumbnail Screens
152
Thumbnail Setup
154
System Info
155
Setting up for Playback
159
Playing Back AVCHD Clips
160
Recording AVCHD Material on P2 Cards
160
Recording AVCHD to an SD Memory Card
162
Recording Remote Input Signals
163
Unit Setup
164
Changing Settings
165
Change Operations
165
Using a Lock to Protect the User Setting File
166
Returning to Factory Defaults (Initial Settings)
166
Setup Menu
167
Item Settings
169
System
169
Basic
171
Operation
177
Interface
179
Edit
180
Time Code
180
Video
183
Audio
187
Lcd
191
Menu
192
Saving Menu Settings to SD Memory Cards
193
Time Code, User Bit and CTL
195
Superimpose Screen
198
List of Compatible Input and Output Formats
199
Audio V Fade Function
201
Audio Recording Channels Selection
202
Audio Recording Channels
202
Condensation
203
Maintenance
203
Error Messages
204
WARNING Information Display
205
HOURS METER" Information Display
213
List of Shortcuts
214
List of Multiple Button Operations
215
Updating the Firmware in this Unit
216
Rack Mounting
217
Mounting the Recorder in the Rack
217
Handling P2 Card Recording
218
Handling SD Memory Card Recording
219
Specifications
220
Index
223
Advertisement
Related Products
Panasonic AJ-HPD2500P
Panasonic AJHPM100 - P2HD MOBILE RECORDER
Panasonic AJ-HPX2100
Panasonic AJ-HPM100P
Panasonic AJ-HPM100E
Panasonic AJ-HPM110
Panasonic AJ-HPM200E
Panasonic AJ-HPM200P
Panasonic AJ-HPM100
Panasonic AJHD1400 - DVCPRO HD VTR
Panasonic Categories
Camcorder
Air Conditioner
TV
Digital Camera
Cordless Telephone
More Panasonic Manuals
Login
Sign In
OR
Sign in with Facebook
Sign in with Google
Upload manual
Upload from disk
Upload from URL