Sign In
Upload
Manuals
Brands
Miele Manuals
Dishwasher
Classic G 4205
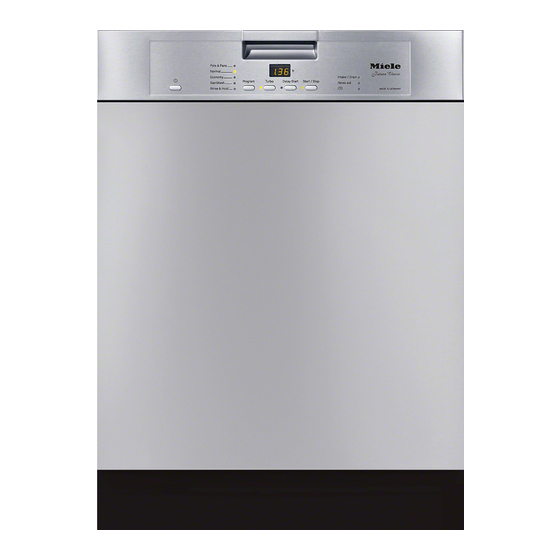
User Manuals: Miele Classic G 4205 Dishwasher
Manuals and User Guides for Miele Classic G 4205 Dishwasher. We have
3
Miele Classic G 4205 Dishwasher manuals available for free PDF download: Technical Information, Operating Instructions Manual, Product Dimensions
Miele Classic G 4205 Technical Information (159 pages)
G 5 series Futura Dishwashers
Brand:
Miele
| Category:
Dishwasher
| Size: 4.33 MB
Table of Contents
Table of Contents
2
Technical Information
10
Warning and Safety Instructions
10
General Information
10
Touch Current Measurement
10
Risk of Injury Due to Sharp Edges and Protruding Parts
11
Uninstalling the Dishwasher
11
Service Work - Casing
11
Installation Aids Containing Silicone
11
Modification History
12
C Technical Data
13
Data Sheets
13
Futura Classic
13
Table C-1: US Data Sheet, Futura Classic Models
13
Futura Crystal
14
Table C-2: US Data Sheet, Futura Crystal Models
14
Futura Diamond
15
Table C-3: US Data Sheet, Futura Diamond Models
15
Futura Dimension
16
Table C-4: US Data Sheet, Futura Dimension Models
16
Futura Dimension Plus
17
Table C-5: US Data Sheet, Futura Dimension Plus Models
17
Door Springs
18
Summary
18
Standard Door Springs by Appliance Model
18
Electrical and Plumbing Connections
18
Electrical Information
18
Hard-Wired Electrical Connection
18
Table C-6: Door Springs Summary
18
Table C-7: Standard Door Springs by Model
18
Plumbing Connections
19
Intake Connection
19
Drain Connection
19
Layout of Electrical Components
19
Control Panels
19
Touchtronic
19
Figure D-1: Touchtronic Fascia Panel (G 5505/G 5705 Shown)
19
Incognito
20
Navitronic
20
Figure D-2: Incognito Fascia Panel (G 427X/G 4570/G 5175 Shown)
20
Figure D-3: Navitronic Fascia Panel (G 5915 Shown)
20
Appliance Overviews
21
Integrated Models
21
Figure D-4: Integrated Model
21
Fully Integrated Models
22
Figure D-5: Fully Integrated Model
22
Component Layouts
23
G 4205, G 45X0 (Classic, Slimline Dimension with Touchtronic, Without Display)
23
Figure D-6: G 4205/G 45X0 Component Layout
23
G 5105, G 5225 (Crystal with Touchtronic and Display)
24
Figure D-7: G 5105, G 5225 Component Layout
24
G 5505, G 5605, G 5705 (Dimension/Dimension Plus with Touchtronic and Display)
25
Figure D-8: G 5505, G 5605, G 5705 Component Layout
25
G 427X, G 428X, G 4570, G 5175, G 5285 (Classic, Dimension, Crystal W/Incognito)
26
Figure D-9: G 427X, G 428X, G 4570, G 5175, G 5285 Component Layout
26
G 557X, G 567X (Dimension with Incognito)
27
Figure D-10: G 557X, G 567X Component Layout
27
G 5775 (Dimension Plus with Incognito)
28
Figure D-11: G 5775 Component Layout
28
G 5975 (Diamond with Incognito)
29
Figure D-12: G 5975 Component Layout
29
G 5915 (Diamond with Navitronic)
30
Figure D-13: G 5915 Component Layout
30
Data Tag
31
Model Numbering
31
Figure D-14: Data Tag Location
31
Figure D-15: Data Tag Information
31
Figure D-16: Model Numbering
31
G 5Xxx
32
Casing
32
Function
33
Brilliantlight (Select Models)
33
Service
33
Side Panel Removal
33
Drip Pan Removal
34
Figure 010-1: Side Panel Removal
34
Hinge Removal
35
Figure 010-2: Drip Pan Removal
35
Figure 010-3: Opening the Hinge Bracket
35
Brilliantlight Deactivation
36
Figure 010-4: Front Hinge Retaining Screw
36
Figure 010-5: Side Hinge Retaining Screw
36
Brilliantlight Activation
37
Brilliantlight Assembly Removal
37
Figure 010-6: Brilliantlight Circuit Board and Plug
37
Figure 010-7: Brilliantlight Lens
38
Door
39
Door Handle and Door Lock (Touchtronic/Navitronic)
40
Door Lock (Incognito)
40
Child Safety Lock
40
Automatic Door Lock Latch ("Drying Plus" Function)
40
Figure 020-1: Door Handle Release
40
Figure 020-2: Child Safety Lock
40
Figure 020-3: Drying Plus (before Program End)
41
Figure 020-4: Drying Plus (after Program End)
42
Figure 020-5: Door Lock Latch Plugs
42
Figure 020-6: Door Lock Latch, Position 1
43
Figure 020-7: Door Lock Latch, Position 2
44
Figure 020-8: Door Lock Latch, Position 3
45
Figure 020-9: Door Lock Latch, Intermediate Opening Position
46
Figure 020-10: Door Lock Latch, Intermediate Closing Position
47
Combination Dispenser
48
Figure 020-11: Door Lock Latch Assembly (Mechanical Version)
48
Figure 020-12: Combination Dispenser
48
Fault Repair
49
Door Can't be Closed
49
Fault with Automatic Door Lock Latch
50
Service
50
Removing the Combination Dispenser
50
Cable Holder Removal
51
Locking Plate Adjustment/Replacement
51
Figure 020-13: Combination Dispenser Removal
51
Bottom Door Seal Removal
52
Figure 020-14: Door Seal with Door
52
Door Lock with Contact Switch Removal
53
Fully Integrated Models
53
Integrated Models
53
Figure 020-15: Bottom Door Seal
53
Figure 020-16: Door Lock Removal (Integrated Models)
54
Automatic Door Opener and Drive Removal
55
Figure 020-17: Door Lock Emergency Release
55
Figure 020-18: Automatic Door Opener, Viewed from Underside
56
Figure 020-19: Drive
57
Front Panel
58
Service
59
Custom Door Panel (GDU) Removal
59
Door Tension Adjustment
59
Figure 030-1: Integrated Door Panel Screw Locations
59
Figure 030-2: Door Tension Adjustment
59
Door Outer Panel Removal
60
Figure 030-3: Outer Door Panel Removal
60
Lower Access Cover Plate Removal
61
Connecting Strip Removal
61
Terminal Block Removal
61
Figure 030-4: Lower Access Cover Plate and Connecting Strip Removal
61
Figure 030-5: Terminal Block Cover
62
Figure 030-6: Terminal Block Screws
62
Figure 030-7: Interference Suppression Capacitor and Ground Wire
63
Inner Cabinet
64
Function
65
Cabinet Construction
65
Drying System
65
Figure 040-1: Recirculation Turbothermic Drying
65
Fan
66
Technical Information
67
Fault Repair
67
Condensation Forms on Adjacent Cabinets
67
Noises During Drying Cycle
67
Figure 040-2: Condenser Pocket
67
Service
68
Door Seal Replacement
68
Basket Guide Removal
68
Figure 040-3: Seal Install Guide
68
Multi-Plinth Removal
69
Figure 040-4: Basket Guide
69
Figure 040-5: Clip with Bolt
69
Technical Information
70
Steam Condenser Removal
70
Fan Removal
70
Connection Box Removal (Select Models)
71
Figure 040-6: Fan/Condenser Removal
71
Figure 040-7: Connection Box
71
Brilliantlight Control Module Removal
72
Figure 040-8: Brilliantlight Control Module
72
Water Paths
73
Function
74
Water Circulation
74
Figure 050-1: Water Paths - Diagram
74
Waterproof System (WPS)
75
Waterproof System Flow Rate Restrictor
75
Figure 050-2: Flow Rate Restrictor
75
View from Underside of Base
76
Water Diverter
76
Figure 050-3: View from Underside of Base
76
Figure 050-4: Water Diverter
77
Figure 050-5: Water Diverter Without EGS
78
Water Diverter Without EGS
78
Figure 050-6: Water Diverter with EGS
79
Water Diverter with EGS
79
Figure 050-7: Reactivation
80
Reactivation
80
Water Softener Programming
81
Flow Meter B3/4, Water Intake Quantity
81
Electronically Controlled Water Hardness (EGS)
81
MPEH Circulation Pump (no Slide Shutter or Frequency Converter)
81
MPEW Circulation Pump (with Slide Shutter, no Frequency Converter)
82
Figure 050-8: MPEH Circulation Pump
82
MPPW Circulation Pump (with Frequency Converter & Slide Shutter)
83
Figure 050-9: MPEW Circulation Pump
83
Figure 050-10: MPPW Circulation Pump
84
Table 050-1: MPPW Pump Pressure Versus Wash Program
84
Heater Element
85
Heater Pressure Switch, B1/13
85
Figure 050-11: MPPW Circulation Pump Voltages
85
NTC Temperature Sensor R30
86
Figure 050-12: Heater Pressure Switch
86
Turbidity Sensor (ECO Sensor III, Autosensor), B3/10
87
Table 050-2: Temperature Sensor R30 Resistance Values
87
Figure 050-13: Turbidity Sensor Circuit
88
Figure 050-14: Turbidity Sensor Location
88
Spray Arms
89
Spray Arm Sensing, Middle and Bottom Spray Arms
89
Table 050-3: Spray Arm Speeds
89
Filter Combination with Microfine Filter
90
Figure 050-15: Middle and Bottom Spray Arm Sensors
90
Drain Pump
91
Figure 050-16: Filter Combination in Sump
91
Fault Repair
92
Jammed Circulation Pump
92
Drain Pump Switches on and off at Short Intervals
92
Intake/Drain LED Flashes and Lights up Alternately (Incognito)
92
Foreign Object in Drain System
93
Figure 050-17: Microfine Filter Trap
93
Service
94
Removing the Top Spray Arm
94
Removing the Middle Spray Arm
94
Removing the Bottom Spray Arm
94
Removing the Top Spray Arm Feed Pipe with Turbidity Sensor
94
Removing the Middle Spray Arm Feed Pipe
94
Replacing the Spray Arm Sensor
95
Flow Meter (Circuit Board) Removal
96
Figure 050-18: Spray Arm Sensor
96
Removing EGS Valve Y5
97
Removing Reactivation Valve Y38
97
Heater Relay Removal
97
Salt Container and Salt Container Reed Switch Removal
97
Water Diverter Removal
98
Circulation Pump Removal
100
Removing the Circulation Pump Housing Cap with Ring Heater
101
Figure 050-19: Screws and Clips Securing the Pump Housing Cap (MPPW)
101
G 5Xxx
102
MPEH/MPEW Pump Capacitor Removal
102
Removing the Heater Pressure Switch
102
Removing the Drain Pump
102
Removing the Float
103
Removing the Float Switch
103
Figure 050-20: Removing the Drain Pump
103
Removing the NTC Temperature Sensor
104
Non-Return Valve Removal
104
Removing the Sump
104
Filter Combination Disassembly
105
Filter Combination Assembly (New Microfine Filter and Handle)
106
Figure 050-21: Combination Filter
106
Figure 050-22: Microfine Filter Installation
107
Figure 050-23: Filter Combination Lock/Unlock Positions
107
Filter Combination Assembly (with Locking Piece)
108
Figure 050-24: Combination Filter Locking Clip (Unlocked)
108
Replacing the Waterproof System Restrictor
109
Figure 050-25: Combination Filter Locking Clip (Locked)
109
Figure 050-26: Waterproof System
110
Figure 050-27: Removing the Waterproof System Restrictor
110
Waterproof System (WPS) Removal
111
Filling the Salt Container in the Sump
111
Figure 050-28: Replacing the Waterproof System Restrictor
111
Water Level Check
112
Figure 050-29: Filling the Salt Container in the Sump
112
Figure 050-30: Water Level Reference
112
Electronic
113
Function
114
General Operation
114
Touchtronic/Navitronic Controls
114
Figure 080-1: Touchtronic/Navitronic Main Menu
114
Figure 080-2: Selected Program Display
114
Figure 080-3: Selected Options
114
Incognito Controls
115
Component Test
115
Test Sequence and Background Information
115
Figure 080-4: Incognito Main Menu
115
Figure 080-5: Selected Program Display
115
Machine Response Following a Power Failure
118
Turbo Function (Select Models)
118
Sensordry Feature
119
Drying Plus Function
120
Normal" Program
120
Extra Quiet" Program (MPPW Only)
120
Table 080-1: "Normal" Program
120
Intensive Lower Basket" Option
121
Table 080-2: "Extra Quiet" Program
121
Table 080-3: Programs with "Intensive Lower Basket" Option
121
Demo Mode
122
Table 080-4: Circulation Pump Function with and Without "Intensive Lower Basket
122
Electronics ID Summary
123
Programming of Language and Time of Day at First Commissioning (Models with Display Only)
123
Fault Repair
123
Main Switch Is On, no Message in Display
123
Rinse Aid Used up too Quickly (Models with Sensordry)
123
Table 080-5: Electronics ID Summary
123
Program Can be Selected but Not Started
124
Program Interrupted, no Fault Indication
124
Diagnostic Support Cannot Establish a Connection
125
Settings Selected During Initial Commissioning Are Not Saved
125
Standby Mode Not Functioning
125
Fault Code Summary
126
Table 080-6: Fault Code Summary
126
Fault Code F01: Water/Heating NTC or Leads Short-Circuited
127
Fault Code F02: Water/Heating NTC or Leads Open-Circuited
127
Fault Code F11: Drainage Fault
127
Figure 080-6: Circuit Test Path for F11
128
Fault Code F12: Water Intake Fault at Start of Step
129
Fault Code F13: Water Intake Fault at End of Step
131
Fault Code F14: Water Intake Fault: Heater Pressure Switch
133
Fault Code F15: Water Intake Fault - Hot Water
135
Fault Code F18: Flow Meter Stationary State Monitor B3/4
135
Fault Code F19: Flow Meter B3/4 Stiff and Not Turning Freely
135
Figure 080-7: F19 Start Rinse Block Water Intake
136
Figure 080-8: F19 Test Routine
136
Fault Code F24: Heater Relay Contact
137
Figure 080-9: Circuit Test Path for F24
137
Fault Code F25: Target Temperature Fault
138
Fault Code F26: Boiling Protection
139
Fault Code F32: Door Lock Does Not Close
139
Fault Code F33: Door Lock Does Not Open
139
Fault Code F36: Door Lock Switch Defective
140
Fault Code F40: Electronic Fault
140
Fault Code F42: Line Frequency Registration Fault
140
Fault Code F47: Faulty Interface between Selection-Display Electronic (BAE) & Control-Power Electronic (SLT)
141
Fault Code F51: Heater Pressure Switch
141
Figure 080-10: Circuit Test Path for F51 (Initial State)
141
Figure 080-11: Circuit Test Path for F51 (Testing State)
142
Fault Code F52: Heater Pressure Switch Has Reset During Heating
143
Fault Code F63: Slide Shutter Fault
143
Fault Code F67: Circulation Pump Speed too Low
144
Fault Code F68: Circulation Pump Operating after Shutoff
144
Fault Code F69: Circulation Pump Blocked
145
Fault Code F70: Float Switch Fault
145
Fault Code F78: Circulation Pump Fault
146
Fault Code F79: Circulation Pump Interaction Fault
147
Fault Code F84: Slide Shutter Positioning Fault
147
Fault Code F85: Slide Shutter Signal Change Fault
148
Fault Code F86: Salt Container Lid Contact Fault
148
Fault Code F88: Turbidity Sensor Fault
149
Fault Code F91: Load Size Registration Inactive
149
Technical Information
135
Service
150
Programming Mode
150
Service Mode
150
Fascia Panel
151
Fault Repair
152
On/Off Button Jams
152
Display Steams up
152
Service
152
Fascia Panel Removal (Touchtronic/Navitronic)
152
Fascia Panel Removal (Incognito)
153
Figure 100-1: Screws Securing the Fascia Panel (Touchtronic/Navitronic)
153
Control Panel Removal (Touchtronic/Novotronic)
154
On/Off Switch Removal (Touchtronic/Novotronic)
154
Figure 100-2: Fascia Panel Removal (Incognito)
154
Electronic Removal (Incognito)
155
Figure 100-3: On/Off Switch Removal (Touchtronic/Novotronic)
155
Electronic Removal (Touchtronic/Novotronic)
156
Technical Service Bulletins
157
Miele Policy on Dishwasher Detergent Requirements
157
Dishwasher Detergents and Phosphates
157
G 5000 Inlet Hoses; Update
158
G 5775 Fascia Panel Mounting
159
Advertisement
Show specifications
Features
Style
Built-In
Color
Stainless Steel
Load Capacity
16 Place Settings
Number of Cycles
6
Cycle Selections
Pots and Pans
Options/Settings
-
Drying Type
-
Temperature Options
-
Noise level
48 dB
Special Features
-
Power
Energy Class
-
Annual Energy Consumption
285 kWh
Energy Consumption Per Cycle
-
Annual Water Consumption
-
Water Consumption Per Cycle
-
Voltage
120 V
Frequency
-
Current
15 A
Dimensions
Depth
22 7/16 in
Height
33 11/16 in
Width
23 9/16 in
Net Weight
-
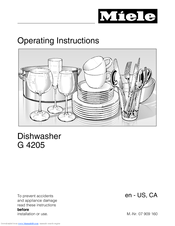
Miele Classic G 4205 Operating Instructions Manual (52 pages)
Miele Dishwasher User Manual
Brand:
Miele
| Category:
Dishwasher
| Size: 2.4 MB
Table of Contents
Operating Instructions
1
Table of Contents
2
Important Safety Instructions
4
Guide to the Dishwasher
7
Control Panel
8
Caring for the Environment
9
Before Using for the First Time
10
To Open the Door
10
To Close the Door
10
Child Safety Lock
10
Rinse Aid
11
Adding Rinse Aid
11
Adjusting the Dosage
12
Loading the Dishwasher
13
Items Not Recommended for Dishwashing
14
Typical Load for 10 Place Settings
15
Typical Load for 16 Place Settings
16
Upper Basket
17
Lower Basket
19
Cutlery Tray
21
Split Cutlery Tray
22
Optional Accessories
23
Use
24
Detergent
24
Adding Detergent
25
Turning on
26
Selecting a Program
26
Starting a Program
26
Program Sequence Display
26
Standby
26
At the End of a Program
27
Preparing Your Appliance for an Extended Vacation
27
Interrupting a Program
27
Changing a Program
27
Program Guide
28
Additional Options
29
Frequently Asked Questions
30
Technical Faults
30
Problems Water Intake / Drain
31
General Problems with the Dishwasher
32
Sounds
33
Poor Cleaning Results
34
After Sales Service
37
Transport
38
User Maintenance Instructions
39
Cleaning and Care
40
Triple Filter System
41
Cleaning the Spray Arms
43
Cleaning the Drain Pump and Non-Return Valve
44
Installation Instructions
45
Help to Protect the Environment
46
Electrical Connection
47
Plumbing
49
Connection to the Water Supply
49
Drainage
50
Miele Classic G 4205 Product Dimensions (3 pages)
Miele Classic G 4205 Classic G 4205 Prefinished Prefinished Dishwasher
Brand:
Miele
| Category:
Dishwasher
| Size: 0.06 MB
Advertisement
Advertisement
Related Products
Miele G 4205
Miele G4203
Miele G 4202
Miele G 4207
Miele G 4208
Miele G 4203 U
Miele G4203SC
Miele G4203SCU
Miele G 4203 i
Miele G4263
Miele Categories
Washer
Dishwasher
Oven
Ventilation Hood
Dryer
More Miele Manuals
Login
Sign In
OR
Sign in with Facebook
Sign in with Google
Upload manual
Upload from disk
Upload from URL