Sign In
Upload
Manuals
Brands
GE Manuals
Protection Device
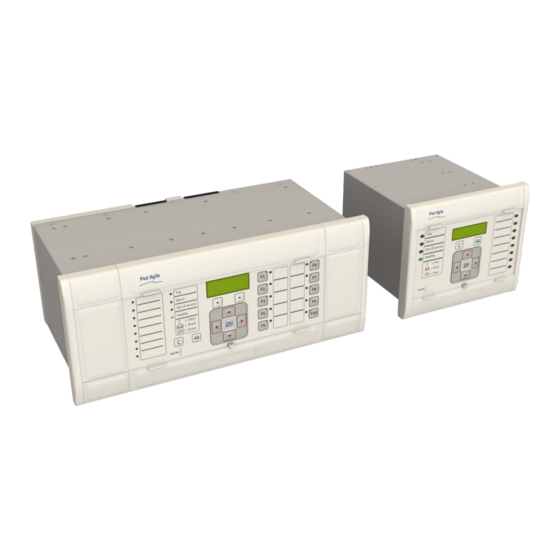
MiCOM P747 Agile
GE MiCOM P747 Agile Manuals
Manuals and User Guides for GE MiCOM P747 Agile. We have
1
GE MiCOM P747 Agile manual available for free PDF download: Technical Manual
GE MiCOM P747 Agile Technical Manual (458 pages)
Busbar Protection IED
Brand:
GE
| Category:
Protection Device
| Size: 34.13 MB
Table of Contents
Table of Contents
3
Chapter 1 Introduction
21
Trip Circuit Supervision Scheme
22
Rear Serial Port
22
Chapter Overview
23
Measurement Table
23
Trip Circuit Supervision Scheme
23
Cip
23
Foreword
24
Target Audience
24
Typographical Conventions
24
Nomenclature
24
Cip
24
Product Scope
25
Cip
25
Features and Functions
26
Protection Functions
26
Control Functions
26
Measurement Functions
26
Cip
26
Communication Functions
27
Cip
27
Compliance
28
Functional Overview
29
Cip
29
Figure 1: Functional Overview
29
Ordering Options
30
Chapter 2 Safety Information
31
Chapter Overview
33
Chapter Overview Health and Safety Symbols
33
Installation, Commissioning and Servicing
36
Lifting Hazards
36
Electrical Hazards
36
UL/CSA/CUL Requirements
37
Fusing Requirements
37
Equipment Connections
38
Protection Class 1 Equipment Requirements
38
Pre-Energization Checklist
39
Peripheral Circuitry
40
Upgrading/Servicing
40
Decommissioning and Disposal
41
Chapter 3 Hardware Design
43
Chapter Overview
45
Hardware Architecture
46
Figure 2: Hardware Architecture
46
Mechanical Implementation
47
Housing Variants
47
Figure 3: Exploded View of IED
47
List of Boards
48
Front Panel
49
Figure 4: Front Panel (80TE)
49
Top Compartment with Hinged Cover
50
Keypad
50
Liquid Crystal Display
50
Front Serial Port (SK1)
50
Front Parallel Port (SK2)
51
Fixed Function Leds
51
Function Keys
52
Programable Leds
52
Rear Panel
53
Figure 5: Rear View of Populated 80TE Case
53
Figure 6: Terminal Block Types
54
Boards and Modules
55
Pcbs
55
Subassemblies
55
Figure 7: Rear Connection to Terminal Block
55
Main Processor Board
56
Figure 8: Main Processor Board
56
Combined Coprocessor and Isolated Input Board
57
Figure 9: Combined Coprocessor and Isolated Digital Input Board
57
Power Supply Board
58
Figure 10: Power Supply Board
58
Figure 11: Power Supply Assembly
59
Watchdog
60
Figure 12: Power Supply Terminals
60
Rear Serial Port
61
Figure 13: Watchdog Contact Terminals
61
Input Module - 2 Transformer Boards
62
Figure 14: Rear Serial Port Terminals
62
Figure 15: Input Module - 1 Transformer Board
62
Sigma-Delta Input Module Circuit Description
63
Figure 16: Input Module Schematic
63
Transformer Board
65
Figure 17: Instrument Transformer Board
65
Main Input Board
66
Figure 18: Main Input Board
66
Standard Output Relay Board
67
Figure 19: Output Relay Board - 8 Contacts
67
IRIG-B Board
69
Figure 20: IRIG-B Board
69
Fibre Optic Board
70
Figure 21: Fibre Optic Board
70
Rear Communication Board
71
Figure 22: Rear Communication Board
71
Ethernet Board
72
Figure 23: Ethernet Board
72
Redundant Ethernet Board
73
Figure 24: Redundant Ethernet Board
73
Chapter 4 Configuration
75
Chapter Overview
77
Using the HMI Panel
78
Navigating the HMI Panel
79
Getting Started
79
Figure 25: Menu Navigation
79
Default Display
80
Default Display Navigation
81
Password Entry
81
Figure 26: Default Display Navigation
81
Processing Alarms and Fault Records
82
Menu Structure
83
Changing the Settings
84
Direct Access (the Hotkey Menu)
84
Setting Group Selection
85
Control Inputs
85
Circuit Breaker Control
86
Function Keys
86
Configuring the Data Protocols
88
Courier Configuration
88
DNP3 Configuration
90
DNP3 Configurator
91
MODBUS Configuration
93
IEC 61850 Configuration
94
IEC 61850 Configuration Banks
95
IEC 61850 Network Connectivity
95
Date and Time Configuration
96
Time Zone Compensation
96
Daylight Saving Time Compensation
96
Configuration Settings
98
System Data
98
Date and Time
103
General Configuration
104
Transformer Ratios
106
System Configuration
110
Security Configuration
115
Chapter 5 Protection Functions
117
Chapter Overview
119
Busbar Protection
120
Unit Protection
120
Current Differential Protection Principles
120
Figure 27: Current Differential Protection
120
Through Fault Stability
121
Bias Current Compensation
121
Figure 28: Compensation Using Biased Differential Characteristic
122
Busbar Multiple Tripping Criteria
123
Tripping Criteria Ddbs
123
Figure 29: Multiple Tripping Criteria
123
Topology Replica Function
124
Figure 30: Topology Replica Function
124
Topology Replica Function Ddbs
125
Zone Current Differential Elements
126
Check Zone
126
Figure 31: Zone Tripping Characteristic
126
Check Zone Supervision
127
Auxiliary Contacts Discrepancy
127
Continuous Supervision of Current Circuits (Circuitry Fail)
127
Figure 32: Check Zone Supervision Characteristic
127
Current Phase Comparison Check
128
Figure 33: Circuitry Check Characteristic
128
Optional Voltage Criteria
129
Instantaneous or Delayed Tripping
129
Dead Zone (Blind Spot) Protection
129
Dead Zone (Blind Spot) Protection Logic
130
Dead Zone (Blind Spot) Protection Ddbs
130
Figure 34: Example of Busbar Dead-Zone
130
Figure 35: Dead-Zone Logic
130
Circuit Breaker Fail Protection
131
Circuit Breaker Fail Implementation
131
Circuit Breaker Fail Logic
131
Figure 36: CBF Initiated by Internal Signal
132
CB Fail Settings
133
Figure 37: CBF Initiated by External Signal
133
CB Fail DDB Signals
134
Backup Overcurrent Protection
136
Overcurrent 1 Settings
136
Overcurrent 2 Settings
141
Overcurrent DDB Signals
153
Configuring the Busbar Protection
157
Example of Configuring the Busbar Protection
157
Figure 38: Busbar Topology Used in Configuration Example
157
Chapter 6 Monitoring and Control
161
Chapter Overview
163
Event Records
164
Event Records Table
164
Event Types
171
Opto-Input Events
172
Contact Events
172
Alarm Events
172
Fault Record Events
175
Figure 39: Fault Recorder Stop Conditions
175
Maintenance Events
176
Protection Events
177
Security Events
177
Platform Events
178
View Records Column
178
Disturbance Recorder
181
Measurements
182
Measured Quantities
182
Measured and Calculated Currents
182
Measured and Calculated Voltages
182
Power and Energy Quantities
182
Demand Values
183
Frequency Measurements
183
Other Measurements
183
Measurement Setup
183
Measurement Tables
184
Measurement Table 3
187
O Functions
188
Function Keys
188
Function Key DDB Signals
188
Function Key Settings
189
Leds
189
Fixed Function Leds
189
Programable Leds
190
Function Key Leds
190
Trip LED Logic
190
LED DDB Signals
190
Figure 40: Trip LED Logic
190
LED Conditioners
192
Opto-Inputs
192
Opto-Input Configuration
192
Opto-Input Labels
195
Opto-Input DDB Signals
197
Enhanced Time Stamping
198
Output Relays
198
Output Relay Labels
198
Output Relay DDB Signals
200
Output Relay Conditioners
200
Control Inputs
200
Control Input Settings
200
Control Input Configuration
202
Control Input Labels
206
Control Input DDB Signals
206
Voltage Transformer Supervision
207
Trip Circuit Supervision
208
Trip Circuit Supervision Scheme
208
Figure 41: TCS Scheme 1
208
Psl for Tcs Scheme 1
209
Figure 42: PSL for TCS Scheme 1
209
Figure 43: TCS Scheme 2
209
Psl for Tcs Scheme 2
210
Figure 44: PSL for TCS Scheme 2
210
Figure 45: TCS Scheme 3
210
Figure 46: PSL for TCS Scheme 3
210
Chapter 7 SCADA Communications
211
Chapter Overview
213
Communication Interfaces
214
Serial Communication
215
EIA(RS)232 Bus
215
EIA(RS)485 Bus
215
EIA(RS)485 Biasing Requirements
216
K-Bus
216
Figure 47: RS485 Biasing Circuit
216
Figure 48: Remote Communication Using K-Bus
217
Standard Ethernet Communication
218
Overview of Data Protocols
219
Courier
220
Physical Connection and Link Layer
220
Courier Database
220
Settings Categories
220
Setting Changes
220
Settings Transfer
221
Event Extraction
221
Automatic Event Record Extraction
221
Manual Event Record Extraction
221
Disturbance Record Extraction
222
Programmable Scheme Logic Settings
223
Time Synchronisation
223
Configuration
223
Physical Connection and Link Layer
224
Initialisation
224
Iec 60870-5-103
224
Time Synchronisation
225
Spontaneous Events
225
General Interrogation (GI)
225
Cyclic Measurements
225
Commands
225
Test Mode
225
Disturbance Records
225
Command/Monitor Blocking
226
Configuration
226
Dnp
227
Physical Connection and Link Layer
227
Object 1 Binary Inputs
227
Object 10 Binary Outputs
227
Object 20 Binary Counters
228
Object 30 Analogue Input
228
Figure 49: Control Input Behaviour
228
Object 40 Analogue Output
229
Object 50 Time Synchronisation
229
Configuration
229
Modbus
230
Physical Connection and Link Layer
230
MODBUS Functions
230
Response Codes
230
Register Mapping
231
Event Extraction
231
Automatic Event Record Extraction
231
Manual Event Record Extraction
232
Record Data
232
Disturbance Record Extraction
233
Manual Extraction Procedure
234
Automatic Extraction Procedure
235
Figure 50: Manual Selection of a Disturbance Record
235
Figure 51: Automatic Selection of Disturbance Record - Method 1
236
Extracting the Disturbance Data
237
Figure 52: Automatic Selection of Disturbance Record - Method 2
237
Figure 53: Configuration File Extraction
238
Figure 54: Data File Extraction
239
Setting Changes
240
Password Protection
240
Protection and Disturbance Recorder Settings
240
Time Synchronisation
241
Power and Energy Measurement Data Formats
242
Iec 61850
243
Benefits of IEC 61850
243
IEC 61850 Interoperability
243
The IEC 61850 Data Model
243
IEC 61850 in Micom Ieds
244
Figure 55: Data Model Layers in IEC61850
244
IEC 61850 Data Model Implementation
245
IEC 61850 Communication Services Implementation
245
IEC 61850 Peer-To-Peer (GSSE) Communications
245
Mapping GOOSE Messages to Virtual Inputs
246
IEC 61850 GOOSE Configuration
246
Ethernet Functionality
246
Ethernet Disconnection
246
Loss of Power
246
IEC 61850 Configurator Settings
246
Read Only Mode
249
IEC 60870-5-103 Protocol
249
Courier Protocol
249
IEC 61850 Protocol
250
Read-Only Settings
250
Read-Only DDB Signals
250
Time Synchronisation
251
Demodulated IRIG-B
252
IRIG-B Implementation
252
Figure 56: GPS Satellite Timing Signal
252
Sntp
253
Time Synchronsiation Using the Communication Protocols
254
Communication Settings
255
Chapter 8 Redundant Ethernet
259
Chapter Overview
261
Board Versions
262
Board Connections
263
Figure 57: Board Connectors
263
Redundancy Protocols
264
Parallel Redundancy Protocol (PRP)
264
PRP Networks
264
Network Elements
264
Figure 58: Example PRP Redundant Network
265
Rapid Spanning Tree Protocol (RSTP)
266
Figure 59: Application of PRP at Substation Level
266
Self-Healing Protocol (SHP)
267
Figure 60: IED Attached to Redundant Ethernet Star or Ring Circuit
267
Figure 61: IED, Bay Computer and Ethernet Switch with Self Healing Ring Facilities
267
Figure 62: Internal Architecture of IED, C264 Bay Computer and H36X Ethernet Switch
268
Dual-Homing Protocol (DHP)
269
Figure 63: Redundant Ethernet Ring Architecture with IED, Bay Computer and Ethernet
269
Figure 64: Redundant Ethernet Ring Architecture with IED, Bay Computer and Ethernet
269
Figure 65: Dual Homing Mechanism
270
Figure 66: Application of Dual Homing Star at Substation Level
271
Generic Functions for Redundant Ethernet Boards
272
Forwarding
272
Priority Tagging
272
Simple Network Management Protocol (SNMP)
272
SNMP MIB Structure for RSTP, DHP and SHP
273
Figure 67: SNMP MIB Tree
273
SNMP MIB Structure for PRP
274
Simple Network Time Protocol (SNTP)
277
Configuring IP Addresses
278
Configuring the IED IP Address
278
Configuring the Board IP Address
278
Figure 68: IED and REB IP Address Configuration
278
Configuring the First Two Octets of the Board IP Address
279
Configuring the Third Octet of the Board IP Address
279
Configuring the Last Octet of the Board IP Address
279
PRP Configurator
282
Connecting the IED to a PC
282
Installing the Configurator
282
Figure 69: Connection Using (A) an Ethernet Switch and (B) a Media Converter
282
Starting the Configurator
283
PRP Device Identification
283
PRP IP Address Configuration
283
SNTP IP Address Configuration
283
Check for Connected Equipment
283
PRP Configuration
284
Filtering Database
284
End of Session
284
RSTP Configurator
285
Connecting the IED to a PC
285
Installing the Configurator
285
Figure 70: Connection Using (A) an Ethernet Switch and (B) a Media Converter
285
Starting the Configurator
286
RSTP Device Identification
286
RSTP IP Address Configuration
286
SNTP IP Address Configuration
286
Check for Connected Equipment
287
RSTP Configuration
287
Bridge Parameters
287
Port Parameters
287
Port States
288
End of Session
288
Switch Manager
289
Installation
289
Setup
290
Network Setup
290
Bandwidth Used
290
Reset Counters
290
Check for Connected Equipment
291
Mirroring Function
291
Ports On/Off
291
Vlan
291
End of Session
292
Chapter 9 Cyber-Security
293
Overview
295
The Need for Cyber-Security
296
Standards
297
NERC Compliance
297
Cip 002
298
Cip 007
299
Ieee 1686-2007
299
Cyber-Security Implementation
301
NERC-Compliant Display
301
Four-Level Access
302
Figure 71: Default Display Navigation
302
Blank Passwords
303
Password Rules
303
Access Level Ddbs
304
Enhanced Password Security
304
Password Strengthening
304
Password Validation
304
Password Blocking
305
Password Recovery
306
Password Encryption
307
Disabling Physical Ports
307
Disabling Logical Ports
307
Security Events Management
308
Logging out
310
Cyber-Security Settings
311
Chapter 10 Settings Application Software
313
Introduction to the Settings Application Software
315
Getting Started
315
Quick System Guide
316
Figure 72: Flowchart Showing How S1 Agile Can be Used to Set up and Save a Protection System Offline or Online
316
Download Data Models
317
Set up a System
317
Connect to an IED Front Port
317
Connect to an IED in a System
317
Send Settings to a Device
317
Extract Settings from a Device
317
Extract a PSL File from a Device
317
Extract a DNP3 File from a Device
318
Extract an Events File from a Device
318
Extract a Disturbance Record from a Device
318
PSL Editor
318
IEC 61850 Configurator
318
DNP3 Configurator
318
Curve Tool
319
S&R Courier
319
Aedr2
319
Winaedr2
319
Wavewin
319
Device (Menu) Text Editor
320
Event Viewer
320
GOOSE Editor
320
PRP Configurator
320
RSTP Configurator
320
Switch Manager
321
Chapter 11 Busbar Commissioning Tool
323
P747 Busbar Commissioning Tool (Remote HMI)
325
Scheme Editor
326
Connections
326
Manual Connections
326
Automatic Connections
326
Remove Connection
327
Scheme Elements
327
Add Elements to a Scheme
327
Remove an Element
327
Group Elements in a Scheme
327
Rotate Elements in a Group
327
Working with Text on the Scheme
327
Add a Label to an Element
328
Remove a Label from an Element
328
Change an Element's Label
328
Add or Remove Free Text
328
Validate a Scheme
328
Protection Data Monitor
329
Connect to the IED
329
Polling Timer
329
Read IED Data
329
Measurements Data
329
Chapter 12 Scheme Logic
331
Chapter Overview
333
Introduction to the Scheme Logic
334
Figure 73: Scheme Logic Interfaces
334
Fixed Scheme Logic
336
Any Start Logic
337
Figure 74: any Start Logic
337
VTS Acceleration Indication Logic
338
CB Fail SEF Protection Logic
338
Figure 75: VTS Acceleration Indication Logic
338
Figure 76: CB Fail SEF Protection Logic
338
CB Fail Non Current Protection Logic
339
Composite Earth Fault Start Logic
340
Any Trip Logic
340
SEF any Start Logic
340
Figure 78: Composite Earth Fault Start Logic
340
Figure 79: any Trip Logic
340
Figure 80: SEF any Start Logic
340
Programmable Scheme Logic
341
Viewing and Printing PSL Diagrams
341
Trip Output Mappings
342
Figure 81: Trip Output Mappings
342
Opto-Input Mappings
343
Figure 82: Opto-Input Mappings
343
Output Relay Mappings
344
Figure 83: Output Relay Mappings
344
LED Mappings
345
Control Input Mappings
345
Function Key Mappings
345
Figure 84: LED Mappings
345
Figure 85: Control Input Mappings
345
Figure 86: Function Key Mappings
345
Circuit Breaker Mapping
346
Fault Record Trigger Mapping
346
Check Synchronisation and Voltage Monitor Mappings
346
Settings
346
Figure 87: Circuit Breaker Mapping
346
Figure 88: Fault Record Trigger Mapping
346
Figure 89: Check Synchronisation and Voltage Monitor Mappings
346
Chapter 13 Installation
349
Chapter Overview
351
Handling the Goods
352
Receipt of the Goods
352
Unpacking the Goods
352
Storing the Goods
352
Dismantling the Goods
352
Mounting the Device
353
Flush Panel Mounting
353
Figure 90: Location of Battery Isolation Strip
353
Rack Mounting
354
Figure 91: Rack Mounting of Products
355
Cables and Connectors
356
Terminal Blocks
356
Figure 92: Terminal Block Types
356
Power Supply Connections
357
Earth Connnection
357
Current Transformers
357
Voltage Transformer Connections
358
Watchdog Connections
358
EIA(RS)485 and K-Bus Connections
358
IRIG-B Connection
358
Opto-Input Connections
358
Output Relay Connections
358
Ethernet Metallic Connections
359
Ethernet Fibre Connections
359
RS232 Connection
359
Download/Monitor Port
359
GPS Fibre Connection
359
Fibre Communication Connections
359
Case Dimensions
360
Case Dimensions 80TE
360
Figure 93: 80TE Case Dimensions
360
Chapter 14 Commissioning Instructions
361
Chapter Overview
363
General Guidelines
364
Commissioning Test Menu
365
Opto I/P Status Cell (Opto-Input Status)
365
Relay O/P Status Cell (Relay Output Status)
365
Test Mode Cell
365
Test Pattern Cell
366
Contact Test Cell
366
Test Leds Cell
366
Red and Green LED Status Cells
366
PSL Verificiation
366
Test Port Status Cell
366
Monitor Bit 1 to 8 Cells
366
Using a Monitor Port Test Box
367
Commissioning Equipment
368
Minimum Equipment Required
368
Optional Equipment Required
368
Product Checks
369
Product Checks with the IED De-Energised
369
Visual Inspection
370
Current Transformer Shorting Contacts
370
Insulation
370
External Wiring
371
Watchdog Contacts
371
Power Supply
371
Product Checks with the IED Energised
371
Watchdog Contacts
372
Test LCD
372
Date and Time
372
Test Leds
373
Test Alarm and Out-Of-Service Leds
373
Test Trip LED
373
Test User-Programmable Leds
373
Test Opto-Inputs
373
Test Output Relays
374
Test Serial Communication Port RP1
374
Figure 94: RP1 Physical Connection
375
Figure 95: Remote Communication Using K-Bus
375
Test Serial Communication Port RP2
376
Test Ethernet Communication
376
Test Current Inputs
376
Test Voltage Inputs
377
Setting Checks
378
Apply Application-Specific Settings
378
Transferring Settings from a Settings File
378
Entering Settings Using the HMI
378
Busbar Protection Checks
380
Busbar Differential Protection Checks
380
Connecting the Test Circuit
380
Performing the Test
380
Check the Operating Time
381
Onload Checks
382
Confirm Current Connections
382
Confirm Voltage Connections
382
On-Load Busbar Differential Test
383
Final Checks
384
Commissioning Test Settings
385
Chapter 15 Maintenance and Troubleshooting
387
Chapter Overview
389
Maintenance
390
Maintenance Checks
390
Alarms
390
Opto-Isolators
390
Output Relays
390
Measurement Accuracy
390
Replacing the Device
391
Repairing the Device
392
Figure 96: Possible Terminal Block Types
392
Removing the Front Panel
393
Replacing Pcbs
393
Replacing the Main Processor Board
394
Replacement of Communications Boards
394
Figure 97: Front Panel Assembly
394
Replacement of the Input Module
395
Replacement of the Power Supply Board
396
Replacement of the I/O Boards
396
Recalibration
396
Changing the Battery
397
Post Modification Tests
397
Battery Disposal
397
Cleaning
397
Troubleshooting
398
Self-Diagnostic Software
398
Power-Up Errors
398
Error Message or Code on Power-Up
398
Out of Service LED on at Power-Up
399
Error Code During Operation
400
Backup Battery
400
Mal-Operation During Testing
400
Failure of Output Contacts
400
Failure of Opto-Inputs
400
Incorrect Analogue Signals
401
PSL Editor Troubleshooting
401
Diagram Reconstruction
401
PSL Version Check
401
Repair and Modification Procedure
402
Chapter 16 Technical Specifications
403
Chapter Overview
405
Interfaces
406
Front Serial Port
406
Download/Monitor Port
406
Rear Serial Port
406
Fibre Rear Serial Port
406
Redundant Ethernet Ports
407
IRIG-B (Demodulated)
407
IRIG-B (Modulated)
407
Rear Serial Port 2
407
Rear Ethernet Port Copper
408
Rear Ethernet Port Fibre
408
100 Base Fx Receiver Characteristics
408
100 Base Fx Transmitter Characteristics
409
Busbar Protection Functions
410
Busbar Circuitry Fault Protection
410
Busbar Dead Zone Protection
410
Three-Phase Overcurrent Protection
410
Earth Fault Protection
411
Transient Overreach and Overshoot
411
Performance of Monitoring and Control Functions
412
Voltage Transformer Supervision
412
PSL Timers
412
Measurements and Recording
413
General
413
Disturbance Records
413
Event, Fault and Maintenance Records
413
Fault Locator
413
Standards Compliance
414
EMC Compliance: 2004/108/EC
414
Product Safety: 2006/95/EC
414
R&TTE Compliance
414
UL/CUL Compliance
414
Mechanical Specifications
415
Physical Parameters
415
Enclosure Protection
415
Mechanical Robustness
415
Transit Packaging Performance
415
Ratings
416
AC Measuring Inputs
416
Current Transformer Inputs
416
Voltage Transformer Inputs
416
Auxiliary Supply Voltage
416
Nominal Burden
417
Power Supply Interruption
417
Standard Output Contacts
418
Watchdog Contacts
418
Isolated Digital Inputs
419
Nominal Pickup and Reset Thresholds
419
Environmental Conditions
420
Ambient Temperature Range
420
Ambient Humidity Range
420
Corrosive Environments
420
Type Tests
421
Insulation
421
Creepage Distances and Clearances
421
High Voltage (Dielectric) Withstand
421
Impulse Voltage Withstand Test
421
Electromagnetic Compatibility
422
Mhz Burst High Frequency Disturbance Test
422
Damped Oscillatory Test
422
Immunity to Electrostatic Discharge
422
Electrical Fast Transient or Burst Requirements
422
Surge Withstand Capability
422
Surge Immunity Test
423
Immunity to Radiated Electromagnetic Energy
423
Radiated Immunity from Digital Communications
423
Radiated Immunity from Digital Radio Telephones
423
Immunity to Conducted Disturbances Induced by Radio Frequency Fields
423
Magnetic Field Immunity
424
Conducted Emissions
424
Radiated Emissions
424
Power Frequency
424
Appendix A Symbols and Glossary
425
Chapter Overview
427
Acronyms and Abbreviations
428
Units for Digital Communications
434
American Vs British English Terminology
435
Logic Symbols and Terms
436
Logic Timers
440
Logic Gates
442
Figure 98: Logic Gates
442
Appendix B Commissioning Record
443
Test Record
445
Engineer Details
445
Front Plate Information
445
Test Equipment
445
Tests with Product De-Energised
445
Tests with Product Energised
446
Communication Tests
446
Current Input Tests
446
Voltage Input Tests
447
Overcurrent Checks
447
On-Load Checks
447
Final Checks
447
Appendix C Wiring Diagrams
449
Appendix Overview
451
P747: Busbar Protection
452
Figure 99: P747 Busbar Protection, 3 Box Solution
452
P747: I/O Option a
453
Figure 100: P747 Busbar Protection with 40 Inputs, 24 Outputs and Coprocessor
453
P747: I/O Option B
454
Figure 101: P747 Busbar Protection with 32 Inputs, 32 Outputs and Coprocessor
454
P747: I/O Option C
455
Figure 102: P747 Busbar Protection with 32 Inputs, 24 Outputs and Standard Coprocessor
455
Advertisement
Advertisement
Related Products
GE P442
GE P444
GE P741
GE P742
GE P743
GE LOGIQ P7
GE P7CESAS6RBB
GE Profile P7CEBBS6RBB
GE Profile P7CEBAS6RBB
GE PGS908BEMBB
GE Categories
Refrigerator
Ranges
Microwave Oven
Air Conditioner
Dishwasher
More GE Manuals
Login
Sign In
OR
Sign in with Facebook
Sign in with Google
Upload manual
Upload from disk
Upload from URL