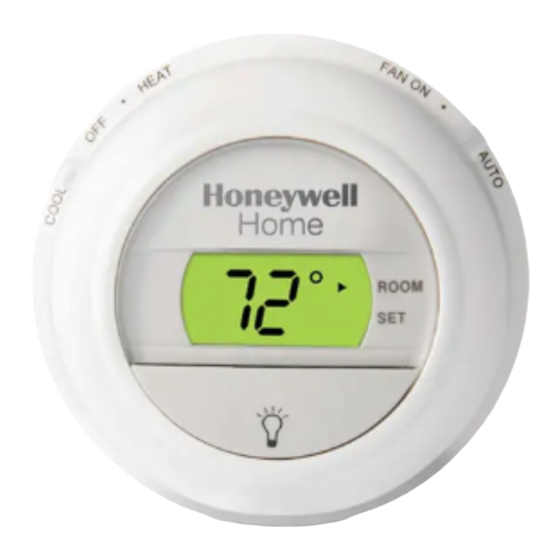
Honeywell T8775A Installation Instructions Manual
The digital round non-programmable thermostats
Hide thumbs
Also See for T8775A:
- Owner's manual (16 pages) ,
- Installation instructions manual (13 pages) ,
- Installation manual (13 pages)
Table of Contents
Advertisement
Available languages
Available languages
Quick Links
The T8775A,C Thermostats provide single-stage
temperature control for 24V systems. The
T8775A,C models include a thermostat, wallplate
(for wiring and mounting thermostat), mounting
screws, wall anchors, and a 4074 FAB resistor.
MERCURY NOTICE
If this control is replacing a control that
contains mercury in a sealed tube, do not
place your old control in the trash.
Contact your local waste management
authority for instructions regarding
recycling and the proper disposal of an old
control containing mercury in a sealed
tube.
INSTALLATION
When Installing this Product...
1. Read these instructions carefully. Failure to
follow them could damage the product or
cause a hazardous condition.
2. Check the ratings given in the instructions
and on the product to make sure the product
is suitable for your application.
3. Installer must be a trained, experienced ser-
vice technician.
4. After installation is complete, check out prod-
uct operation as provided in these instruc-
tions.
CAUTION
Electrical Shock or Equipment Damage
Hazard.
Can shock individuals or short
equipment circuitry.
Disconnect power supply before
installation.
® U.S. Registered Trademark
Copyright © 2003 Honeywell International Inc.
All Rights Reserved
Non-Programmable Thermostats
The Digital Round
INSTALLATION INSTRUCTIONS
Location
Install the thermostat about 5 ft (1.5m) above the
floor in an area with good air circulation at average
temperature. Do not install the thermostat where it
can be affected by:
— drafts or dead spots behind doors and in
corners.
— hot or cold air from ducts.
— radiant heat from the sun or appliances.
— concealed pipes and chimneys.
— unheated (uncooled) areas such as an outside
wall behind the thermostat.
Mounting Wallplate to Wall
Mount the T8775A,C wallplate, with the screws
provided. See Fig. 1.
WALL ANCHORS (2)
WALL PLATE
1 INCH SCREW (2)
1 WHEN USING WALL ANCHORS, DRILL 3/16 IN. HOLES
FOR DRYWALL, 7/32 IN. HOLES FOR PLASTER.
Fig. 1. Mounting wallplate to wall.
T8775A,C
1
WIRING HOLE
M19499
69-1677ES
™
Advertisement
Table of Contents

Summary of Contents for Honeywell T8775A
- Page 1 Contact your local waste management Mounting Wallplate to Wall authority for instructions regarding recycling and the proper disposal of an old Mount the T8775A,C wallplate, with the screws control containing mercury in a sealed provided. See Fig. 1. tube. INSTALLATION WALL ANCHORS (2) When Installing this Product…...
-
Page 2: Wiring
VALVE COIL POWER SUPPLY. PROVIDE DISCONNECT MEANS AND OVERLOAD PROTECTION AS REQUIRED. M19513 COMPRESSOR CONTACTOR Fig. 2. Typical hookup of T8775A in a heat-only system. HEATING RELAY OR RELAY VALVE COIL 1 POWER SUPPLY. PROVIDE DISCONNECT MEANS AND OVERLOAD PROTECTION AS REQUIRED. -
Page 3: Customize Thermostat
T8775A,C THE DIGITAL ROUND™ NON-PROGRAMMABLE THERMOSTATS CUSTOMIZE THERMOSTAT Table 1. Heat Cycle Rate. Cycles Switch Switch Setting Fuel Switch (T8775C only) Heating System Hour Steam, Gravity The fuel switch is preset at the factory in the F position. See Fig. 7. This is the correct setting for gas High Efficiency Warm Air or oil systems. -
Page 4: Checkout
T8775A,C THE DIGITAL ROUND™ NON-PROGRAMMABLE THERMOSTATS (T8775C ONLY) SELECTS (T8775C ONLY) ON/AUTO SELECTS COOL/OFF/HEAT ROOM SHOWS THAT THE CURRENT ROOM TEMPERATURE IS DISPLAYED. SHOWS THAT THE CURRENT TEMPERATURE SETPOINT IS DISPLAYED. DISPLAYS ROOM OR SET TEMPERATURE DISPLAYS AND ADJUSTS TEMPERATURE SETPOINT/TURNS... -
Page 5: Mercury Notice
™ T8775A, C INSTRUCCIONES DE INSTALACIÓN INSTALACIÓN Los termostatos T8775A, C ofrecen control de temperatura de una etapa para sistemas de 24 V. Los modelos T8775A, C incluyen un termostato, una placa de fijación (para cablear y montar el Al instalar este producto... -
Page 6: Cómo Montar La Placa De Fijación Al Muro
Cómo montar la placa de fijación al muro Monte la placa de fijación del T8775A, C con los tornillos incluidos. Vea la Figura 1. RELEVADOR DE CALEFACCIÓN ANCLAS DE PARED (2) O BOBINA DE VÁLVULA... - Page 7 TERMOSTATOS DIGITALES THE DIGITAL ROUND™ T8775A, C NO PROGRAMABLES VÁLVULA DE CONTACTOR DEL CONMUTACIÓN RELEVADOR RELEVADOR DE COMPRESOR CONTACTOR DEL DE CALOR CALEFACCIÓN COMPRESOR O BOBINA VENTILADOR DE VÁLVULA RELEVADOR VÁLVULA DE CONMUTACIÓN VENTILADOR DE FRÍO 1 FUENTE DE ALIMENTACIÓN. INCLUYA MEDIOS DE DESCONEXIÓN Y PROTECCIÓN CONTRA...
-
Page 8: Configure El Termostatoa Su Gusto
TERMOSTATOS DIGITALES THE DIGITAL ROUND™ T8775A, C NO PROGRAMABLES CONFIGURE EL TERMOSTATO Ajuste la razón del ciclo de calor A SU GUSTO Utilice los interruptores DIP 1 y 2 para ajustar la razón del ciclo de calor. Vea la Tabla 1. -
Page 9: Operación
TERMOSTATOS DIGITALES THE DIGITAL ROUND™ T8775A, C NO PROGRAMABLES OPERACIÓN Cómo ajustar los interruptores del SISTEMA y del VENTILADOR (sólo T8775C) Los ajustes del sistema y del ventilador se controlan manualmente utilizando los interruptores situados en la parte superior del termostato. Vea la Figura 10. - Page 10 TERMOSTATOS DIGITALES THE DIGITAL ROUND™ T8775A, C NO PROGRAMABLES Enfriamiento (sólo T8775C) Deslice el interruptor SYSTEM a la posición de enfriamiento y el interruptor FAN a la posición Auto. Baje el punto de referencia de temperatura CAUTION varios grados por debajo de la temperatura ambiente.
- Page 11 69-1677ES...
- Page 12 Soluciones de automatización y control Honeywell International Inc. Honeywell Limited-Honeywell Limitée 1985 Douglas Drive North 35 Dynamic Drive Golden Valley, MN 55422 Scarborough, Ontario M1V 4Z9 69-1677ES J.S. 6-03 Impreso en Hungría www.honeywell.com/yourhome...


