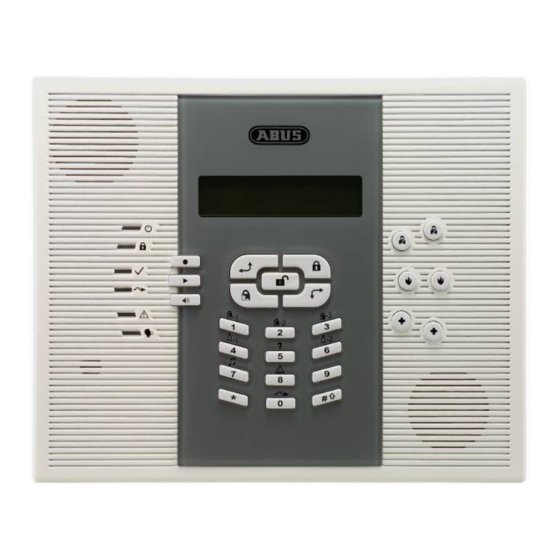
Abus WIRELESS ALARM SYSTEM User Manual
Hide thumbs
Also See for WIRELESS ALARM SYSTEM:
- Installation instructions manual (101 pages) ,
- Operating instructions manual (56 pages)
Table of Contents
Advertisement
Quick Links
ABUS WIRELESS ALARM SYSTEM
These installation instructions are published by Security-Center GmbH & Co. KG, Linker Kreuthweg 5, D-86444
Affing/Mühlhausen.
All rights including translation reserved. Reproductions of all kinds – e.g. photocopy, microfilm, or storage in computer
systems – require the express written permission of the publisher.
Reprinting prohibited, even in part.
These installation instructions correspond to the state of the art at the time of printing. We reserve the right to make
changes to technology and equipment. Liability for printing errors and technical changes excluded.
© Copyright 2007 by Security-Center GmbH & Co. KG / Printed in Israel.
Advertisement
Table of Contents

Summary of Contents for Abus WIRELESS ALARM SYSTEM
- Page 1 ABUS WIRELESS ALARM SYSTEM These installation instructions are published by Security-Center GmbH & Co. KG, Linker Kreuthweg 5, D-86444 Affing/Mühlhausen. All rights including translation reserved. Reproductions of all kinds – e.g. photocopy, microfilm, or storage in computer systems – require the express written permission of the publisher.
- Page 2 ABUS WIRELESS ALARM SYSTEM These installation instructions are an important product accessory.They contain important installation and operation information.Bear this in mind if you pass the product on to others. Store these installation instructions in a safe place for future reference.
-
Page 3: Table Of Contents
Chapter 1 Contents Chapter 1 Contents ....................................1-3 Chapter 2 Software installation ................................2-4 Chapter 3 Overview of the software menu options ..........................3-5 3.1 The Upload/Download window ..............................3-5 Chapter 4 Creating a new client................................4-6 Chapter 5 Connecting to the client................................. 5-6 Chapter 6 Panel status .................................. -
Page 4: Chapter 2 Software Installation
Chapter 2 Software installation Follow these instructions to install the ABUS Up/Download software on your PC. Insert the CD-ROM supplied in your CD/DVD drive and open the ABUS folder. Double-click the UploadDownload icon. You receive a security warning. Confirm with Run. -
Page 5: Chapter 3 Overview Of The Software Menu Options
Chapter 3 Overview of the software menu options After starting the program, you are asked to enter your password. The factory default of this password is abus. Enter this password and press OK. The factory default of this password is: abus The software starts. -
Page 6: Chapter 4 Creating A New Client
Chapter 4 Creating a new client To make changes to your ABUS wireless alarm system, you first have to create a new client. Select the Clients dropdown menu. You can now change the information on the Client information page. Enter a serial number under Client Number. -
Page 7: Chapter 6 Panel Status
Select Dial to panel to establish a remote connection. Chapter 6 Panel status Select End-user -> Status -> Status Display to obtain the following overview of your wireless alarm system. Under Trouble, you see an overview of all possible faults. -
Page 8: Chapter 7 Installer Menu
Chapter 7 Installer menu To program your wireless alarm system, use the Installer dropdown menu. In this menu, you can set the following: Select System to program system macros and the PIN code. Select Communication to make settings for alarm calls. -
Page 9: Devices
Devices Under Devices, you make the settings for the wireless sounders. Select Installer -> Devices -> Sounder. Select the siren Select whether the Select how long Select the Select the Select whether type: siren emits an alarm the external siren strobe duration of the siren emits... -
Page 10: Utility Outputs
Utility outputs Under Utility outputs, you make the settings for the switched outputs. Select Installer -> Utility outputs. Enter the Select the If an output was If you select the Select the group Select Assign utility output configuration selected as Zone group, you can event: the event... -
Page 11: Follow Me
Follow Me Under Follow Me, you make the settings for the events that cause an alarm to be transmitted by telephone. You also define the remote access phone code that has to be entered if you want to access the system from outside by telephone. Select Installer -> Follow me. -
Page 12: Chapter 8 End-User Menu
Chapter 8 End-user menu To program your wireless alarm system, use the End-user dropdown menu. In this menu, you can set the following: Select Status to display the status of the system. Select Scheduling to program a schedule for the automatic arming/disarming of the system. -
Page 13: User Settings
User settings Under User settings, you program the user PINs, the Follow Me numbers and the types of messages to be transmitted. In the dropdown menu, select User PIN. Enter the user’s first and last name and a four-digit user PIN. You cannot make any changes to the authority level and the partition authority. -
Page 14: User Operations
User operations Under User operations, you can perform system functions such as arming and disarming partitions, controlling utility outputs, etc. You can also test partitions. Select functions and confirm the dialog. Chapter 9 Comm Under Comm, you can upload screen data or all data, and send screen data or all data to the client. You also use this dropdown menu for calling the system via a modem (remote) connection.


