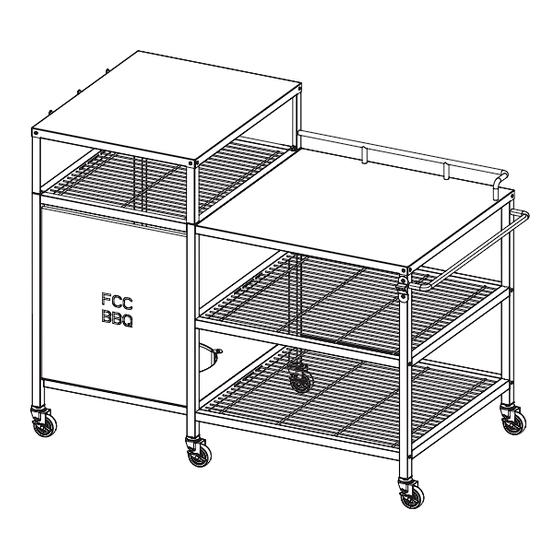
Summary of Contents for FCC BBQ PIZZA STATION
- Page 1 P I ZZA STATION FCC-A-10134 A S S E M B L Y & I N S T R U C T I O N IMPORTANT, KEEP THE MANUAL FOR FUTURE REFERENCE: READ CAREFULLY.
- Page 2 It´s fantastic flavors, it´s tough, it´s cool and it’s love for the most amazing cooking method in the world! 2024 will be the seventh year for FCC BBQ, and we´re very proud and humble for the success and what we as a company have achieved.
- Page 3 FCC-A-10134 p i z z a s ta s j o n...
-
Page 4: Exploded Drawing
E X P L O D E D D R A W I N G A M5... -
Page 5: Parts List
P A R T S L I S T Code Description Wire shelf Right side panel Senter panel Table top Left leg Wire shelf Bottom plate with hole for gas cylinder Textile front wall Wheels with brake Leg to table top Leg to top shelve with hole Table top Gas bottle support... - Page 6 A S S E M B L Y MONTERIN 8stk 8stk 6stk Mount part 1 wire shelf to part 2 right side panel and part 3 center panel with 8 pcs A screws. MONTERING 8stk 6stk MONTERING 6stk 3stk 2stk 3stk Admission 2 pcs screw B to center legs.
- Page 7 A S S E M B L Y 3stk 2stk 3stk 2stk Install wire shelf part 6 and bottom plate part 7 to part 5 left side rail with 3 pcs screw B and 2 pcs screw A. 3stk 2stk on the front wall in textile part 8.
- Page 8 MONTERING MONTERING A S S E M B L Y 3stk 3stk 2stk 2stk Assemble the parts together with 3 pieces B screws and 2 pcs A screws. 3stk 2stk 8stk 8stk 8stk Screw on Part 9 wheels with brake.
- Page 9 RING A S S E M B L Y 3stk 2stk 8stk 8stk 8stk Mount 3 pieces of part 10 legs to the top plate. Mount part 11 legs with holes to the top plate on the right side at the back with a total of 8 pcs screws B.
- Page 10 MONTERIN A S S E M B L Y 4stk 4stk 4stk Install 3 suspension hooks, part 15. Then mount holder to gas cylinder with part 13 and 14 with 4pcs C screws. MONTERING 13 14 MONTERING 13 14 4stk 4stk 2stk 2stk...
- Page 11 4stk 13 14 MONTERING A S S E M B L Y 2stk 2stk 2stk 4stk Install part 17 handles with 2 pcs A screws. 2stk 2stk Install part 18 bottle opener with 2pcs C screws. p i z z a s ta s j o n...
- Page 12 FOR COMMERCIAL USE IN RESTAURANTS OR SIMILAR VENUES • Covers must not be applied before the pizza station is completely cool and dry. Moisture on the inside of covers may cause large formations of surface rust and damage to those parts that are in coated steel and stainless steel.
-
Page 13: Maintenance
M A I N T E N A N C E MAINTENANCE • If the pizza station is located in coastal areas, we recommend that you treat the pizza station more often. • Wipe off food residues, grease and other things after use. If this is left behind, it can lead to rust formation. - Page 14 N O T E S...
- Page 15 N O T E S p i z z a s ta s j o n...
-
Page 16: Warranty Claim
WARRANTY CLAIM This product is covered by a warranty in accordance with consumer legislation. It has undergone strict quality controls and testing at the factory. If there are any parts missing or the product has been damaged, please contact your dealer or the consumer contact below for help. In the event of damage to the product, we ask for pictures of the damage and damage to the product’s packaging is attached to the complaint.
