Table of Contents
Advertisement
Representative models:
READ AND SAVE THESE INSTRUCTIONS
Thank you for purchasing this Panasonic product.
Please read these instructions carefully before attempting to install, operate or service
the Panasonic product. Please carefully read the "GENERAL SAFETY INFORMATION"
Failure to comply with instructions could result in personal injury or property damage.
Please explain to users how to operate and maintain the product after installation,
and this booklet should be presented to users.
Please retain this booklet for future reference.
INSTALLATION INSTRUCTIONS
Contents
FV-0511VQ1
FV-1115VQ1
FV-0511VQC1
Ventilating Fan
Model No.
----------------------------------------4
-----------------------------------------4
--------------------------4
-----------------------------------------5
-----------------------------------6
---------------------------------------------7
-----------------------BACK COVER
--------------------BACK COVER
--------------2~3
----------6
------------------7
--------8~9
-----------------------10
------------------10~11
-----------------11
1 5 V Q 1 0 4 2 0 B
Advertisement
Table of Contents

Summary of Contents for Panasonic FV-0511VQ1
-
Page 1: Table Of Contents
Thank you for purchasing this Panasonic product. Please read these instructions carefully before attempting to install, operate or service the Panasonic product. Please carefully read the “GENERAL SAFETY INFORMATION” Failure to comply with instructions could result in personal injury or property damage. -
Page 2: General Safety Information
GENERAL SAFETY INFORMATION For Your Safety To reduce the risk of injury, loss of life, electric shock, fire, malfunction, and damage to equipment or property, always observe the following safety precautions. Explanation of symbol word panels The following symbol word panels are used to classify and describe the level of hazard, injury, and property damage caused when the denotation is disregarded and improper use is performed. - Page 3 GENERAL SAFETY INFORMATION CONTINUED WARNING These models are UL listed for tub and shower enclosures. Canada only: Not to be installed in a ceiling thermally insulated to a value greater than R40. Do not disassemble the unit for reconstruction. It may cause fire or electric shock. A statement to the effect that when the product is to no longer be used, it must not be left in place but remove, to prevent it from possibly failing.
-
Page 4: Description
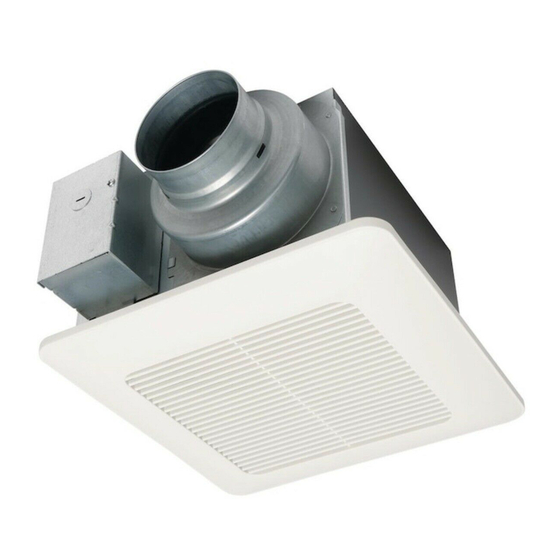
The blower uses a high-capacity sirocco fan developed to reduce the noise level. (FV-0511VQC1 only) This Panasonic ventilating fan model is equipped with a motion sensor and a humidity sensor that turn on automatically when motion is detected, when humidity increases rapidly, or when humidity rises above a 30% ~ 80% relative humidity set-point. -
Page 5: Dimensions
DIMENSIONS FV-0511VQ1 , FV-1115VQ1 Unit: inches (mm) 1 1/2 (37) 7/8 (23.5) 4 1/2 (114) 6 5/8 (169) FV-1115VQ1 7 1/2 (190) FV-1115VQ1 13 (330) Part name Part name Blade Pick-A-Flow switch Grille Fan body Junction box Damper Adaptor Flex-Z Fast... -
Page 6: Wiring Diagram
WIRING DIAGRAM FV-0511VQ1 , FV-1115VQ1 Fan body Junction box White Neutral Main control circuit AC120V 60Hz Live Black (Power supply) Main control Motor circuit Green (Ground wire) FV-0511VQC1 Fan body Junction box Neutral White AC120V Main control circuit 60Hz Live... -
Page 7: Operation (Fv-0511Vqc1 Only)
The Pick-A-Flow switch on the face of all WhisperCeiling ventilating fans allow the option to choose 50 – 80 – 110 CFM for the FV-0511VQ1 or 110 – 130 – 150 CFM for the FV-1115VQ1. These fans can run with constant air volume depending upon the needs of the owner. -
Page 8: Installation (New Construction)
INSTALLATION (NEW CONSTRUCTION) The fan position between joists from 16" to 24" Adaptor on center can be adjusted flexibly. Machine screw (M4X8) CAUTION Please wear gloves during the installation work as follow. 1. Disconnect plug connector from receptacle (Fig.6) Fan body and remove adaptor from fan body by removing the Fig.1 machine screw (M4X8) before installation. - Page 9 INSTALLATION (NEW CONSTRUCTION) CONTINUED 8. Insert fan body and slide into adapter assy with some strength, until the flange overlaps Joist the Flex-Z Fast bracket. Secure the fan body to Flex-Z Fast bracket by using 2 self-drilling screws, plug connector to receptacle and secure the fan body to adaptor by using machine screw (M4X8).
-
Page 10: Installation (Retrofit)
INSTALLATION (RETROFIT) WARNING Unit: inches (mm) Conduit Circular duct Joist Disconnect power source before working on unit. 4Tapping 1. Remove the existing fan and cut ceiling opening. ( ST4.2x20) screws Secure the Flex-Z Fast bracket to joists by drilling 4 tapping screws (ST4.2x20) which Ceiling (already existed) have been fixed on it. -
Page 11: Practical Guide To Installation
MAINTENANCE (CLEANING) CONTINUED 1. Remove grille by pulling down one mounting Mounting spring spring (Fig.13), then pull down the other. (Pull down the mounting spring that without lead wire passed side, and remove motion sensor as Grille shown in Fig.14) (Squeeze mounting spring and Slot pull down carefully) Gloves... -
Page 12: Specifications
Warning Concerning Removal of Covers. The unit should be serviced by qualified technicians only. Your product is designed and manufactured to ensure a minimum of maintenance. Should your unit require service or parts, call Panasonic Call Center at 1-866-292-7299 (USA) or 1-800-669-5165 (Canada). Panasonic Corporation of North America Panasonic Canada Inc.


