Table of Contents
Advertisement
Remote
Commander
Operating Instructions
Owner's Record
The model and serial numbers are located on the rear panel. Record the serial number
in the space provided below. Refer to them whenever you call upon your Sony dealer
regarding this product.
Model No.
RM-PP505
© 2001 Sony Corporation
4-236-327-11(2)
Serial No.
Advertisement
Table of Contents

Summary of Contents for Sony RM-PP505
-
Page 1: Operating Instructions
Operating Instructions Owner’s Record The model and serial numbers are located on the rear panel. Record the serial number in the space provided below. Refer to them whenever you call upon your Sony dealer regarding this product. Model No. RM-PP505 ©... -
Page 2: About This Manual
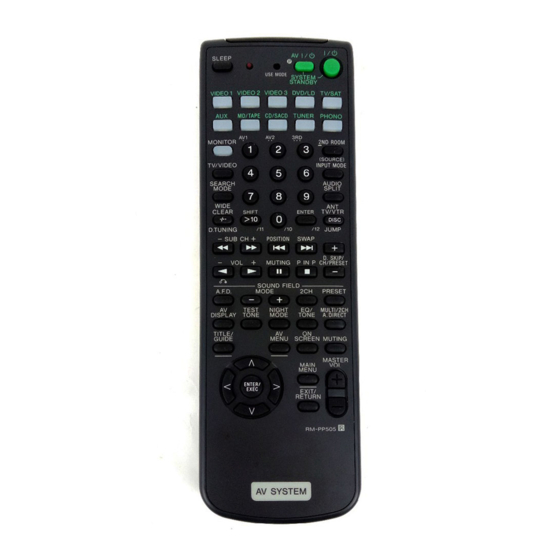
If you have any question or problem concerning your remote, please consult your nearest Sony dealer. About this manual The instructions in this manual are for model RM-PP505. Check your model number by looking at the lower right corner of the front side. -
Page 3: Table Of Contents
Before you use your remote Check that you received the following item with the remote: R6 (size-AA) batteries (2) Inserting batteries into the remote Insert two R6 (size-AA) batteries with the + and – properly oriented in the battery compartment. When using the remote, point it at the remote sensor on the receiver. -
Page 4: Location Of Parts And Basic Remote Operations
Location of Parts and Basic Remote Operations This chapter provides information on the location of buttons and how to use them to perform basic operations. However, some functions explained in this section may not work depending on the model of the receiver. For the functions of the receiver you purchased, refer to the Operating Instructions supplied with the receiver. - Page 5 2 Remote mode buttons Press to select the mode of the remote (page 13). 3 INPUT MODE button Press to select the input mode. 4 AUDIO SPLIT button Press to assign the audio input for each function. 5 SOUND FIELD buttons A.F.D.
- Page 6 If you press the ?/1 switch at the same time, it will turn off the main component and other Sony audio/video components (SYSTEM STANDBY). Note The function of the AV ?/1 switch changes automatically each time you press the function buttons (1).
- Page 7 wa Cursor buttons (U/u/I/i), ENTER/ EXEC button After pressing the MAIN MENU, AV MENU, or TITLE/GUIDE button, use the cursor buttons to make specific settings, then press the ENTER/EXEC button to enter the selection. ws TITLE/GUIDE button* Press to display DVD titles or guide menus. wd AV DISPLAY button Press to select the information displayed on the TV screen.
- Page 8 (1). The above explanation is intended to serve as an example only. Therefore, depending on the component, the above operation may not be possible or may operate differently than described. **Only with Sony TVs with the picture-in-picture function.
-
Page 9: Table Of Buttons That You Can Use To Control Each Component
Table of buttons that you can use to control each component Component CD player deck Button(s) AV ?/1 Numeric buttons SHIFT >10 VOL – O (Return) VOL + MUTING ./> SUB CH +/– D.SKIP CH/PRESET +/– ANT TV/VTR DISC CLEAR -/-- D.TUNING AV MENU TITLE/GUIDE... -
Page 10: Advanced Remote Operations
Furthermore, you can also program the remote for Sony components that the remote is unable to control. Note that the remote can only control components that accept infrared wireless control signals. - Page 11 Use the numeric codes in the tables below to control non-Sony conponents and also Sony components that the remote is normally unable to control. Since the remote signal that a component accepts differs depending on the...
- Page 12 Programming the remote (continued) To control a VCR Maker Code(s) SONY 701, 702, 703, 704, 705, 706 AIWA 710, 750, 757, 758 AKAI 707, 708, 709, 759 BLAUPUNKT EMERSON 711, 712, 713, 714, 715, 716, 750 FISHER 717, 718, 719, 720...
-
Page 13: Selecting The Mode Of The Remote
Selecting the mode of the remote Set the remote mode using the USE MODE button (wl) and the remote mode buttons (2). Selecting the command mode You can switch the command mode (AV1 or AV2) of the remote. If the command mode of the receiver and the remote is different, you cannot use the remote to operate the receiver. -
Page 14: Additional Information
Should any problem persist, consult your nearest Sony dealer. The remote does not function. • Check the mode of the remote (page 13). • Point the remote at the remote sensor receiver. - Page 16 Sony Corporation Printed in Malaysia...


