Sign In
Upload
Manuals
Brands
Motorola Manuals
Two-Way Radio
APX 3
Motorola APX 3 Manuals
Manuals and User Guides for Motorola APX 3. We have
3
Motorola APX 3 manuals available for free PDF download: User Manual, Quick Reference Manual
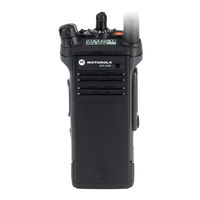
Motorola APX 3 User Manual (200 pages)
Brand:
Motorola
| Category:
Two-Way Radio
| Size: 5.2 MB
Table of Contents
Display Status Icons
4
Sending a Silent Emergency Call
4
Table of Contents
5
Declaration of Conformity
12
Important Safety Information
14
Software Version
15
Notice to Users (FCC and Industry Canada)
15
Consignes de Sécurité Importantes
16
Version Logicielle
17
Avis Aux Utilisateurs (FCC Et Industrie Canada)
17
Computer Software Copyrights
18
Documentation Copyrights
19
Disclaimer
20
Getting Started
21
How to Use this Guide
21
Notations Used in this Manual
21
Additional Performance Enhancement
21
ASTRO 25 Enhanced Data
21
Dynamic System Resilience (DSR)
22
Crosstalk Prevention
22
Encrypted Integrated Data (EID)
22
Securenet
22
Conventional Talkgroup and Radio Scan Enhancements
22
What Your Dealer/System Administrator Can Tell You
23
Preparing Your Radio for Use
24
Charging the Battery
24
Attaching the Battery
24
Attaching the Antenna
25
Removing and Attaching the Accessory Connector Cover
26
Using the Carry Holder
27
Turning on the Radio
29
Adjusting the Volume
30
Identifying Radio Controls
31
Radio Parts and Controls
31
Programmable Features
32
Assignable Radio Functions
33
Assignable Settings or Utility Functions
36
Accessing the Preprogrammed Functions
37
Menu Select Buttons
37
Home Button
38
4-Way Navigation Button
38
Data Feature Button
38
Keypad
38
Keypad Characters - Uppercase Mode
39
Keypad Characters - Lowercase Mode
40
Keypad Characters - Numeric Mode
41
Keypad Characters - Hexadecimal Mode
42
Push-To-Talk (PTT) Button
43
Identifying Status Indicators
44
Status Icons
44
Text Messaging Service (TMS) Indicators
48
TMS Status Icons
49
TMS Menu Options
50
Call Type Icons
50
LED Indicator
51
Intelligent Lighting Indicators
52
Alert Tones
53
Phone Call Displays and Alerts
57
General Radio Operation
59
Selecting a Zone
59
Selecting a Radio Channel
60
Selecting a Channel Via Channel Search Button
60
Mode Select Feature
61
Saving a Zone and a Channel to a Softkey
61
Saving a Zone and a Channel to a Button
62
Receiving and Responding to a Radio Call
62
Receiving and Responding to a Talkgroup Call
62
Receiving and Responding to a Private Call (Trunking Only)
63
Receiving and Responding to a Telephone Call (Trunking Only)
64
Making a Radio Call
64
Making a Talkgroup Call
64
Making a Private Call (Trunking Only)
65
Making an Enhanced Private Call (Trunking Only)
66
Making a Telephone Call (Trunking Only)
67
Switching between Repeater or Direct Operation Button
68
Monitor Feature
68
Monitoring a Channel
68
Monitoring Conventional Mode
69
Advanced Features
70
Advanced Call Features
70
Selective Call (ASTRO Conventional Only)
70
Talkgroup Call Feature (Conventional Operation Only)
71
Sending a Status Call
72
Responding to the Dynamic Regrouping Feature (Trunking Only)
72
Dynamic Zone Programming (DZP)
74
Contacts
76
Making a Private Call from Contacts
77
Adding a New Contact Entry
78
Deleting a Contact Entry
79
Adding a Contact to a Call List
79
Removing a Contact from a Call List
80
Methods of Contact Editing in a Call List
80
Viewing Details of a Contact
82
Scan Lists
82
Viewing a Scan List
82
Editing the Scan List
82
Changing the Scan List Status
83
Viewing and Changing the Priority Status
84
Scan
84
Turning Scan on or off
85
Making a Dynamic Priority Change (Conventional Scan Only)
85
Deleting a Nuisance Channel
85
Restoring a Nuisance Channel
86
Call Alert Paging
86
Receiving a Call Alert Page
86
Sending a Call Alert Page
86
Emergency Operation
88
Sending an Emergency Alarm
89
Sending an Emergency Call (Trunking Only)
89
Sending an Emergency Alarm with Emergency Call
90
Sending a Silent Emergency Alarm
91
Change of Channels During Emergency
91
Emergency Keep-Alive Feature
91
Fireground (Conventional Only)
92
Entering Fireground Zone Channel
92
Responding to Evacuation Indicator
93
Tactical Public Safety(TPS) (Conventional Only)
94
Using TPS Normal Transmission
94
Using TPS Emergency Transmission
94
Man down
95
Pre-Alert Timer
96
Post-Alert Timer
96
Radio Alerts When man down Feature Is Triggered
97
Triggering Emergency
97
Radio Alerts When man down Enhanced Is Triggered
97
Exiting man down Feature
98
Re-Initiating man down
98
Testing the man down Feature
98
Automatic Registration Service (ARS)
99
Selecting or Changing the ARS Mode
99
User Login Feature
100
Text Messaging Service (TMS)
102
Accessing the Messaging Features
102
Composing and Sending a New Text Message
103
Sending a Quick Text Message
104
Priority Status and Request Reply of a New Text Message
105
ASTRO 25 Advanced Messaging Solution
112
System Setup for ASTRO Advanced Messaging Solution
113
Two-Factor Authentication
113
Sending a Query
115
Receiving a Query
117
Secure Operations
117
Selecting Secure Transmissions
117
Selecting Clear Transmissions
118
Managing Encryption
118
Security
123
Radio Lock
123
Radio Stun and Kill
125
Radio Stun
125
Radio Kill
126
Global Positioning System (GPS)
127
GPS Operation
128
GPS Performance Enhancement
128
The Outdoor Location Feature (Using GPS)
129
Military Grid Reference System (MGRS) Coordinates
129
Accessing the Outdoor Location Feature
130
Saving a Waypoint
131
Viewing a Saved Waypoint
131
Editing the Alias of a Waypoint
132
Editing the Coordinates of a Waypoint
133
Deleting a Single Saved Waypoint
134
Deleting All Saved Waypoints
134
Measuring the Distance and Bearing from a Saved Waypoint
135
Location Feature in Emergency Mode
135
Peer-Location on the Display (ASTRO Conventional Only)
136
Geofence (ASTRO 25 Trunking System)
137
Entering the Geofence Area
137
Trunking System Controls
138
Using the Failsoft System
138
Out-Of-Range Radio
139
Site Trunking Feature
139
Locking and Unlocking a Site
139
Site Display and Search Button
140
Mission Critical Wireless - Bluetooth
140
Turning the Bluetooth on
141
Turning the Bluetooth off
141
Re-Pair Timer
142
Bluetooth Drop Timer
143
Pairing with Low Frequency-Motorola Proximity Pairing (LF-MPP) Feature
144
Radio Indications of Lost Bluetooth Connection
145
Standard Pairing Feature
146
PIN Authentication in Pairing
148
Turning on the Bluetooth Audio (Routing the Audio from the Radio to the Headset)
151
Turning off the Bluetooth Audio (Routing the Audio from the Headset to the Radio)
152
Adjusting the Volume of the Radio from Bluetooth Audio Device
152
Viewing and Clearing the Bluetooth Device Information
153
Clearing All Bluetooth Devices Information
154
Editing the Bluetooth Friendly Name
155
Programming over Project 25 (POP 25) (ASTRO 25 and ASTRO Conventional)
155
Responding to the Notification of Upgrade
155
Voice Announcement
156
Site Selectable Alerts (ASTRO 25)
157
Sending SSA Notification to Single Site
157
Sending SSA Notification to Single Site Via Manual Entry
158
Sending SSA Notification to All Sites
159
Sending SSA Notification to All Available Sites
160
Stopping SSA Notification of a Single Site
160
Stopping SSA Notification of a Single Site Via Manual Entry
161
Stopping SSA Notification of All Sites
162
Stopping SSA Notification of All Available Sites
162
Utilities
163
Viewing Recent Calls
163
Using the Flip Display
164
Selecting a Basic Zone Bank
164
Selecting an Enhanced Zone Bank
164
Selecting the Power Level
165
Selecting a Radio Profile
165
Enabling and Disabling the Radio Alias
166
Selecting the Audio Speaker
166
Controlling the Display Backlight
167
Locking and Unlocking the Keypad and Controls
168
Turning the Controls and Keypad Buttons Tones on or off
168
Turning Voice Mute on or off
169
Using the Time-Out Timer
169
Time and Date Setup
170
Using Conventional Squelch Operation Features
171
Using the PL Defeat Feature
171
Digital PTT ID Support
172
Smart PTT Feature (Conventional Only)
172
Transmit Inhibit
173
IMPRES Battery Annunciator
174
General Radio Information
174
Helpful Tips
178
Radio Care
178
Cleaning Your Radio
179
Proper Ways to Handle the Radio
179
Radio Service and Repair
179
Battery Care
180
Battery Charge Status
180
Battery Recycling and Disposal
181
Accessories
183
Maritime Radio Use in the VHF Frequency Range
184
Special Channel Assignments
184
Emergency Channel
184
Non-Commercial Call Channel
184
Operating Frequency Requirements
184
Declaration of Compliance for the Use of Distress and Safety Frequencies
187
Technical Parameters for Interfacing External Data Sources
187
Glossary
188
Limited Warranty
194
Motorola Communication Products
194
What this Warranty Covers and for How Long
194
II. General Provisions
195
III. State Law Rights
195
IV. How to Get Warranty Service
195
What this Warranty Does Not Cover
196
VI. Patent and Software Provisions
196
VII. Governing Law
198
Advertisement
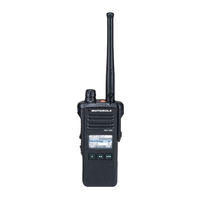
Motorola APX 3 User Manual (126 pages)
Brand:
Motorola
| Category:
Two-Way Radio
| Size: 1.98 MB
Table of Contents
Table of Contents
2
List of Tables
9
Software Version
10
Chapter 1: Read Me First
11
Notations Used in this Manual
11
Radio Care
11
Cleaning Your Radio
12
Cleaning the External Surface of the Radio
13
Radio Service and Repair
13
Battery Recycling and Disposal
13
Additional Performance Enhancement
13
ASTRO 25 Enhanced Data
14
Dynamic System Resilience
14
Crosstalk Prevention
14
Encrypted Integrated Data
14
Securenet
14
P25 Digital Vehicular Repeater System
14
Conventional Talkgroup and Radio Scan Enhancements
14
What Your Dealer/System Administrator Can Tell You
15
Chapter 2: Preparing Your Radio for Use
16
Charging the Battery
16
Attaching the Battery
16
Attaching the Antenna
17
Removing and Attaching the Accessory Connector Cover
17
Attaching the Belt Clip
17
Turning on the Radio
17
Adjusting the Volume
18
Chapter 3: Radio Controls
19
Radio Parts and Controls
19
Keypad
21
Table 1: Text Entry Modes
21
Table 2: Keypad Characters
21
Programmable Features
22
Assignable Radio Functions
22
Assignable Settings or Utility Functions
24
Chapter 4: Status Indicators
26
Battery Charge Status
26
Fuel Gauge Icons
26
Accessing the Battery Info Screen
26
HAZLOC Battery Type Detection
27
LED Indications
27
Table 3: LED Indications
27
Status Icons
28
TMS Status Icons
30
Call Type Icons
30
Table 4: TMS Status Icons
30
Table 5: Call Type Icons
30
Top Lightbar Indicator
31
Intelligent Lighting Indicators
31
Alert Tones
32
Phone Call Displays and Alerts
34
Display Color Change on Channel
34
Chapter 5: General Radio Operation
36
Selecting a Zone
36
Selecting a Radio Channel
36
Selecting a Channel by Using Channel Search Button
37
Mode Select Feature
37
Saving a Zone and a Channel to a Softkey
38
Saving a Zone and a Channel to a Button
38
Receiving and Responding to a Radio Call
38
Receiving and Responding to a Talkgroup Call
38
Receiving and Responding to a Private Call (Trunking Only)
39
Receiving and Responding to a Telephone Call (Trunking Only)
39
Methods to Make a Radio Call
39
Making a Talkgroup Call
40
Making a Private Call (Trunking Only)
40
Making an Enhanced Private Call (Trunking Only)
41
Making a Telephone Call (Trunking Only)
41
Switching between Repeater or Direct Operation Button
42
Monitor Feature
42
Monitoring a Channel
42
Monitoring Conventional Mode
43
Chapter 6: Advanced Features
44
Advanced Call Features
44
Selective Call (ASTRO Conventional Only)
44
Receiving a Selective Call
44
Making a Selective Call
44
Talkgroup Call Feature (Conventional Only)
45
Selecting a Talkgroup
45
Sending a Status Call
45
Making a Priority Dispatch Calls
46
Dynamic Regrouping (Trunking Only)
46
Classification of Regrouped Radios
46
Requesting a Reprogram (Trunking Only)
47
Dynamic Zone Programming
47
Entering the Dynamic Zone to Select a Dynamic Channel
47
Saving a Channel in the Dynamic Zone from List Selection
48
Saving a Channel in the Dynamic Zone from Channel Name
48
Deleting a Channel in the Dynamic Zone
49
Zone-To-Zone Cloning
49
Cloning Zones
49
Contacts
50
Making a Private Call from Contacts
51
Adding a New Contact Entry
51
Deleting a Contact Entry
52
Adding a Contact to a Call List
52
Removing a Contact from a Call List
53
Methods of Contact Editing in a Call List
53
Editing an Entry Alias
53
Editing as Entry ID
53
Editing a Call Type
54
Viewing Details of a Contact
54
Scan Lists
54
Intelligent Priority Scan
55
Viewing a Scan List
55
Editing the Scan List
55
Changing the Scan List Status
56
Viewing and Changing the Priority Status
56
Scan
57
Turning Scan on or off
57
Making a Dynamic Priority Change (Conventional Scan Only)
57
Deleting a Nuisance Channel
57
Restoring a Nuisance Channel
58
Call Alert Paging
58
Receiving a Call Alert Page
58
Sending a Call Alert Page
58
Recent Calls
59
Viewing Recent Calls
59
Instant Recall
60
Saving and Playback Calls
60
In-Call User Alert
61
Quick Call II
62
Initiating a Quick Call II Transmission
62
Emergency Operation
62
Special Considerations for Emergency Operation
63
Emergency Keep-Alive
63
Exiting Emergency Operation
63
Exiting Emergency as Supervisor (Trunking Only)
63
Table 6: Emergency Operation Scenarios
63
Sending an Emergency Alarm
64
Sending an Emergency Call (Trunking Only)
65
Sending an Emergency Call with Hot MIC (Trunking Only)
65
Sending an Emergency Alarm with Emergency Call
65
Sending an Emergency Alarm and Call with Hot MIC
66
Sending a Silent Emergency Alarm
67
Sending Evacuation Tone
67
Automatic Registration Service
67
Selecting or Changing the ARS Mode
67
User Login Feature
68
Logging in as a User
68
Logging out
69
Text Messaging Service
69
Accessing the Messaging Features
70
Composing and Sending a New Text Message
70
Sending a Quick Text Message
71
Priority Status and Request Reply of a New Text Message
72
Appending a Priority Status to a Text Message
72
Removing a Priority Status from a Text Message
72
Appending a Request Reply to a Text Message
73
Removing a Request Reply from a Text Message
73
Appending a Priority Status and a Reply Request to a Text Message
73
Removing a Priority Status and a Reply Request from a Text Message
73
Receiving a Text Message
74
Viewing a Text Message from the Inbox
74
Replying to a Received Text Message
75
Accessing the Drafts Folder
75
Sent Text Messages
76
Deleting a Text Message
77
Deleting All Text Messages
77
ASTRO 25 Advanced Messaging Solution
77
Two-Factor Authentication
78
Logging in Using the Two-Factor Authentication
78
Logging out of Two-Factor Authentication
79
Sending a Query
79
Receiving a Query
80
Radio Lock
81
Enabling or Disabling Radio Lock (Secure Radios Only)
81
Changing the Radio Lock Password
81
Changing the Tactical Inhibit Password
82
Radio Inhibit
82
Global Positioning System/Global Navigation Satellite System
83
GPS Performance Enhancement
83
The Outdoor Location Feature (Using GPS)
83
Location Format
84
Military Grid Reference System (MGRS) Coordinates
84
Accessing the Outdoor Location Feature
84
Selecting Location Format
85
Saving a Waypoint
85
Viewing a Saved Waypoint
86
Editing the Alias of a Waypoint
86
Editing the Coordinates of a Waypoint
87
Deleting a Single Saved Waypoint
88
Deleting All Saved Waypoints
88
Measuring the Distance and Bearing from a Saved Waypoint
89
Location Feature in Emergency Mode
89
Peer-Location on the Display (ASTRO Conventional)
89
Mission Critical Geofence (ASTRO 25 Trunking)
90
Entering the Geofence Area
90
Mission Critical Geofence
91
Entering Mission Critical Geofence
91
Exiting Mission Critical Geofence
91
Trunking System Controls
91
Operating in Failsoft System
92
Out-Of-Range Radio
92
Site Trunking Feature
92
Locking and Unlocking a Site
92
Viewing the Current Site
93
Changing the Current Site
93
ASTRO 25 (P25) Programming over Project 25 (POP25)
93
Responding to the Notification of Upgrade
93
Voice Announcement
94
Utilities
94
Selecting the Power Level
94
Selecting a Radio Profile
95
Enabling and Disabling the Radio Alias
96
Selecting the Audio Speaker
96
Controlling the Display Backlight
97
Locking and Unlocking the Keypad and Controls
97
Turning the Controls and Keypad Buttons Tones on or off
97
Turning Voice Mute on or off
98
Using the Time-Out Timer
98
Time and Date Setup
98
Editing the Time and Date
99
Adjusting Squelch Level
99
Conventional Squelch Operation
100
Using Conventional Squelch Operation Features
100
Using the PL Defeat Feature
100
Digital PTT ID Support
101
Smart PTT (Conventional Only)
101
Transmit Inhibit
101
Enabling Transmit Inhibition
102
Disabling Transmit Inhibition
102
General Radio Information
102
Accessing the Radio Information
102
Viewing the IP Information
103
Viewing the Control Assignments
104
Editing the Soft ID
104
Front Panel Programming
105
Initiating the FPP Feature
105
Changing Password (Optional)
106
Selecting a Channel Within a Zone
106
Changing a Channel Parameter
106
Editing Parameters
107
Table 7: Parameter Editing Keys
107
Chapter 7: Accessories
109
Legal and Compliance Statements
110
Disclaimer
110
Copyrights
110
Declaration of Conformity
111
Important Safety Information
112
Notice to Users (FCC)
112
FCC Licensing Information
112
Applying for Canadian License
113
Maritime Radio Use in the VHF Frequency Range
114
Special Channel Assignments
114
Emergency Channel
114
Non-Commercial Call Channel
114
Operating Frequency Requirements
114
Table 8: VHF Marine Channel List
115
Declaration of Compliance for the Use of Distress and Safety Frequencies
117
Technical Parameters for Interfacing External Data Sources
117
Limited Warranty
118
Motorola Solutions Communication Products
118
What this Warranty Covers and for How Long
118
II. General Provisions
119
III. State Law Rights
119
IV. How to Get Warranty Service
119
What this Warranty Does Not Cover
119
VI. Patent and Software Provisions
120
VII. Governing Law
121
VIII. for Australia Only
121
Glossary
122
Motorola APX 3 Quick Reference Manual (48 pages)
Brand:
Motorola
| Category:
Two-Way Radio
| Size: 9.87 MB
Table of Contents
Menu Navigation
4
Navigation Dans le Menu
8
Πλοήγηση Στο Μενού
26
Menüde Gezinme
32
Advertisement
Advertisement
Related Products
Motorola Astro APX 3000
Motorola APX 3000
Motorola ASTRO APX 3000 P25
Motorola EMS APX 7500
Motorola APX 8000XE M2
Motorola APX 8000H 3.5
Motorola APX 900
Motorola APX 1500
Motorola APX 5000 1
Motorola APX E5
Motorola Categories
Cell Phone
Two-Way Radio
Baby Monitor
Cordless Telephone
Radio
More Motorola Manuals
Login
Sign In
OR
Sign in with Facebook
Sign in with Google
Upload manual
Upload from disk
Upload from URL