Sign In
Upload
Manuals
Brands
Canon Manuals
Fax Machine
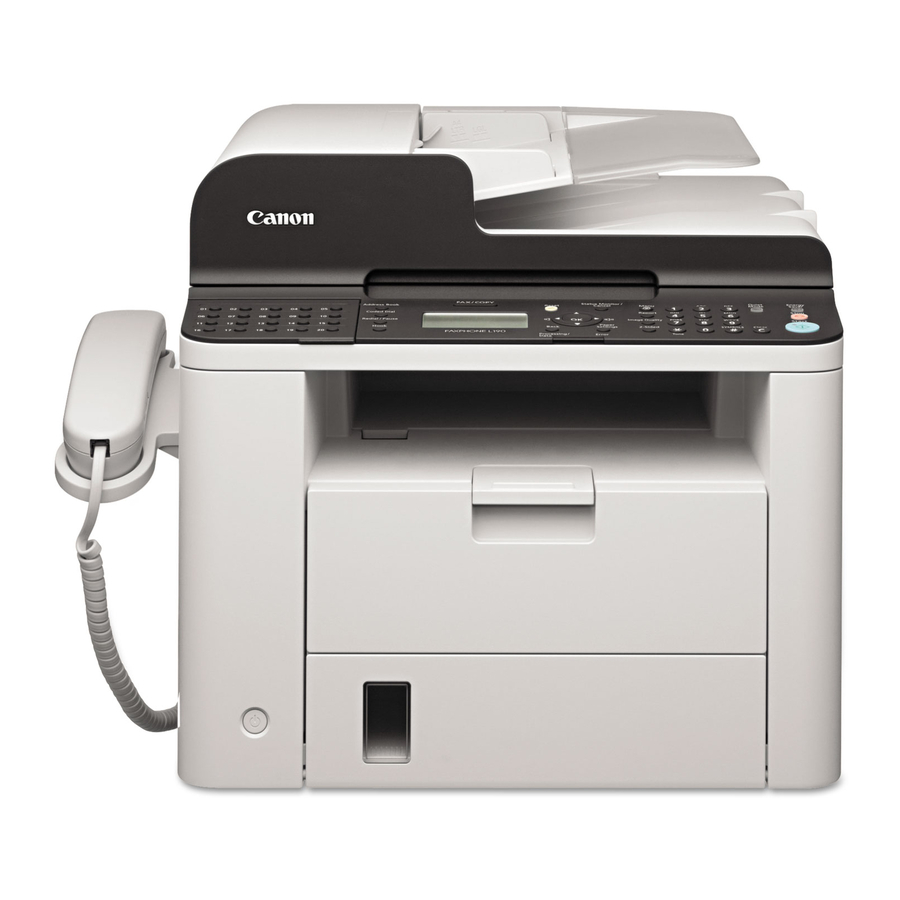
FAXPHONE L190
Canon FAXPHONE L190 Manuals
Manuals and User Guides for Canon FAXPHONE L190. We have
4
Canon FAXPHONE L190 manuals available for free PDF download: Service Manual, Basic Operation Manual, Basic Operation Gude, Starter Manual
Canon FAXPHONE L190 Service Manual (511 pages)
Brand:
Canon
| Category:
All in One Printer
| Size: 54.44 MB
Table of Contents
Table of Contents
4
Safety Precautions
17
CDRH Provisions
18
Laser Safety
18
About Laser Beams
18
Handling Laser Scanner Unit
18
Toner Safety
19
About Toner
19
Handling Adhered Toner
19
Notes on Handling Lithium Battery
19
Notes on Assembly/Disassembly
19
1 Product Overview
20
Product Lineups
20
Main Unit
21
Options
22
Features
23
Product Specifications
23
Main Unit Specifications
23
Wireless LAN Specifications
25
FAX Specifications
25
Name of Parts
26
External View
26
Mf4890Dw/Mf4880Dw
26
Mf4870Dn/Mf4830D/Mf4780W/Mf4770N/Mf4750/Mf4730
27
Mf4820D/Mf4720W/Mf4712/Mf4710
28
D530
29
L418S/L410/L190
30
Cross Section
31
Dadf
31
Sadf
31
Printer
32
Reader
32
Control Panel
33
Mf4890Dw/Mf4880Dw/Mf4830D/Mf4820D
33
Mf4780W/Mf4770N/Mf4750/Mf4730/Mf4720/Mf4712/Mf4710
35
L418S/L410/L190
37
2 Technical Overview
39
Basic Configuration
39
Configuration Function
40
Basic Sequence
40
Basic Sequence of Operation
40
Print Sequence
41
Controller System
42
Main Controller
42
General Description
42
Engine Controller
42
Service Works
43
At Parts Replacement
43
Maintenance
43
Notes on Service Works
43
Document Exposure/Feeder System
44
Document Exposure System
44
Major Components
44
Overview
44
Document Feeder System
45
Overview
45
Various Control
46
Service Works
48
At Parts Replacement
48
Maintenance
48
Notes on Service Works
48
Laser Exposure System
49
Overview
49
Controlling the Laser Activation Timing
50
Laser ON/OFF Control
50
Horizontal Sync Control
50
Laser Control
51
Auto Power Control (APC)
51
Laser Scanner Motor Control
51
Overview
51
Scanner Motor Fault Detection
52
Service Works
52
At Parts Replacement
52
Maintenance
52
Notes on Service Works
52
Image Formation System
53
Overview/Configuration
53
Overview
53
Print Process
53
Static Latent Image Formation Block
54
Development Block
55
Transfer Block
55
Drum Cleaning Block
56
Fixing Block
56
High-Voltage Control
57
Generating Developing Bias
57
Generating Primary Charging Bias
57
Generating Transfer Bias
57
Overview
57
Toner Cartridge
58
Operation When Toner Level Is Low/Nearly out
58
Specification of Toner Level Display
58
Toner Level Detection
58
Toner Cartridge Absence/Presence Detection
59
Service Works
59
At Parts Replacement
59
Maintenance
59
Notes on Service Works
59
Fixing System
60
Overview/Configuration
60
Main Parts of Fixing Assembly
60
Overview
60
Fixing Temperature Control
61
Protective Functions
61
Various Control Mechanisms
61
Other Functions
62
Throughput down Control
62
At Parts Replacement
63
Maintenance
63
Notes on Service Works
63
Service Works
63
Pickup and Feeding System
64
Overview
64
Detecting Jams
65
Jam Detection Outline
65
Delay Jams
66
Reversal Delay Jam
67
Stationary Jams
68
Other Jams
69
At Parts Replacement
70
Maintenance
70
Notes on Service Works
70
Service Works
70
External and Controls System
71
Power Supply
71
Protective Functions
71
At Parts Replacement
72
Maintenance
72
Notes on Service Works
72
Service Works
72
3 Periodical Services
73
Periodically Replaced Parts
73
Consumables
73
Consumables
74
Periodical Service
75
Scheduled Servicing
75
Cleaning
75
Printer
75
Reader ADF
76
Dadf
76
Sadf
76
4 Disassembly/Assembly
77
List of Parts
77
Main Unit
79
Lists of DADF Unit
79
Lists of SADF Unit
79
Lists of Reader Unit
80
Duplex Printer Unit
80
Lists of Motor/Fan
80
List of Sensor
81
Lists of Solenoid
81
List of Heater/Thermoswitch/Thermistor
82
List of Switch and Speaker
82
List of PCB
83
Single-Sided Printer Unit
83
List of Motor/Fan
83
List of Solenoid
84
List of Connectors
87
DADF Unit
87
SADF Unit
87
Reader Unit
88
Duplex Printer Unit
88
Single-Sided Printer Unit
90
External Cover, Interior
92
Removing the Left Cover(Mf4890Dw/4880Dw)
92
Removing the Right Cover(Mf4890Dw/4880Dw)
93
Removing the Front Cover Unit(Mf4890Dw/4880Dw)
94
Removing the Upper Cover(Mf4890Dw/4880Dw)
94
Removing the Left Cover(Mf4870Dn/Mf4830D)
96
Removing the Right Cover(Mf4870Dn/Mf4830D)
97
Removing the Front Cover Unit(Mf4870Dn/Mf4830D)
98
Removing the Upper Cover (Mf4870Dn/Mf4830D)
98
Removing the Left Cover(Mf4820D)
100
Removing the Right Cover(Mf4820D)
101
Removing the Front Cover Unit(Mf4820D)
102
Removing the Upper Cover (Mf4820D)
102
Removing the Left Cover(D530)
104
Removing the Right Cover(D530)
105
Removing the Front Cover Unit(D530)
106
Removing the Upper Cover (D530)
106
Removing the Left Cover(Mf4780W/Mf4770N/Mf4750/Mf4730)
108
Removing the Right Cover(Mf4780W/Mf4770N/Mf4750/Mf4730) -4-33 Procedure
109
Removing the Front Cover Unit(Mf4780W/Mf4770N/Mf4750/Mf4730)
110
Removing the Upper Cover Mf4780W/Mf4770N/Mf4750/Mf4730)
110
Removing the Left Cover(Mf4720W/Mf4712/Mf4710)
112
Removing the Right Cover(Mf4720W/Mf4712/Mf4710)
113
Removing the Front Cover Unit(Mf4720W/Mf4712/4710)
114
Removing the Upper Cover (Mf4720W/Mf4712/Mf4710)
114
Removing the Left Cover(L418S/L410/L190)
116
Removing the Right Cover(L418S/L410/L190)
117
Removing the Front Cover Unit(L418S/L410/L190)
118
Removing the Upper Cover (L418S/L410/L190))
118
Document Exposure/Feeder System
120
Removing the DADF Unit and Reader Unit(Mf4890Dw/Mf4880Dw)
120
Removing the DADF Unit (Mf4890Dw/Mf4880Dw)
121
Removing the DADF Pickup Unit (Mf4890Dw/Mf4880Dw)
123
Removing the DADF Motor Unit (Mf4890Dw/Mf4880Dw)
126
Removing the DADF Solenoid Unit (Mf4890Dw/Mf4880Dw)
127
Removing the DADF Pickup Roller Unit (Mf4890Dw/Mf4880Dw)
128
Removing the DADF Separation Pad(Mf4890Dw/Mf4880Dw)
130
Removing the Copyboard Glass(Mf4890Dw/Mf4880Dw)
133
Removing the Flatbed Motor Unit(Mf4890Dw/Mf4880Dw)
134
Removing the DADF CIS Unit(Mf4890Dw/Mf4880Dw)
136
Removing the SADF Unit and Reader Unit(Mf4870Dn/Mf4830D) --4-62
138
Removing the SADF Unit (Mf4870Dn/Mf4830D)
139
Removing the SADF Pickup Unit (Mf4870Dn/Mf4830D)
141
Removing the SADF Motor Unit (Mf4870Dn/Mf4830D)
143
Removing the SADF Pickup Roller 1,2 (Mf4870Dn/Mf4830D)
144
Removing the SADF Separation Pad(Mf4870Dn/Mf4830D)
147
Removing the Copyboard Glass(Mf4870Dn/Mf4830D)
150
Removing the Flatbed Motor Unit(Mf4870Dn/Mf4830D)
151
Removing the SADF CIS Unit(Mf4870Dn/Mf4830D)
153
Removing the Copyboard Cover (Mf4820D)
155
Removing the Copyboard Cover and Reader Unit (Mf4820D)
155
Removing the Copyboard Glass(Mf4820D)
157
Removing the Flatbed Motor Unit(Mf4820D)
158
Removing the CIS Unit(Mf4820D)
160
Removing the Copyboard Cover (D530)
161
Removing the Copyboard Cover and Reader Unit (D530)
162
Removing the Copyboard Glass(D530)
163
Removing the Flatbed Motor Unit(D530)
164
Removing the CIS Unit(D530)
166
Removing the SADF Unit and Reader Unit(Mf4780W/Mf4770N/Mf4750/Mf4730)
168
Removing the SADF Unit (Mf4780W/Mf4770N/Mf4750/Mf4730) --4-93
169
Removing the SADF Pickup Unit (Mf4780W/Mf4770N/Mf4750/Mf4730)
171
Removing the SADF Motor Unit
173
Removing the SADF Pickup Roller 1,2 (Mf4780W/Mf4770N/Mf4750/Mf4730)
174
Removing the SADF Separation Pad(Mf4780W/Mf4770N/Mf4750/Mf4730)
177
Removing the Copyboard Glass(Mf4780W/Mf4770N/Mf4750/Mf4730)
180
Removing the Flatbed Motor Unit(Mf4780W/Mf4770N/Mf4750/Mf4730)
181
Removing the SADF CIS Unit(Mf4780W/Mf4770N/Mf4750/Mf4730)
183
Removing the Copyboard Cover (Mf4720W/Mf4712/Mf4710)
185
Removing the Copyboard Cover and Reader Unit (Mf4720W/Mf4712/Mf4710)
185
Removing the Copyboard Glass(Mf4720W/Mf4712/Mf4710)
187
Removing the Flatbed Motor Unit(Mf4720W/Mf4712/Mf4710)
188
Removing the CIS Unit (MF4720/MF4712/MF4710)
190
Removing the DADF Motor Unit (L418S/L410/L190)
197
Removing the DADF Solenoid Unit (L418S/L410/L190)
198
Removing the DADF Pickup Roller Unit (L418S/L410/L190)
199
Removing the DADF Separation Pad (L418S/L410/L190)
202
Removing the Copyboard Glass (L418S/L410/L190)
204
Removing the Flatbed Motor Unit (L418S/L410/L190)
206
Removing the DADF CIS Unit (L418S/L410/L190)
208
Controller System
210
Removing the Control Panel Unit (Mf4890Dw/Mf4880Dw)
210
Removing the Drive Belt (Mf4890Dw/Mf4880Dw)
211
Removing the Main Motor (Mf4890Dw/Mf4880Dw)
214
Removing the Main Fan (Mf4890Dw/Mf4880Dw)
216
Removing the Engine Controller PCB(Mf4890Dw/Mf4880Dw)
218
Removing the Main Controller PCB(Mf4890Dw/Mf4880Dw)
221
Removing the FAX NCU PCB(Mf4890Dw/Mf4880Dw)
221
Removing the Wireless LAN PCB(Mf4890Dw Only)
222
Removing the Paper Leading Edge Sensor PCB(Mf4890Dw/Mf4880Dw)
222
Removing the Fixing Delivery/Paper Width Sensor PCB
225
Mf4880Dw)
225
Removing the Toner Sensor and Multi Pickup Sensor Unit (Mf4890Dw/Mf4880Dw)
227
Removing the Speaker (Mf4890Dw/Mf4880Dw)
229
Removing the Control Panel Unit (Mf4870Dn/Mf4830D)
231
Removing the Drive Belt (Mf4870Dn/Mf4830D)
232
Removing the Main Motor (Mf4870Dn/Mf4830D)
235
Removing the Main Fan (Mf4870Dn/Mf4830D)
237
Removing the Engine Controller PCB (Mf4870Dn/Mf4830D)
239
Removing the Main Controller PCB (Mf4870Dn/Mf4830D)
242
Removing the FAX NCU PCB (Mf4870Dn)
242
Removing the Paper Leading Edge Sensor PCB(Mf4870Dn/Mf4830D)
243
Removing the Fixing Delivery/Paper Width Sensor PCB(Mf4870Dn/Mf4830D)
245
Removing the Toner Sensor and Multi Pickup Sensor Unit (Mf4870Dn)
248
Removing the Speaker (Mf4870Dn)
250
Removing the Control Panel Unit (Mf4820D)
251
Removing the Drive Belt (Mf4820D)
252
Removing the Main Motor (Mf4820D)
255
Removing the Engine Controller PCB(Mf4820D)
257
Removing the Main Controller PCB(Mf4820D)
260
Removing the Paper Leading Edge Sensor PCB(Mf4820D)
260
Removing the Fixing Delivery/Paper Width Sensor PCB(Mf4820D)
263
Removing the Toner Sensor and Multi Pickup Sensor Unit (Mf4820D)
265
Removing the Control Panel Unit (D530)
267
Removing the Main Motor (D530)
271
Removing the Main Fan (D530)
275
Removing the Engine Controller PCB(D530)
277
Removing the Main Controller PCB(D530)
280
Removing the Paper Leading Edge Sensor PCB(D530)
280
Removing the Fixing Delivery/Paper Width Sensor PCB(D530)
283
Removing the Multi Pickup Sensor Unit (D530)
285
Removing the Engine Controller PCB (Mf4780W/Mf4770N/Mf4750/Mf4730)
294
Removing the Main Controller PCB (Mf4780W/Mf4770N/Mf4750/Mf4730)
296
Removing the FAX NCU PCB (Mf4780W/Mf4770N/Mf4750/)
297
Removing the Wireless LAN PCB (Mf4780W)
297
Removing the Paper Leading Edge Sensor PCB (Mf4780W/Mf4770N/Mf4750/Mf4730)
298
Removing the Drive Belt (Mf4720W/Mf4712/Mf4710)
306
Removing the Main Motor (Mf4720W/Mf4712/Mf4710)
309
Removing the Engine Controller PCB (Mf4720W/Mf4712/Mf4710)
312
Removing the Main Controller PCB (Mf4720W/Mf4712/Mf4710)
314
Removing the Paper Leading Edge Sensor PCB (Mf4720W/Mf4712/Mf4710)
315
Removing the Fixing Delivery/Paper Width Sensor PCB
317
Mf4712/Mf4710)
317
Removing the Toner Sensor and Multi Pickup Sensor Unit (Mf4720W/Mf4712/Mf4710)
320
Removing the Control Panel Unit (L418S/L410/L190)
322
Removing the Drive Belt (L418S/L410/L190)
323
Removing the Main Motor (L418S/L410/L190)
326
Removing the Main Fan (L418S/L410/L190)
329
Removing the Engine Controller PCB (L418S/L410/L190)
332
Removing the Main Controller PCB (L418S/L410/L190)
334
Removing the FAX NCU PCB(L418S/L410/L190)
335
Removing the Wireless LAN PCB (L418S/L410/L190)
335
Removing the Paper Leading Edge Sensor PCB (L418S/L410/L190)
336
Removing the Fixing Delivery/Paper Width Sensor PCB (L418S/L410/L190)
338
Removing the Toner Sensor and Multi Pickup Sensor Unit (L418S/L410/L190)
341
Removing the Speaker (L418S/L410/L190)
343
Laser Exposure System
344
Removing the Laser Scanner Unit (Mf4890Dn/Mf4880Dw)
344
Removing the Laser Scanner Unit (Mf4870Dn/4830D)
345
Removing the Laser Scanner Unit (Mf4820D)
347
Removing the Laser Scanner Unit (D530)
348
Removing the Laser Scanner Unit (Mf4780W/Mf4770N/Mf4750/Mf4730)
351
Removing the Laser Scanner Unit (Mf4720W/Mf4712/Mf4710)
352
Removing the Laser Scanner Unit (L418S/L410/L190)
354
Image Formation System
357
Removing the Transfer Roller (Mf4890Dw/Mf4880Dw)
357
Removing the Transfer Roller (Mf4870Dn/Mf4830D)
358
Removing the Transfer Roller (Mf4820D)
359
Removing the Transfer Roller (D530)
360
Removing the Transfer Roller (Mf4780W/Mf4770N/Mf4750/Mf4730)
361
Removing the Transfer Roller (Mf4720W/Mf4712/Mf4710)
362
Removing the Transfer Roller (L418S/L410/L190)
363
Fixing System
365
Removing the Fixing Assembly (Mf4890Dw/Mf4880Dw)
365
Removing the Fixing Assembly(Mf4870Dn/Mf4830D)
368
Removing the Fixing Assembly (Mf4820D)
371
Removing the Fixing Assembly (D530)
374
Removing the Fixing Assembly (Mf4780W/Mf4770N/Mf4750/Mf4730)
377
Removing the Fixing Assembly (Mf4720W/Mf4712/Mf4710)
381
Removing the Fixing Assembly (L418S/L410/L190)
384
Pickup and Feeding System
387
Removing the Pickup Unit (Mf4890Dw/Mf4880Dw)
387
Removing the Pickup Tray Unit (Mf4890Dw/Mf4880Dw)
390
Removing the Pickup Roller (Mf4890Dw/Mf4880Dw)
392
Removing the Pickup Solenoid (Mf4890Dw/Mf4880Dw)
393
Removing the Separation Pad (Mf4890Dw/Mf4880Dw)
395
Removing the Duplex Feed Unit (Mf4890Dw/Mf4880Dw)
396
Removing the Duplex Solenoid (Mf4890Dw/Mf4880Dw)
397
Removing the Pickup Unit (Mf4870Dn/Mf4830D)
399
Removing the Pickup Tray Unit (Mf4870Dn/Mf4830D)
403
Removing the Pickup Roller (Mf4870Dn/Mf4830D)
405
Removing the Pickup Solenoid (Mf4870Dn/Mf4830D)
406
Removing the Duplex Feed Unit (Mf4870Dn/Mf4830D)
409
Removing the Duplex Solenoid (Mf4870Dn/Mf4830D)
410
Removing the Pickup Unit (Mf4820D)
412
Removing the Pickup Tray Unit (Mf4820D)
415
Removing the Pickup Roller (Mf4820D)
417
Removing the Pickup Solenoid (Mf4820D)
418
Removing the Separation Pad (Mf4820D)
421
Removing the Duplex Feed Unit (Mf4820D)
421
Removing the Duplex Solenoid (Mf4820D)
423
Removing the Pickup Unit (D530)
425
Removing the Pickup Tray Unit (D530)
428
Removing the Pickup Roller (D530)
430
Removing the Pickup Solenoid (D530)
431
Removing the Separation Pad (D530)
433
Removing the Duplex Feed Unit (D530)
434
Removing the Duplex Solenoid (D530)
435
Removing the Pickup Unit (Mf4780W/Mf4770N/Mf4750/Mf4730)
438
Removing the Pickup Tray Unit (Mf4780W/Mf4770N/Mf4750/Mf4730)
441
Removing the Pickup Roller (Mf4780W/Mf4770N/Mf4750/Mf4730)
443
Removing the Pickup Solenoid (Mf4780W/Mf4770N/Mf4750/Mf4730)
444
Removing the Separation Pad (Mf4780W/Mf4770N/Mf4750/Mf4730)
447
Removing the Pickup Unit (Mf4720W/Mf4712/Mf4710)
447
Removing the Pickup Tray Unit (Mf4720W/Mf4712/Mf4710)
450
Removing the Pickup Roller (Mf4720W/Mf4712/Mf4710)
452
Removing the Pickup Solenoid (Mf4720W/Mf4712/Mf4710)
453
Removing the Separation Pad (Mf4720W/Mf4712/Mf4710)
456
Removing the Pickup Unit (L418S/L410/L190)
456
Removing the Pickup Tray Unit (L418S/L410/L190)
459
Removing the Pickup Roller (L418S/L410/L190)
461
Removing the Pickup Solenoid (L418S/L410/L190)
462
Removing the Separation Pad (L418S/L410/L190)
465
Removing the Duplex Feed Unit (L418S/L410/L190)
465
5 Adjustment
470
Mechanical Adjustment
470
Confirming Nip Width
471
6 Troubleshooting
472
Test Print
472
Test Print Function
473
Troubleshooting Items
474
Image Faults
474
Smudged/Streaked
474
Version Upgrade
475
Overview
475
System Requirements
475
Downloading System Software
476
Log Collector
478
Outline
478
Operation Procedure
478
Scope of Application
478
What to Prepare
478
Troubleshooting
479
7 Error Codes
480
Overview
480
8 Service Mode
484
Overview
484
Entering Service Mode
485
Service Mode Menu
485
Copier
486
Display
486
CCD
486
Version
486
I/O
486
R-Con
486
Adjust
487
Adj-Xy
487
CCD
487
Function
488
Clear
488
Misc-P
488
Misc-R
488
Param
488
System
488
Acc
489
Body
489
Serial
489
Splman
489
Counter
490
Feeder
490
Jam
490
Pick-Up
490
Total
490
Feeder
491
Adjust
491
Function
491
Fax
492
List of SSSW
492
List of Menu
493
List of NUM
494
List of NCU
494
Tone/Pulse
494
Busy Tone0
495
Busy Tone1
495
Auto
496
Cng Detect
496
Reorder Tone
496
Rkey
496
Pbx Busy Tone
497
Pbx Dial Tone
497
Testmode
498
System
498
Dram
498
Speaker
498
Scan
498
Adjust
498
Sensor
498
Adftest
499
Bookfeed
499
Modem
499
Faculty
500
Panel
500
Network
500
Sssw
500
Appendix
501
Service Tools
501
Solvent/Oil List
501
General Circuit Diagram
501
Mf4890Dw/Mf4880Dw/Mf4870Dn
504
Mf4830D/Mf4820D
505
Mf4780W/Mf4770N/Mf4750
506
Mf4730
507
Mf4720W/Mf4712/Mf4710
508
L418S/L410/L190
509
D530
510
General Timing Chart
511
Advertisement
Canon FAXPHONE L190 Basic Operation Manual (100 pages)
Laser Fax
Brand:
Canon
| Category:
Fax Machine
| Size: 6.56 MB
Table of Contents
How to Use this Manual
3
Table of Contents
6
Basic Operation
9
Learn the Names and Functions of each Part of the Machine
10
Front Side
10
Output Tray
11
Interior
12
Back Side
13
Learn the Functions of the Operation Panel
14
Switch between Copy and Fax Mode
16
Enter Text
17
Set Date and Time
18
Place Documents
19
Placing Documents on the Platen Glass
20
Load Documents in the Feeder
20
Load Paper
22
Loading Paper in the Paper Cassette
22
Loading Small Size Paper
24
Loading Envelopes or Paper with a Letterhead
25
Setting a Paper Size and Type
26
Switch to the Quiet Mode
27
Switch to the Sleep Mode
27
Use the Toner Saver Mode
28
Copy
29
Make a Basic Copy
30
Enlarge or Reduce Copies
31
Adjust the Image Quality for Copy
31
Adjusting the Density
31
Selecting the Document Type
32
Adjusting the Sharpness
32
Make Double-Sided Copies
33
Copy Multiple Pages Onto One Sheet
34
Collate Copies
34
Copy a Double-Sided ID Card
35
View and Cancel Copy Jobs
36
Change the Default Copy Settings
36
Print
37
Print a Document
38
Enlarge or Reduce a Document
38
Print a Double-Sided Document
39
Print Multiple Pages Onto One Sheet
40
Print a Booklet
41
Print a Poster
42
Add Watermarks to a Printout
43
View and Cancel Print Jobs
44
Fax
46
Register Numbers in the Address Book
46
Registering Numbers to One-Touch Keys
46
Registering Numbers to Coded Dialing Codes
47
Registering Recipients for Group Dialing
48
Editing and Deleting Registered Destinations
50
Adjust the Image Quality for Fax
50
Adjusting the Density
50
Selecting the Resolution
51
Adjusting the Sharpness
51
Specifying the Double-Sided Document Format
52
Changing the Default Settings
52
Send a Fax
53
Entering a Fax Number with the Alphanumeric Keys
53
Using the One-Touch Keys
54
Using the Coded Dialing Codes
54
Searching the Address Book
55
Redialing
55
Sending a Fax to Multiple Destinations (Sequential Broadcast)
56
Sending a Fax at a Preset Time
56
Sending a Fax to an International Destination (Adding Pauses)
57
Calling a Recipient before Sending a Fax
58
Receive a Fax (Receive Mode)
59
Using the Machine for Fax Only
60
Using the Machine for Faxing and Phoning
60
Using the Answering Machine
61
Using the Machine Primarily for Phoning
61
Receiving Faxes in Manual Mode
62
Receive a Fax from Memory
63
Switching to Memory Lock Mode
63
Viewing and Canceling Received Fax Documents
64
Printing Received Fax Documents
64
View and Cancel a Fax Job
65
Change the Fax Settings
65
Changing Fax Sending Settings
65
Restricting Fax Sending Functions
67
Changing Fax RX Settings
68
Changing Communication Management Settings
69
Maintenance and Management
71
Clean the Machine
72
Cleaning the Exterior and Interior
72
Cleaning the Fixing Unit
73
Cleaning the Platen Glass and Feeder
74
Check and Replace Toner Cartridges
75
Checking the Toner Level
75
Conserving the Toner to Extend the Life of Toner Cartridges
76
Replacing the Toner Cartridge
76
Manage Using the Report and List Functions
79
Troubleshooting
81
Clear Jams
82
Clearing Document Jams in the Feeder
83
Clearing Paper Jams Inside the Machine
84
Resolve a Displayed Message
87
Resolve an Error Code
88
Improve Output Quality
89
Resolve a Problem
91
Faq
92
If a Power Failure Occurs
93
Recycling Used Cartridges
93
The Clean Earth Campaign
93
Important Safety Instructions
94
Power Supply
95
Legal Notices
96
Laser Safety
99
Canon FAXPHONE L190 Basic Operation Gude (100 pages)
Brand:
Canon
| Category:
Fax Machine
| Size: 17.2 MB
Table of Contents
How to Use this Manual
3
Table of Contents
6
Basic Operation
9
Learn the Names and Functions of each Part of the Machine
10
Front Side
10
Output Tray
11
Interior
12
Back Side
13
Learn the Functions of the Operation Panel
14
Switch between Copy and Fax Mode
16
Enter Text
17
Set Date and Time
18
Place Documents
19
Placing Documents on the Platen Glass
20
Load Documents in the Feeder
20
Load Paper
22
Loading Paper in the Paper Cassette
22
Loading Small Size Paper
24
Loading Envelopes or Paper with a Letterhead
25
Setting a Paper Size and Type
26
Switch to the Quiet Mode
27
Switch to the Sleep Mode
27
Use the Toner Saver Mode
28
Copy
29
Make a Basic Copy
30
Enlarge or Reduce Copies
31
Adjust the Image Quality for Copy
31
Adjusting the Density
31
Selecting the Document Type
32
Adjusting the Sharpness
32
Make Double-Sided Copies
33
Copy Multiple Pages Onto One Sheet
34
Collate Copies
34
Copy a Double-Sided ID Card
35
View and Cancel Copy Jobs
36
Change the Default Copy Settings
36
Print
37
Print a Document
38
Enlarge or Reduce a Document
38
Print a Double-Sided Document
39
Print Multiple Pages Onto One Sheet
40
Print a Booklet
41
Print a Poster
42
Add Watermarks to a Printout
43
View and Cancel Print Jobs
44
Maintenance and Management
45
Clean the Machine
46
Cleaning the Exterior and Interior
46
Cleaning the Fixing Unit
47
Cleaning the Platen Glass and Feeder
48
Check and Replace Toner Cartridges
49
Checking the Toner Level
49
Conserving the Toner to Extend the Life of Toner Cartridges
50
Replacing the Toner Cartridge
50
Manage Using the Report and List Functions
53
Fax
55
Register Numbers in the Address Book
56
Registering Numbers to One-Touch Keys
56
Registering Numbers to Coded Dialing Codes
57
Registering Recipients for Group Dialing
58
Editing and Deleting Registered Destinations
60
Adjust the Image Quality for Fax
60
Adjusting the Density
60
Selecting the Resolution
61
Adjusting the Sharpness
61
Specifying the Double-Sided Document Format
62
Changing the Default Settings
62
Send a Fax
63
Entering a Fax Number with the Alphanumeric Keys
63
Using the One-Touch Keys
64
Using the Coded Dialing Codes
64
Searching the Address Book
65
Redialing
65
Sending a Fax to Multiple Destinations (Sequential Broadcast)
66
Sending a Fax at a Preset Time
66
Sending a Fax to an International Destination (Adding Pauses)
67
Calling a Recipient before Sending a Fax
68
Receive a Fax (Receive Mode)
69
Using the Machine for Fax Only
70
Using the Machine for Faxing and Phoning
70
Using the Answering Machine
71
Using the Machine Primarily for Phoning
71
Receiving Faxes in Manual Mode
72
Receive a Fax from Memory
73
Switching to Memory Lock Mode
73
Viewing/Canceling/Forwarding Received Fax Documents
74
Printing Received Fax Documents
74
View/Cancel/Forward a Fax Job
75
Change the Fax Settings
75
Changing Fax Sending Settings
75
Restricting Fax Sending Functions
77
Changing Fax RX Settings
78
Changing Communication Management Settings
79
Troubleshooting
81
Clear Jams
82
Clearing Document Jams in the Feeder
83
Clearing Paper Jams Inside the Machine
84
Resolve a Displayed Message
87
Resolve an Error Code
88
Improve Output Quality
89
Resolve a Problem
91
Faq
92
If a Power Failure Occurs
93
Recycling Used Cartridges
93
The Clean Earth Campaign
93
Important Safety Instructions
94
Power Supply
95
Legal Notices
96
Laser Safety
99
Advertisement
Canon FAXPHONE L190 Starter Manual (29 pages)
Faxphone
Brand:
Canon
| Category:
Fax Machine
| Size: 2.04 MB
Table of Contents
Checking the Supplied Accessories
2
Removing the Packing Materials
4
Preparing the Toner Cartridge
6
Loading Paper
8
Connecting the Handset
10
Connecting the Power Cord
12
Connecting the Telephone Line
17
Connecting to the Computer
18
Using the Online Help
24
Entering Text
27
Advertisement
Related Products
Canon L100 Series
Canon L120 Series
Canon FAXPHONE L180
Canon L360
Canon L240
Canon L290
Canon MultiPASS L6000
Canon L250
Canon L2000
Canon LaserBase MF5750
Canon Categories
Printer
Digital Camera
All in One Printer
Camcorder
Scanner
More Canon Manuals
Login
Sign In
OR
Sign in with Facebook
Sign in with Google
Upload manual
Upload from disk
Upload from URL