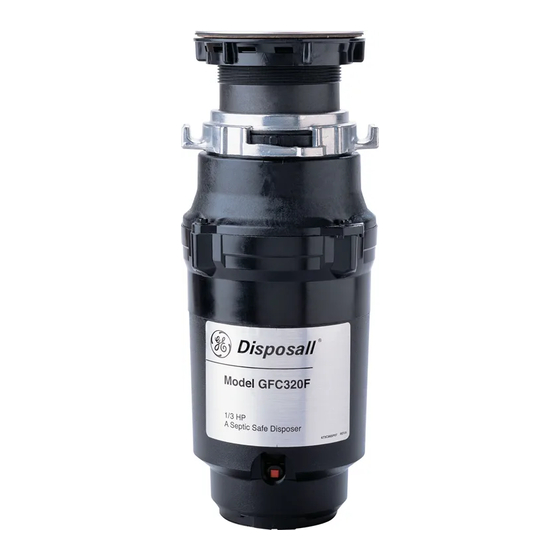
GE Line Series GFC300F Owner's Manual & Installation Instructions
Line series food waste disposer
Hide thumbs
Also See for Line Series GFC300F:
- Owner's manual & installation instructions (24 pages) ,
- Owner's manual & installation instructions (24 pages) ,
- Owner's manual & installation instructions (13 pages)
Table of Contents
Advertisement
Quick Links
www.GEAppliances.com
Safety Information
Connecting Electricity . . . . . . 2, 3
Safety Precautions . . . . . . . . . . . 2
Attaching the Discharge
Elbow . . . . . . . . . . . . . . . . . . . . . . 6
of Sink Flange . . . . . . . . . . . . . . . 5
Connecting Disposer to
Sink Flange . . . . . . . . . . . . . . . . . .7
Dimensions/Typical
Installations . . . . . . . . . . . . . . . . .8
Dishwasher Connection . . . . . . . 6
Batch Feed Models . . . . . . . . . . .9
Care and Maintenance . . . . . . .10
Continuous Feed Models . . . . . .9
Before You Call for
Service . . . . . . . . . . . . . . . . . . . . .11
Customer Service
Warranty . . . . . . . . . . . . . . . . . . 12
Write the model and serial
numbers for your disposall here:
Model #______________________
Serial # ______________________
You can find them on a label on
the bottom of the disposer.
Owner's Manual
& Installation
Instructions
Model Line Series
GFC300F
GFC500F
GFC700F
GFB700F
GFC1000F
GFB1000F
165D4700P229
49-5903
560C460P01 Rev. A
01-01 JR
Advertisement
Table of Contents

Summary of Contents for GE Line Series GFC300F
-
Page 1: Table Of Contents
www.GEAppliances.com Safety Information Owner’s Manual Connecting Electricity ..2, 3 & Installation Safety Precautions ... 2 Instructions Installation Instructions Model Line Series Attaching the Discharge GFC300F Elbow . -
Page 2: Safety Precautions
IMPORTANT SAFETY INSTRUCTIONS. READ ALL INSTRUCTIONS BEFORE USING. INSTRUCTIONS PERTAINING TO A RISK OF FIRE, ELECTRIC SHOCK OR INJURY TO PERSONS WARNING! When using electrical appliances, basic safety precautions should be followed, including the following: SAFETY PRECAUTIONS Use this appliance only for its intended To reduce the risk of injury by materials that may purpose as described in this Owner’s Manual. - Page 3 IMPORTANT SAFETY INSTRUCTIONS. READ ALL INSTRUCTIONS BEFORE USING. www.GEAppliances.com WARNING! HOW TO CONNECT ELECTRICITY (cont.) If you are not familiar with electrical power and procedures, call a qualified electrician. The power cord and/or connections must comply C. Use a cable clamp with the National Electrical Code, Section 422 strain relief and/or local codes and ordinances.
-
Page 4: Installation Instructions
Installation Disposer Instructions If you have questions, call 1-800-GECARES www.GEAppliances.com visit our Website at: BEFORE YOU BEGIN WHAT YOU WILL NEED Read these instructions completely and carefully. IMPORTANT – • Save these • Phillips and flat blade screwdrivers instructions for local inspector’s use. IMPORTANT –... -
Page 5: Elbow
Installation Instructions COMPONENTS AND INSTALLATION NOTE: Pay close attention to the order of the sink COMPONENTS flange parts, as they have been correctly assembled by the factory. *Stopper *Removable A. Disassemble the sink flange assembly from the Splash Guard disposer by turning the mount ring to the left Sink Flange (clockwise) and removing it. -
Page 6: Dishwasher Connection
Installation Instructions DISHWASHER CONNECTION (IF REQUIRED) If you are connecting to a dishwasher, complete the following step. If a dishwasher is not to be connected, go on to “Attaching the Discharge Elbow” section. KNOCK OUT PLUG CONNECT HOSE Using a blunt instrument (steel punch or wooden Connect the dishwasher hose using a hose clamp. - Page 7 Installation Instructions CONNECTING DISPOSER TO SINK FLANGE ATTACH TO SINK FLANGE LOCK MOUNT RING Turn the mount ring to the right until it locks up Line up the disposer tight. Hopper projections must be to the extreme under the sink flange. left of the mounting slots.
- Page 8 Installation Instructions DIMENSIONS ” ” ” ” ” ” ” ” ” ” ” ” ” ” ” ” ” ” GFC320F GFC520F GFC325F GFC530F GFC525F GFC535F ” ” ” ” ” ” ” ” ” ” ” ” ” ”...
-
Page 9: Operating Instructions
Operating instructions. www.GEAppliances.com This disposer uses anti-jam swivel impellers that make a clicking sound as they swing into place. This indicates normal operation. Continuous Feed Models A. Remove the sink stopper and turn on D. Before turning the disposer off, a medium flow of cold water. -
Page 10: Care And Maintenance
Operating instructions. Helpful Hints A. Be sure the disposer is empty before D. TO SPEED UP FOOD WASTE using the dishwasher so it can drain DISPOSAL... Cut or break up large properly. bones, melon rinds, grapefruit skins and corn cobs. Items such as large bones, B. -
Page 11: Troubleshooting Tips
Before you call for service… www.GEAppliances.com Troubleshooting Tips Save time and money! Review the chart on this page first and you may not need to call for service. SAFETY NOTE: Before investigating, you must disconnect the power supply. WARNING! Before resetting, disconnect the power supply–please see SAFETY NOTE above. The overload control prevents the motor from operating should overloading occur. -
Page 12: Warranty
The entire disposer if there is a defect in materials or workmanship relating to functional parts One Year only (appearance parts are excluded). During this full one-year warranty , GE will also provide, From the date of the free of charge , all labor charges related to replacing the original disposer along with the original purchase replacement disposer within the first year.


