Epson TM-T88V User Manual
Hide thumbs
Also See for TM-T88V:
- Technical reference manual (158 pages) ,
- User manual (122 pages) ,
- Development manual (30 pages)
Table of Contents
Advertisement
Advertisement
Table of Contents

Summary of Contents for Epson TM-T88V
- Page 1 English User’s Manual M00023801EN TM-T88V User’s Manual 1...
-
Page 2: Standards And Approvals
Neither Seiko Epson Corporation nor its affiliates shall be liable to the purchaser of this product or third parties for damages, losses, costs, or expenses incurred by purchaser or third parties as a result of: accident, misuse, or abuse of this product or unauthorized modifications, repairs, or alterations to this product, or (excluding the U.S.) -
Page 3: Important Safety Information
Shut down your equipment immediately if it produces smoke, a strange odor, or unusual noise. Continued use may lead to fire. Immediately unplug the equipment and contact your dealer or a Seiko Epson service center for advice. Never attempt to repair this product yourself. Improper repair work can be dangerous. -
Page 4: Caution Labels
Strips for 58 mm paper width × 2* ❏ ❑ Roll paper guide* ❏ ❑ Screw* AC adapter* ❏ ❑ AC cable* Warranty certificate* ❏ ❑ Setup Guide TM-T88V Software & Documents Disc * May not be included depending on the printer model. 4 TM-T88V User’s Manual... -
Page 5: Downloading Drivers, Utilities, And Manuals
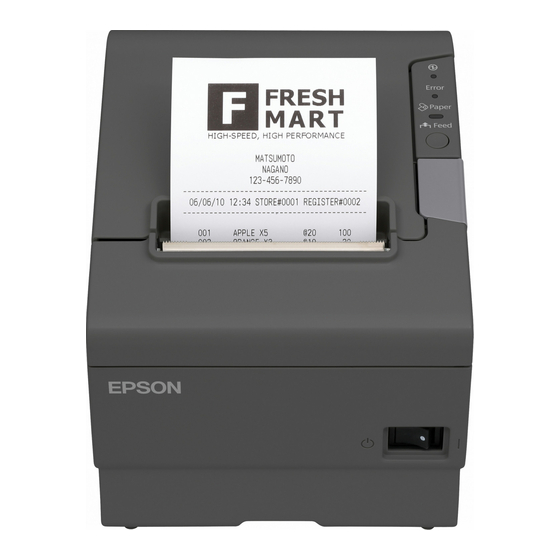
(Power) LED This LED is on when the printer is on. Error LED This indicates an error. Paper LED On indicates a paper near end or out. Flashing indicates standby. Feed button This button feeds paper. TM-T88V User’s Manual 5... -
Page 6: Installing The Printer Horizontally Or Vertically
For the shape of each connector, see the illustration below. (Mounted interfaces vary by the printer model.) IEEE1284 RS-232 10BASE-T/ DC24V 100BASE-TX Connect the interface cable to the computer. Insert the power cord plug into a socket. 6 TM-T88V User’s Manual... -
Page 7: Attaching The Connector Cover
Push the connector cover down to click onto the printer case. Hook To remove the connector cover, turn the printer over, and push the connector cover down while pushing both sides of the connector cover inward to detach the hooks from the printer case. TM-T88V User’s Manual 7... -
Page 8: Arranging The Cables
If you want to pass the USB cable through the cable exit on the back, fit the cable under the hook on the printer to prevent the cable from coming off. Hook After the cable arrangement, turn over the printer, and make sure the cables are not pinched. 8 TM-T88V User’s Manual... -
Page 9: Installing Roll Paper
Press the cover open button to open the roll paper cover. Remove the used roll paper core if any, and insert the roll paper. The correct direction of the paper is shown in the illustration below. Pull out some paper, and close the roll paper cover. TM-T88V User’s Manual 9... -
Page 10: Attaching The Power Switch Cover
To use this cover, install it as shown in the illustration below. WARNING: If an accident occurs with the power switch cover attached, unplug the power cord immediately. Continued use may cause fire or shock. 10 TM-T88V User’s Manual... -
Page 11: Changing The Paper Width
80 mm. When changing the paper width, be sure to make the setting for the paper width with utility software for the TM-T88V. Open the roll paper cover. Install the roll paper guide so that the projection on its bottom is aligned with the hole at the right of the roll paper holder. -
Page 12: Troubleshooting
❏ Printing stops if the head overheats and resumes automatically when it cools. ❏ For other cases, turn the printer off, and after 10 seconds, back on. 12 TM-T88V User’s Manual... -
Page 13: Removing Jammed Paper
Turn the knob until you see a triangle in the opening. This returns the cutter blade to the normal position. There is a label near the cutter to assist you. Close the cutter cover. Open the roll paper cover and remove the jammed paper. TM-T88V User’s Manual 13... -
Page 14: Cleaning The Printer Case
Turn off the printer, open the roll paper cover, and clean the thermal elements of the thermal head with a cotton swab moistened with an alcohol solvent (ethanol or IPA). Epson recommends cleaning the thermal head periodically (generally every 3 months) to maintain receipt print quality. 14 TM-T88V User’s Manual... -
Page 15: Setting The Dip Switches
Remove the DIP switch cover by removing the screw. Set the DIP switches using a fine-tipped tool. Replace the DIP switch cover, and fix it by installing the screw. The new setting becomes effective after the printer is turned on. DSW2 DSW1 TM-T88V User’s Manual 15... -
Page 16: Dip Switch Tables
*1: When DIP switches 1-7 and 1-8 are on, the transmission Print density “Medium” speed can be selected from one of seven speeds: Print density “Dark” 2400, 4800, 9600, 19200, 38400, 57600, and 115200 bps by control commands. Do not set 16 TM-T88V User’s Manual... -
Page 17: Specifications
Ladder bar code and 2D code: 100 mm/s {2.4"/s} The above speed values are approximate. The values are when the printer prints with density “Normal” at 24 V and 25°C {77°F} Speed is adjusted automatically depending on the voltage applied and head temperature. TM-T88V User’s Manual 17... - Page 18 *1: The values are those when the paper width is changed to 58 mm by installing the roll paper guide and making the paper width setting with utility software for the TM-T88V. The roll paper guide may not be included depending on the printer model.


