Advertisement
Quick Links
IMPORTANT:
Read and save
mMPORTANT:
Installer:
Leave Installation
Unstrucfions with
the homeowner.
Homeowner:
Keep UnstaHafion Unstrucfions for
future reference.
Save Installation
Instructions
for UocaU eUectdcd
inspector's
use.
Part No. 4329225/8284826 Rev.A
Quick Reference
TabNe of Contents:
Pages
[]
Before you start
[]
EUectdcaUrequirements
[]
Product dimensions
[]
Cabinet dimensions
[]
Countertop
cutout dimensions
]
Vent system
requirements
Untedor-mounted
vent motor
[_-[]
UnstaHation steps
]
Vent system
requirements
Exterior-mounted
vent motor
[_-[_
Installation
steps
[]
Use and Care Information
[]
Accessories
Advertisement

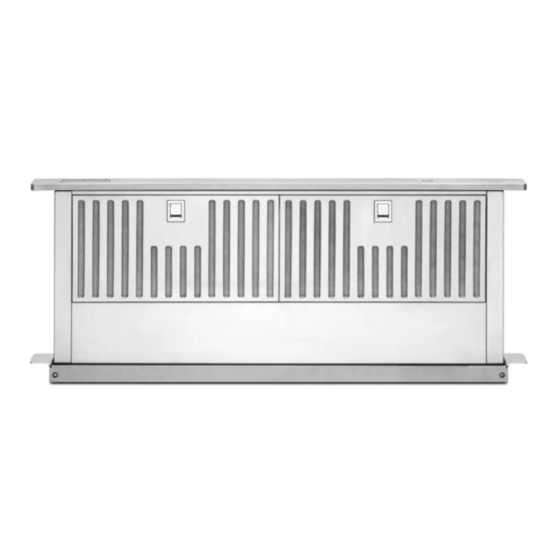
Summary of Contents for KitchenAid KIRD807HSS0
- Page 1 Quick Reference IMPORTANT: TabNe of Contents: Read and save Pages Before you start EUectdcaUrequirements Product dimensions Cabinet dimensions mMPORTANT: Countertop cutout dimensions Installer: Leave Installation Unstrucfions with Vent system requirements the homeowner. Untedor-mounted vent motor Homeowner: Keep UnstaHafion Unstrucfions for [_-[] UnstaHation steps future reference.
- Page 2 Check location where downdraft Parts supplied vent will be installed.The location for installation: should be away from strong draft areas, such as windows, doors Your safety and the safety of and strong heating vents or fans. others are very important, Before making countertop cutout, check that downdraft...
- Page 3 important: Observe aim governing A U.L.- or C.S.A.qisted, 1/2" Wire sizes and connections codes and ordinances. must conform to the (12.7 ram) conduit connector it is the customer's responsibimity: must be provided at each end of requirements of the National Electrical Code, ANSI/NFPA 70 -- the power supply cable (at the...
- Page 4 8=1/4" (21 cm) retractable vent height !9,5 mm) 3=1/4"x 10" 18,3 cmx 26.4 cm) 16" 9" (22.9 cm) 140,6 cm) Diameter (20,8"cm) {15.9 ram} 15" BLOWER (4&6 cm} MOTOR 4&6 cm EXTERIOR=MOUNTED 9=3/8" BLOWER MOTOR 123,8 cm) (10.5 cm) cooktop manufacturer's instructions for cooktop...
- Page 5 1o7/8" /4.8 cm) 1/4" 1&4 ram) 1/2" A=1/2" cooktop (12,7 mm} (12,7 ram} rain, rain, backsplash countertop 1/4" (&4 mm} downdraft vent 3/4"" (19.1 turn} I"_ 1/2'_,(1,2 'mTu mm m ) Ht i srecommended thatthecooktop backsplash depth andventcutouts bedrawn onthe 1/2""...
- Page 6 Vent system installed under a concrete slab using PVC sewer pipe. 6" (15.2 cm) round metal vent Venting system must terminate island location 6" (15.2 cm) transition the outside. Do not terminate the vent system in an attic or other enclosed area. Do not use 4"...
- Page 7 6" 115.2 cm) round over counter support vent system mark 90 ° elbows ft. (1,8 m) --}_1 ft, (9.6 Attach the left side and right side overcounter support brackets to the downdraft. Use 1 screw Move support legs down Ma×imum length = 35 ft.
- Page 8 green bracket ground screw rear venting Excessive Weight Hazard Use two or more people to move and install downdraft vent. Failure to do so can result in back or other injury. d, Remove screws attaching brackets to each side of blower. lore insert downdraft vent...
- Page 9 5 mConnect v ent systemto To get the most efficient blower.Ventsystemmustendwith use from your a wall or roof cap. Useducttape retractable downdra# vent, to sealail joints. read the Use and Care information section page Installcooktopaccording Keep InstMlation to manufacturer's i nstructions. instructions Check that rearof cooktopoverlaps and Use and Care...
- Page 10 Recommended standard cabinet floor. AUign top of bgs fittings with pencil marks on face of downdraft vent.Tighten screws in Uegs. .!support ,, Attach 10" (25.4 cm) round vent collar pUate (suppUied wkh exterior Mower system) to front of 90° elbow = 45°...
- Page 11 microswitehes behind filters. IOta insert retractable downdraft vent into countertop cutout.Two people are vent box recommended to support the knockout weight of the downdraft vent ...wiring during lifting. Position downdraft cover vent so it is centered in cutout and parallel to edge of cutout, Check that downdraft vent is vertical.Then depending...
- Page 12 Theretractabb downdraft ventsystem is designed t o remove smoke, cooking vaporsandodorsfromthecooktop area. Forthebestresuks, theventshouldbeoperating before cooking isstarted.If youuselarge or tall utensils, place them onthelargerearebmentor burner s urface. A higherheat s etting thannormallyusedmaybeneeded whenthe down@aft ventis operating. WARNING --TO REDUCETHE RiSKOFFIRE, Use proper pan size.
- Page 13 United States or Canada. In Canada, travel or transportation expenses for customers who reside in remote areas. WHIRLPOOL, INGLIS LIMITED, KITCHENAID ®and KITCHENAID CANADA DO NOT ASSUME ANY RESPONSIBILITY FOR INCIDENTAL OR CONSEQUENTIAL DAMAGES. Some states or provinces do not allow the exclusion...
- Page 14 Inglis Limited or KitchenAid Canada with any questions correspondence. or concerns at: Consumer Relations Department 1901 Minnesota Court Mississauga, Ontario L5N 3A7 Part No. 4329225/8284826 Rev. A Benton Harbor, Michigan 49022 © 2002 Whirlpool Corporation ® Registered trademark/TM trademark of KitchenAid, U.S.A. KitchenAid Canada licensee in Canada...


