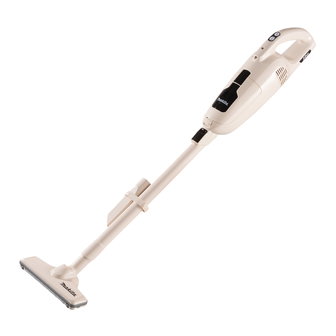
Makita CL114FD Instruction Manual
Cordless cleaner
Hide thumbs
Also See for CL114FD:
- Instruction manual (89 pages) ,
- Instruction manual (69 pages) ,
- Instruction manual (85 pages)
Table of Contents
Advertisement
Quick Links
Advertisement
Table of Contents

Summary of Contents for Makita CL114FD
- Page 1 INSTRUCTION MANUAL Cordless Cleaner CL114FD Read before use.
-
Page 2: Specifications
Children shall not play with the appliance. Cleaning and user maintenance shall not be made by children without supervision. SPECIFICATIONS Model: CL114FD Capacity with a dust bag 500 ml with a paper filter 330 ml... -
Page 3: Intended Use
19. Do not use a battery pack or tool that is dam- Intended use aged or modified. Damaged or modified batteries may exhibit unpredictable behaviour resulting in The appliance is intended for collecting dry dust. fire, explosion or risk of injury. 20. -
Page 4: Functional Description
It will also Do not store and use the tool and built-in bat- void the Makita warranty for the Makita product and tery in locations where the temperature may charger. reach or exceed 50 °C (122 °F). - Page 5 Battery power lamp NOTICE: The battery power lamp blinks and the battery cannot be charged if the battery or cleaner is exposed to extreme temperatures. When the remaining battery capacity gets low, the battery power lamp blinks. When the remaining battery capacity gets much lower, NOTE: The cleaner cannot be controlled while being the cleaner stops and the battery power lamp lights up charged.
-
Page 6: Installing Dust Bag
Installing dust bag ASSEMBLY Use the dust stopper when installing dust bag. Be careful not to take the upper side for the lower side by CAUTION: Always be sure that the appliance mistake because they are different each other. is switched off before carrying out any work on the appliance. - Page 7 Overlap the frame of dust stopper with that of the dust bag. Installing the paper filter Use the dust stopper also when installing paper filter. Be careful not to take the upper side for the lower side by mistake because they are different each other. Place the dust stopper and the dust bag together into the cleaner cavity in the same direction of arrow on the dust stop- per.
-
Page 8: Operation
There is no distinction between the upper and Spread the container part of the paper filter inside lower sides of the paper filter. You may insert its pro- the cleaner. trusion of any side into the lower groove of the dust stopper. - Page 9 When using attachment with lock function Cleaning (Suction) To install an attachment, insert it to the suction inlet of the cleaner until it clicks. Make sure that the attachment is locked. Nozzle Attach the nozzle to clean off tables, desks, furniture, etc.
- Page 10 Corner nozzle + Extension wand Disposing of dust (Straight pipe) CAUTION: Empty the cleaner before it In tight quarters where the cleaner itself cannot becomes too full, or the suction force weakens. squeeze in, or in high places hard to reach, use this arrangement.
-
Page 11: Maintenance
To maintain product SAFETY and RELIABILITY, repairs, any other maintenance or adjustment should be performed by Makita Authorized or Factory Service Centers, always using Makita replacement parts. NOTICE: Never use gasoline, benzine, thinner, alcohol or the like. -
Page 12: Cleaner Body
Cleaning NOTE: Paper filter is a throw-away type. When the sponge filter is clogged with dust, remove it Cleaner body from the cleaner and then wipe it off or wash in water. From time to time wipe off the outside (cleaner body) of Removing and installing the sponge the cleaner using a cloth dampened in soapy water. -
Page 13: Troubleshooting
The nozzle cleaning Wall mount for cordless cleaner (country specific) Optional accessory When the nozzle brush gets dusty, clean up the dust NOTE: The screw to mount the holder is not included. with adhesive tape. Prepare a screw which fits with the material to screw into. - Page 14 Then slide the battery unit out completely. Disposing cleaner A Li-ion battery is built in this cleaner. Always remove it before disposing of the cleaner. Removing built-in battery CAUTION: Do not touch the terminals with any conductive material. CAUTION: Avoid storing battery unit in a container with other metal objects such as nails, coins, etc.
-
Page 15: Optional Accessories
ACCESSORIES CAUTION: These accessories or attachments are recommended for use with your Makita appli- ance specified in this manual. The use of any other accessories or attachments might present a risk of injury to persons. Only use accessory or attachment for its stated purpose. - Page 16 Makita Europe N.V. Jan-Baptist Vinkstraat 2, 3070 Kortenberg, Belgium Makita Corporation 3-11-8, Sumiyoshi-cho, Anjo, Aichi 446-8502 Japan 885813-224 www.makita.com 20200629...


