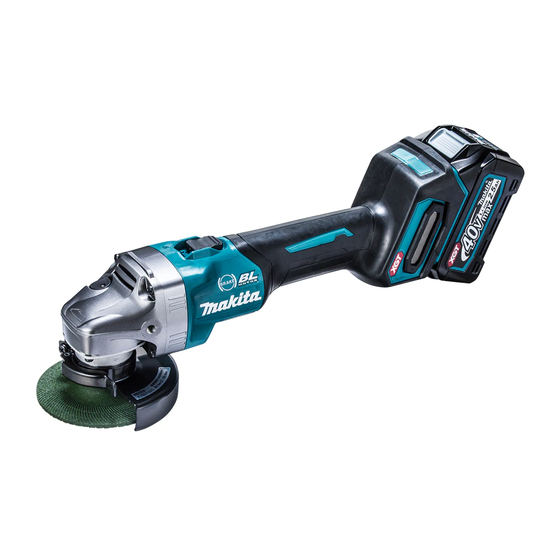
Makita GA003G Instruction Manual
Cordless angle grinder
Hide thumbs
Also See for GA003G:
- Instruction manual (161 pages) ,
- Instruction manual (88 pages) ,
- Instruction manual (129 pages)
Table of Contents
Advertisement
Quick Links
Cordless Angle Grinder
EN
FR
Meuleuse d'Angle sans Fil
DE
Akku-Winkelschleifer
Smerigliatrice angolare a
IT
batteria
Haakse accuslijpmachine
NL
Esmeriladora Angular
ES
Inalámbrica
Esmerilhadeira Angular a
PT
Bateria
DA
Ledningsfri vinkelsliber
Φορητός γωνιακός
EL
λειαντήρας
Akülü Avuç Taşlama Makinesi KULLANMA KILAVUZU
TR
GA003G
GA004G
GA005G
GA006G
GA007G
GA008G
INSTRUCTION MANUAL
MANUEL D'INSTRUCTIONS
BETRIEBSANLEITUNG
ISTRUZIONI PER L'USO
GEBRUIKSAANWIJZING
MANUAL DE
INSTRUCCIONES
MANUAL DE INSTRUÇÕES
BRUGSANVISNING
ΕΓΧΕΙΡΙΔΙΟ ΟΔΗΓΙΩΝ
7
18
30
43
55
67
79
91
102
115
Advertisement
Table of Contents

Summary of Contents for Makita GA003G
- Page 1 ISTRUZIONI PER L’USO batteria Haakse accuslijpmachine GEBRUIKSAANWIJZING Esmeriladora Angular MANUAL DE Inalámbrica INSTRUCCIONES Esmerilhadeira Angular a MANUAL DE INSTRUÇÕES Bateria Ledningsfri vinkelsliber BRUGSANVISNING Φορητός γωνιακός ΕΓΧΕΙΡΙΔΙΟ ΟΔΗΓΙΩΝ λειαντήρας Akülü Avuç Taşlama Makinesi KULLANMA KILAVUZU GA003G GA004G GA005G GA006G GA007G GA008G...
- Page 2 Fig.1 Fig.5 Fig.2 Fig.6 Fig.3 Fig.4...
- Page 3 Fig.9 Fig.7 Fig.10 Fig.11 Fig.8 Fig.12...
- Page 4 Fig.13 Fig.17 Fig.14 Fig.18 16 mm (5/8″) 16 mm (5/8″) Fig.15 Fig.19 Fig.16 Fig.20...
- Page 5 Fig.21 Fig.25 Fig.26 Fig.22 Fig.27 Fig.23 Fig.28 Fig.24...
- Page 6 Fig.29 Fig.31 Fig.30 Fig.32...
-
Page 7: Specifications
ENGLISH (Original instructions) SPECIFICATIONS Model: GA003G GA004G GA005G GA006G GA007G GA008G Wheel diameter 100 mm 115 mm 125 mm 100mm 115 mm 125 mm (4″) (4-1/2″) (5″) (4″) (4-1/2″) (5″) Max. wheel thickness 6.4 mm 7.2 mm 6.4 mm 7.2 mm Spindle thread M14 or 5/8″... - Page 8 The vibration total value (tri-axial vector sum) determined according to EN60745-2-3: Work mode: surface grinding with normal side grip Model Vibration emission (a ) : (m/s ) Uncertainty (K) : (m/s GA003G GA004G GA005G GA006G GA007G GA008G Work mode: surface grinding with anti vibration side grip...
-
Page 9: Safety Warnings
Do not use a damaged accessory. Before each use EC Declaration of Conformity inspect the accessory such as abrasive wheels for chips and cracks, backing pad for cracks, tear or For European countries only excess wear, wire brush for loose or cracked wires. The EC declaration of conformity is included as Annex A If power tool or accessory is dropped, inspect for to this instruction manual. - Page 10 Kickback is the result of power tool misuse and/or Do not position your body in line with and incorrect operating procedures or conditions and can be behind the rotating wheel. When the wheel, at avoided by taking proper precautions as given below. the point of operation, is moving away from your body, the possible kickback may propel the spin- Maintain a firm grip on the power tool and...
- Page 11 If electrolyte gets into your eyes, rinse them causing fires, personal injury and damage. It will out with clear water and seek medical atten- also void the Makita warranty for the Makita tool and tion right away. It may result in loss of your charger.
-
Page 12: Functional Description
Tips for maintaining maximum Indicating the remaining battery capacity battery life Press the check button on the battery cartridge to indi- Charge the battery cartridge before completely cate the remaining battery capacity. The indicator lamps discharged. Always stop tool operation and light up for a few seconds. -
Page 13: Electric Brake
While keeping the lock lever and wheel guard position as described in step 2, rotate the wheel guard Only for model GA003G / GA004G / GA005G toward C, and then, change the angle of the wheel Electric brake is activated after the tool is switched off. - Page 14 To tighten the lock nut, press the shaft lock firmly so Mount inner flange, abrasive wheel and Ezynut onto the that the spindle cannot revolve, then use the lock nut spindle so that Makita Logo on Ezynut faces outside. wrench and securely tighten clockwise. ► Fig.15: 1. Shaft lock ►...
-
Page 15: Operation
For 100 mm (4″) model OPERATION When installing the abrasive cut-off wheel: ► Fig.19: 1. Lock nut 2. Abrasive cut-off wheel WARNING: It should never be necessary to (Thinner than 4 mm (5/32")) 3. Abrasive cut- force the tool. The weight of the tool applies ade- off wheel (4 mm (5/32") or thicker) 4. -
Page 16: Maintenance
Do not start the cutting operation any other maintenance or adjustment should be per- in the workpiece. Let the wheel reach full speed formed by Makita Authorized Service Centers, always and carefully enter into the cut moving the tool using Makita replacement parts. -
Page 17: Optional Accessories
The use of any other accessories or attachments might present a risk of injury to persons. Only use accessory or attachment for its stated purpose. If you need any assistance for more details regarding these accessories, ask your local Makita Service Center. •...


